My blog about my wargaming activities. I collect a lot of 15mm miniatures for the American War of Independence and so collect a lot of rules for this period. I started miniatures with Napoleonics, so I have a number of armies in 6mm and 15mm figures for skirmishing. I have15mm WW II figures that I use for Flames of War, Memoir '44, and someday, Poor Bloody Infantry. Finally there is my on-again, off-again relationship with paper soldiers that I sometimes write about.

Showing posts with label book. Show all posts

Sunday, September 11, 2022

Another Scenario for One-Hour Skirmish Wargames

This post includes another scenario and some special rules for a skirmish game.

Playing OHSW Virtually

I wanted gaming buddy Justo to try out my version of the Sword & Sandal (S&S) variant of One-Hour Skirmish Wargames (OHSW) that I used in the last post, and get some feedback on the rules. Because we had to play virtually we first needed to figure out how to play a skirmish game using online tools.

The first option is something like Tabletop Simulator (TTS) on the computer, as there are a number of skirmish and mass-combat games to use miniatures rules with, such as this one for One-Hour Wargames.

If it does not have miniatures to your liking, you can always search TTS's Workshop for the keyword "miniatures" and find some others, like these medieval miniatures I found.

But, I wasn't sure Justo had TTS and, although we have both played games using Vassal, I did not want to tackle making or modifying a module for a scenario. So I fell back to my default: creating a grid for the map and using grid movement rather than freeform movement. The first problem to solve: how to convert OHSW to a square grid.

Converting OHSW to a Grid

As always, the first thing you need to do is figure out what the cell of the grid (square or hex) represents in terms of ground scale. Because most movement values are closely divisible by 3, I decided each cell was about 3" of ground, so a 3' square board would be 12 rows and 12 columns. Within a single cell you could have two friendly fighters (so four figures total, two for each side).

All distances were converted by taking the distance and dividing by 3, rounded to the nearest. So weapons with a 1/2" or 1" zone of control (ZOC) would be 0 cells (same cell only) and 2" reach would have a 1 cell ZOC and attack range.

In the original playtest we allowed long weapons to attack diagonal, adjacent squares, but I am leaning towards not allowing that. Diagonal squares represent a distance of roughly 1.5 times ground scale, or 4 1/2", which is a stretch for a weapon that originally had a reach of 2".

For movement it was the same, so light foot was 3 squares, medium and heavy were 2 squares.

When 'measuring', you count each cell in between the starting cell to the ending cell, plus the ending cell (but not the starting one). That is the distance. For squares (but not hexes) where you trace a line (of sight, march, or fire) diagonally the first such square will count as 1 square, the second as 2, the third as 1, the fourth as 2, and so on alternating the cost between 1 and 2 points each. Example: the player trace a line through four diagonal squares. The distance is 6 squares (1 + 2 + 1 +2).

The one exception that I made for fudging the distances was for the combat results. Combat results that force a figure to retreat always results in the figure retreating one cell away from the enemy.

Protecting Downed Friends

Another area that I wanted to address was the effect of a figure's ZOC has on enemy trying to dispatch downed friends. Although this should be added to the ZOC section of the S&S variant rules, they were playtested in this game.

Basically the rule is that if a figure is in the ZOC of an enemy, or you have an enemy in your ZOC that is in the same cell (within 1", in freeform movement games) it cannot dispatch a downed opponent unless that enemy is also engaged by another figure in close combat.

In the example above X2 cannot dispatch the downed A1 because it is in the ZOC of Y1. B1, however, can dispatch the downed A2 with a long weapon as B2 has attacked A4 with his own long weapon, engaging him.

Originally, I had the rule simply as you had to have 1 more figure than the number of non-Downed enemy figures. Both accomplish the same thing, but the current rule is a bit more complex when long weapons come into play on both sides. An example is the figure below.

Y1, with a long weapon, holds off both X2 and B1 from dispatching A1 until either X2 or B1 engage it first. Further, if Y1 wins that combat, either by killing, downing, or forcing the retreat of the enemy, it continues to block the other blue attacker.

Again, I want to stress this is not a 'grid' rule, but an adaptation of the S&S variant rules that I add to as I come upon new situations. The ability to easily dispatch downed foes has been the one area that has always bothered me about OHSW and this is an attempt to address that.

Town Raid Scenario

If you think you might have seen this scenario before it is because it is converted from the scenario "Town Raid" in the old Warhammer Skirmish scenario book.

The world of the Kingdom is a dangerous place and even in these civilized lands there is still more countryside than city. It is in these places where brave freeholders must struggle daily to make a living. Ever searching out fertile land for crops and grazing settlers have followed a small river out of the dark forest to the richer plains beyond. Out beyond the coast – and who know what danger lie off there? Can the small local militia protect the farmers?

Overview

A smaller attacking force – as part of a larger attack on a town – has been tasked with making a feint attack in one section of the town with the target of killing or absconding with the town's livestock, burning buildings, and causing general mayhem. The local militia are tasked with driving off the cattle to safety, preventing the burning of buildings, and slowing the attackers until a larger defending force can arrive to drive off the attackers.

Forces

Modified point costs are used, i.e. each figure costs 1 point + 1 point for each point of Army Motivation.

Defenders

  • 40 points
  • May include up to one leader, i.e. someone with the Leader (X) special ability.
  • 10 Livestock critters
  • One 6" (2 square) barricade in the top 3/4 of the map (rows 1-9)
  • If no leader is present then the maximum Army Motivation is 1, otherwise it is 2

Attackers

  • 80 points (no more than half of the figures may have bows; no mounted troops allowed)
  • Must include one leader, but may have a second
  • Minimum Army Motivation is 1 with a maximum of 3

Battlefield

The buildings are not built for defense in mind, rather they are simple dwellings of farmers. The local militia had some time to set up a single 6" barricade. Red-brown rectangles are buildings. Gray rectangles are waist-high stone walls. Green circles are single trees offering no cover.

There is no difference between grass green and light brown squares; they are both open terrain.

Objectives

The Attackers realize that there is little to no value in this area of the settlement, other than the cattle, but they want to draw the locals into this area to fight fires while the main attack heads to richer targets. The game ends when the defending leader (if any) or attacking leader is killed, either side fails morale, or at the end of six turns. Calculates each side's points to determine a winner.

Note that the game ending – regardless of the reason – represents the larger defending force's arrival, and the end of the attacker's marauding.

Attacker

Each defending figure removed from the board - 1 point

Each livestock animal killed - 1 point

Each building totally destroyed - 5 point

Each building partially destroyed - 1 point

Defender

Each attacking figure removed from the board - 1 point

Each livestock animal alive or escaped - 1 point

Each building still standing and not on fire - 5 point

Each building still standing but on fire - 1 point

It is important for the players to realize that the victory conditions represent not who wins this little skirmish, but about the larger action occurring elsewhere. The defenders have 1/2 of the points of the attacker; they are expected to get crushed. So just because the attacker wins the fight, it does not mean that they will win the scenario.

Players are advised to understand and keep an eye on the objectives. The defender can lose every single figure and still win the scenario. It this is not the type of scenario that you like to play – where your forces will almost certainly lose militarily – I suggest that you not play the defenders.

Deployment

The defenders deploy first, then the attackers, then the livestock is deployed.

All defenders must start in the northern half (rows 1-6) of the map, save for a maximum of 2 figures, which may man the barricades. No two defending figures may start in the same square.

The attackers must enter from the south (bottom of the map). However, they must be deployed adjacent to the column where they will enter.

Livestock are then placed alternately (defenders choose first) anywhere on the board at least two squares from any table edge or any other livestock model. (If a livestock model cannot be placed because all eligible squares are filled, then it may be placed within 1 square of another livestock model.)

Scenario Special Rules

Attacker's Initiative

The attacker always has the initiative on the first turn. Initiative is determined as normal on subsequent turns.

Livestock

Livestock are +0 in defense, draw 1 card, and do not attack back in close combat if they are attacked. They are killed when the attacker exceeds the defense value by 4 or more. If the animal is not killed it immediately retreats away from the attacker 2 squares.

Either side may spend 1 AP to drive a livestock model. The figure must be in the same square as the livestock. The figure may choose which direction the livestock model retreats two squares.

Any retreating livestock that comes within 1 square of another livestock, or killed within 1 square of another livestock, will cause that livestock model to retreat 1 square directly away from the retreating or killed livestock. This can cause a chain reaction.

Livestock that run off of the board in any direction save south will be considered saved for the defenders. Those that run off towards the south will be considered killed for the attackers.

Livestock cannot enter buildings or cross stone walls, so adjust their movement accordingly.

Livestock in the square reduce the number of models both sides can have in the square by 1 for each livestock model. Livestock moving into a square already at capacity forces another model out of the square (player's choice). For example, two defenders and one attacker are in a square. A cow retreats into the square making the capacity one model for each side. One defending figure must retreat from the square (away from the cow).

Setting Buildings on Fire

The attackers using one-handed weapons are assumed to have torches to light the buildings on fire. Any model with a torch that is touching a building and not in close combat may try to set it on fire for 1 AP. Draw a card and if it is red, the building is on fire and the figure loses their torch. (If black is drawn another AP may be spent and another attempt may be made.)

A defender not in combat may attempt to put out the fire. Draw a card and if it is black, the fire has been extinguished.

At the end of every turn (not round!), after morale and figure recovery is determined, but before the next turn's initiative is drawn, one structural point is removed from each building per fire.

A building is considered destroyed when five structural points are removed.

Playtest

My main concern with the playtest was getting Justo's opinion on the modified combat system and secondarily how the scenario played. Although I recorded the action through drawings, there were a number of mistakes made that sort of invalidated the game. But he got a feel for the combat system and I added a few refinements here and there to both the variant and the scenario. Our mistakes were:

  • Somebody forgot to put their two Jokers into their deck, making for an extremely long turn 2 with 8 rounds. (My second Joker was the third to the last card in my deck.)
  • I messed up on the movement speed of foot troops, so everyone was moving in slow motion.
  • I did not specify that the attacker's had to specify where there troops were deployed, which led to some painful flank charges that absolutely crushed my defenders.

Nonetheless, my defenders won a narrow victory. I am proud to say that I saved 7 of the 10 cows, defended 2, and only lost 1 to the roasting spit of the attackers. This was largely because Justo did not read the scenario victory scoring system and brought no one with torches (figures with only one handed weapons). But he did kill all but 1 of my defenders!

Overall the combat played very well. Again, I liked the movement stemming from the combat results, the interplay between forces around protecting downed friends, and their being sufficient variety between weapons and armor. The scenario also played out very well, with the Livestock rules in particular producing some interesting results as I was trying to drive cows into other cows to cause a chain reaction of retreats to safety.

Definitely something Justo and I will try again.

Sunday, April 24, 2022

Map Campaign Part 2

For those that have not been following I decided to try my hand at a map campaign using the tables and ideas in The Solo Wargaming Guide (TSWG). Part one of the campaign laid out the basics, then another post spoke about how I was going to convert from Regiments and Companies that TSWG uses, to the units and hits that Neil Thomas' One-Hour Wargames (OHW) uses so that I could use the latter to play out the tactical battles. I played out the first 'battle' – The Battle of Firnskuppe – on the Solo Battles blog. There I showed how TSWG creates terrain layouts for the tabletop and puts some of the factors in TSWG – like the Commander Competency Rating (CCR) assigned to each Brigadier General and force commander – into play.

The basic scenario for the first battle was that the vanguard of the northern Westonian forces – a Regiment of Infantry and a Regiment of Cavalry – sprung to the attack while the Eastonian forces were still mustering. All that was there to defend the Eastonian frontier town of Firnskuppe was an understrength Mounted Skirmisher Regiment. (Note that Mounted Skirmisher is a new unit type for OHW. It is basically a Skirmisher unit that moves 12" as it is mounted on horses.)

I used some old Kings of War Battlefield Cards to determine the battlefield condition both sides had to deal with, the objectives for each side, and the stratagems they had available to them. Looking over the condition cards (there are 14 of them), five are normal conditions, six had easily interpretable conditions, one useless condition, and two hard to interpret conditions (they were written for the Kings of War game system). I think in the future I would prefer to produce my own table of conditions, and increase the odds that the conditions are normal. That said the Reduced Visibility condition had a very good feel to it – the Westonians had surprised the Eastonians and attacked first and although the latter knew the former were across the border, the Westonians had decided to attack early one foggy morning in an attempt to achieve surprise…

One thing of interest that I noted after the battle is how easy it is to become invested in one side or another. There are lots of ways to play solo, but generally you are either playing one side and trying to program the other, non-player side, or you are trying to program both sides. I told myself I was doing the latter, but the reality is that I did the former. I was more emotionally invested with the underdog Eastonians (who I had generated the campaign orders for both Justo and I), so when the Westonian Cavalry flanked the town by moving into the fields at B4, I immediately bugged out.

The whole point of the campaign is to provide interesting scenarios, especially ones you might not normally want to play out on a game night with a face-to-face gaming buddy. The Battle of Firnskuppe (BoF) was just such a scenario. First, it featured two units versus one in a game where it is normally six units versus six. Second, the one unit was the weakest unit in those rules versus the stronger units. So why play it, other than "because you need to know the results"? Well, for one thing, I did not know what the result would be, in terms of campaign impact. BoF was very terrain dense for a OHW game. I added a new Mounted Skirmisher unit type that had all of the weaknesses of the Skirmisher unit type, was more restrictive regarding terrain, and had only a marginally better movement rate of 12" rather than 9". (In hindsight I think it should probably be 15", but that is another discussion.) When we play games unlinked to campaigns, we tend not to think of battlefield casualties – or we minimize the impact – but only of victory conditions. Did we win the battle?

In OHW terms one side took six hits while the other took two, resulting in no lost units. One side 'won' because they achieved more victory points than the other. There wasn't even an obvious reason why the Eastonians retreated because they were giving better than they got.

The Eastonians were firing with 1D6-2 each turn (1.67 hits per turn), while the Westonians were firing 1D6-2 but would have to halve the hits (1 hit per turn) due to the cover the Eastonians were in. If the Westonian Cavalry charged they would hit with 1d6+2 hits (5.5 hits per turn). The Eastonians firing at the Westonian Cavalry would have had 1D6-2 with ½ casualties (1 hit per turn) so once the Westonian Cavalry got into position it should have immediately charged, dispersing the Mounted Skirmishers.

So, why did it play out the way it did? Clearly my own personal bias crept into the stupid play of the Westonians. The Westonian Cavalry could have hit on turn 2, effectively ending the battle with much higher losses to the Eastonians. Or maybe I am just not as analytical 'in the moment' as I like to think.

Even though I am declaring myself a cheat I am going to let the results stand. So how does this affect the campaign?

Converting from Tabletop Back to Campaign

TSWG offers a simple method for adjudicating casualties for the victor: ½ of the total casualties are killed; ¼ are severely wounded; and ¼ are lightly wounded. Killed casualties are replaced after one month; severely wounded casualties are replaced after two weeks; and lightly wounded casualties are replaced after one week. For the defeated the breakdown is the same, but the wounded will be captured – meaning they will not be replaced unless there is a prison exchange – if the victory was decisive.

This begs the question, however: how do you determine total casualties? Let's start by looking at Neil Thomas' notes in OHW:

"My combat rules work on the principle of having units acquire hits throughout the game, to be eliminated after garnering 15. They retain their full fighting ability until destroyed; this reflects a model whereby real casualties are at a fairly low level, but that the sustained experience of combat will steadily degrade a unit’s morale, at which point it routs. This is both simple and historically accurate: most casualties in any ancient battle (and those of most other periods too) were inflicted when the enemy fled, rather than the initial clash of arms. Essentially, loss of morale is reflected in elimination, rather than having to make frequent checks on a unit’s status, which tends to be a feature of complex wargames rules."

With this it is obvious that the six hits sustained by the Infantry Regiment do not reflect a loss of two companies of men, but that morale of the Regiment was down 40% because of ammunition depletion, fatigue, the morale effect of a few men being killed or wounded, and unwounded men leaving the firing line to resupply ammunition, help the wounded to the rear, or simply being ineffective out of fear. he unit did not have two of five companies become casualties.

If the emphasis on unit loss and not hit loss then it is better to come up with a table reflecting casualty effects of a unit loss.

OHW Combat ResultTSWG Campaign Effect
4-9 hits remaining on Infantry or CavalryLose one company on '1' with 1D6
1-3 hits remaining on Infantry or CavalryLose two companies on a '1', one company on a '2' with 1D6
Infantry or Cavalry removed by musketryLose two companies on a '1' or '2', one company on a '3' or '4' with 1D6
Infantry or Cavalry removed by ArtilleryLose three companies on a '1', two companies on a '2' or '3', and one company on a '4' or '5' with 1D6
Infantry removed by close combatLose five companies on a '1', four companies on a '2', three companies on a '3' or '4', two companies on a '5', and one company on a '6' with 1D6.
Cavalry removed by close combatLose four companies on a '1', three companies on a '2' or '3', two companies on a '4' or '5', and one company on a '6' with 1D6.
1-6 hits remaining on any SkirmisherLose one company on '1' with 1D6
Any Skirmisher removed by musketryLose one company on a '1', '2', or '3' with 1D6
Any Skirmisher removed by ArtilleryLose two companies on a '1', one company on a '2', '3', or '4' with 1D6
Any Skirmisher removed by close combatLose three companies on a '1' or '2', two companies on a '3' or '4', and one company on a '5' or '6' with 1D6

I have no idea if these numbers are any good, but I need to try somewhere. Note that the table determines total casualties, so ½ of the companies are replaced after one month, ¼ are replaced after two weeks, and ¼ are replaced after one week. How do we deal with fractional companies? Roll dice to see if you round up or down.

You might question how realistic this table is. What does it mean by "removed", for example? (It means the unit or combat type that rolled the die that caused the unit to be removed, by the way.) What if the unit removing your only inflicted one hit? Won't this lead to unrealistic play like trying to use Cavalry to run down your unit in close combat in order to get a deadlier result? Well, yes, but I don't see it as being 'unrealistic'. If you were routed by Cavalry, for example, they probably ran you down, rather than you outrunning them. Artillery fire was particularly deadlier than musketry, so their casualties tend to 'stick'.

So, how do the casualties play out from BoF?

Westonian Infantry: 9 hits remaining, so it loses one company on a '1'. If it does, that is ½ company killed (50% chance), ¼ company severely wounded (25% chance), and ¼ company lightly wounded (25% chance). So roll a D100 and 1-50 counts as killed; 51-75 counts as severely wounded; and 76-100 counts as lightly wounded.

I rolled a '5', so no company was lost.

Eastonian Mounted Skirmishers: 10 hits remaining, so no losses.

Rest and Recuperation

TSWG is silent (as far as I could tell), on the need for rest and recuperation after a battle, although The Joy of Wargaming hinted at it being otherwise. I noticed that he indicated that it took a day for rest and recuperation after a battle, but he took note, for example, whether light cavalry was uncommitted at the end of the battle. Those troops could be used in pursuit of defeated enemy forces.

The Westonian Infantry spent the remaining day and the next day resting and bringing the town of Firnskuppe under control. Meanwhile the Westonian Cavalry patrol around the town: two squadrons down the road towards Erlenloch, where the Eastonian Cavalry retreated; two squadrons down the road towards Grimme Hutte; and one squadron into the woods north of Firnskuppe.

This leaves a possibility of a skirmish between two squadrons of the Westonian Cavalry and the two squadrons of the Eastonian Cavalry that headed down the road to Erlenloch. But first I need to think about how to handle some of these tactical decisions – such as what to do when you are pushed out of your muster point – better. So that's it on the campaign front for now.

In Other News

So, not that I am looking to garner any sympathy, but more to explain delays in this campaign and other blogging activity I thought I would let everyone know what is going on with me.

About two years ago I was formally diagnosed with high blood pressure and diabetes (type 2). Part of my general problem was that I had hallux rigidus, a degenerative arthritis of the big toe, in both feet. The result is that I would get bloody sores on my big toes, making it difficult to walk as well as spreading blood all over the carpet, which really upset the wife. After months of treatment I decided to have surgery to correct the problem. In October 2020 I had my first surgery and they removed the defective left toe joint and replaced it. That surgery went as well as could be expected, so I decided to follow it up and replace the right toe joint in October of 2021.

Before any surgery you doctor has to clear you. Well the second checkup was worse than they first in that my diabetes was worse than previously. How much worse? Truth be told I was borderline acceptable. A score on my A1C of 9.0 was considered a fail and I was at 8.9. But I think I browbeat my doctor into clearing me anyway – I just wanted to get back to 'normal' and be able to fully walk again – so I went ahead with the second surgery.

The first sign of a problem was when I woke from anesthesia. I was flopping around like a fish out of water. Despite having been under anesthesia twice before in my life (all after the age of 50), I had never had a bad reaction nor found that I was allergic to any medication. This time I apparently had.

After getting home I did not strictly follow the recovery regime of icing and elevating my foot that I had the previous year. That plus the stress I had put on my stitches after the surgery caused my stitches to pop open, introducing an infection to the metallic implant. I did not even know an implant could get an 'infection', but apparently it can and it is bad if it does. Antibiotics cannot really work on digging out an infection from an implant. So after three months I was back on the table and they were removing my implant.

The doctor took no chances and essentially removed the implant and would not put a replacement in. Ironically, by the time of the second surgery on the right toe I had radically altered my diet and brought my diabetes almost under control. Basically an A1C reading of 6.5% means you are diabetic, while 5.7% to 6.4%is pre-diabetic. I had brought it down from 8.9% to 6.2%. Although it would not matter with regards to getting a replacement implant, it has mattered tremendously in healing after the second surgery.

The wound to extract is much larger than the wound when the implant went it. I am pretty sure she took more than the implant; what they call the 'grandma method', which is to basically fill it up with flexible cement. I would still be able to walk, but I would not have as much strength in the foot to push off, so no more hiking and mountain climbing for me. (I never did those things anyway.)

Because the wound was much larger it was going to take longer to heal than the last one (and that had been three months), so they were really worried about it getting infected. The first therapy they wanted to try was a wound vacuum, which is to seal the wound in a vacuum, 24 hours a day. The negative pressure not only stimulates the cells to heal faster, but it helps keep infections out. The downside is that you have to wear a purse-sized pump that sucks the air out of the wound. As the wound was on my bog toe, that meant an air hose ran from the dressing on the wound up through my pants leg, out of the top into the vacuum pump unit at my waist. Thank goodness I work from home. I suddenly discovered the benefits of old-timey nightshirts! It allowed me to look like I had a t-shirt on while attending Zoom conference calls.

So, three times a week I had to change the dressing on the wound. Once per week I went into the doctor's office so she could inspect the wound and measure progress. Well, it turned out that I was healing very well, but the special adhesive they use on the wound dressing is something I was allergic to, as I was breaking out in a very bad rash wherever the adhesive was put, which was largely around the wound. So after about a month the doctor called an end to that given that my rash was just getting so bad. But the wound was healing nicely. New cell growth.

The other issue is that because the wound was so large, and the risk of infection was so high, I was on very strong antibiotics. These were so strong apparently that the doctor had never prescribed them before. My wife is a nurse and she looked them up and this is sort of an antibiotic of the last resort. She was surprised it had been prescribed and that I had been on it so long. Well these antibiotics have a lot of side effects, one of which is killing your gut biome very effectively (the natural result of which is always having diarrhea) and that you can break out in a rash. So not only did I have a rash about the wound from the allergic reaction to the adhesive, I had a rash breaking out all over my body.

When the doctor took me off of the wound vacuum she also took me off the antibiotics; I had simply been on them too long. I was fine with that because it caused a lot of nausea, so my quality of life was down pretty badly. Mind you, I was still wargaming face-to-face with people during this period, but I was always dragging. To counter the antibiotics she told me to get some probiotics to help repopulate my gut biome and bring my gastrointestinal issues to heel. So I did.

Well, it turns out that some people can be affected by heavy probiotic usage and it comes in the form of acne. I would like to think that once upon a time I would not have been one of those people, but after all of this heavy pharmaceutical usage and sickness I should not be surprised that I am one. I broke out in pimples all over the body. Seriously, I thought that somehow bedbugs had gotten into the house and they were bug bites because I would have more red spots every morning. Finally they formed the heads and I looked at the side effects of the probiotics.

One of those pimples turned out to be a monster though. It was on my shoulder, very painful, and I finally had the wife attend to it as I had recently lost an entire weekend to fever. My guess was that it was from all of the inflammation from the acne and rashes, but it had apparently come almost completely from this one pimple/cyst?/whatever. My wife used about a dozen medical sponge gauzes to drain the pus and blood from it that night. We patched it up and I had a fever spike, but the fever broke that night and I felt a lot better the next day. But my weekend was lost.

I would like to say that the campaign has been trudging along because of all of this, but that would not be strictly true. First off, the wound is healing really well. I have moved on to silicon skin graft every week now to higher grade skin grafts every other week. The wound continues to get smaller and not show any complications. So my mobility is up, especially now that I don't have a pump to deal with and dressings to change every day. No the campaign is slow because map campaigns are a lot of work. Plus, the people I game with face-to-face are all climbing out of their lockdown routines and becoming more active and social again, so I have more (welcome) distractions. I need to get out more. No, I chose the wrong time to start a solo campaign; I should have started it months ago.

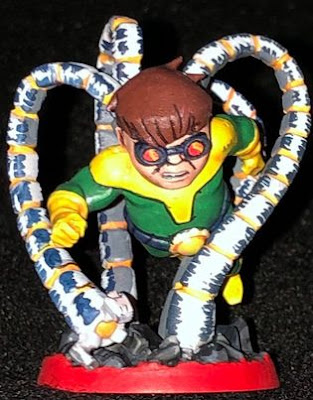
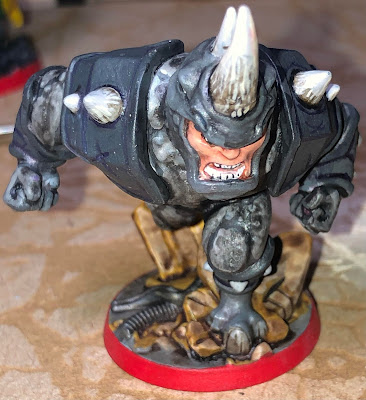
So bear with me as I intersperse writing up about this campaign with other topics. The latest craze has been playing the cooperative superhero game Marvel United. I like the chibi style of the figures and the comic style that I am painting them. Here are two of the latest supervillains that I have painted.


These should be two tough supervillains to take down.

Tuesday, January 25, 2022

Modeling Skirmishers in One-Hour Wargames

Recently there have been a number of posts on the Facebook group Wargaming Neil Thomas' rules where people have noticed that their favorite troop type or army list is not available in his rules One-Hour Wargames (OHW). I have offered my own suggestions, but I noticed that some (you know who you are) like to add new rules and complexity to OHW, despite the fact that the author intentionally stripped these rules down to the bare minimum and has plenty of other rules with slightly more 'crunch' that are much better for tweaking. I have generally resisted the idea of modifying OHW, although I have created an AWI variant, one for the Austro-Prussian War of 1866, and some thoughts on how to use it for the Age of Sail. But the thought behind all of the variants were that I would not add any significant new game mechanics.

One poster to the group wanted to play the Arabs during the Medieval period, but he felt that the standard Medieval army list (3-4 Knights, 0-2 Archers, 0-2 Men-at-Arms, and 0-2 Levy) did not fit the historical model. So how should he modify the list and, given that the majority of the army were horse archers, how should he model them?


The first part, the army list, is pretty easy. Neil Thomas even gave examples of how to modify the army list models at the end of Chapter 4, Dark Age Wargaming. If you look at the lists in Table 1 of Chapter 20, the first column represents the predominate troop type. In the case of Medieval period, that would be Knights. So a roll for Knights would become a roll for Horse Archers. The second, third, and fourth columns are basically the secondary troop types, each with equal chances of occurring. In the Medieval list these are Archers, Men-at-Arms, and Levy. Archers and Levy would still be appropriate for an Arab Medieval army, but the Men-at-Arms should probably be Knights (the Arab heavy, shock cavalry), so that is another easy substitution. No severe changes and very much still in the vein of what Neil Thomas suggests players do.

The second part, how to model Horse Archers, was much more interesting to me. Before I put out what my proposal would be, let me take a bit of a tangent.

De Bellis Antiquitatus or DBA

Although my first ancients and medieval games were using WRG Ancients, 4th Edition (and later 5th and 6th Editions). I stopped gaming ancients about 1984 and did not pick them up again until about 2008, when I was introduced to (one of) the WRG Ancients successor, DBA.

I really took a shine to DBA, as did our club, due to its simplicity and small army size. One aspect of the rules that confused me, however, was that most troops that you would have thought could shoot enemy units at a distance could not. Light Horse and Skirmishers (tribal javelin throwers, Balearic slingers, Cretan archers, whatever were all lumped together) would all fight the enemy by moving into contact. Basically they looked like they were engaging in melee. Eventually I found the DBA Fanaticus forum and I asked the question: "why can't these troops shoot?" Basically the answer was that, historically, all of these troops shot from very close range, either to ensure they hit, or to ensure that their hit actually did some damage.

I looked it up and sure enough, these troops did fight from very close range. Rather than giving them very short ranges (in the order of 1" or 2"), the author chose to visually model their tactics of running up, firing, and retreating, as melee. Equally as important, the results of combat with those troops typically produced a result where if they lost, they would simply retreat rather than be eliminated.

I took that concept of visually representing this close-range skirmishing as melee, with combat results reflecting the likelihood the skirmishers would simply retreat, with me to other games. But I noticed that OHW did not model skirmishers this way at all. The author models them as shooters and when they are contacted in melee, they cannot retreat away.

Horse Archers and Light Cavalry

I don't believe in modeling horse archers as shooters. I guess I agree with the DBA model that says they don't really have enough mass and range to act like troops that stand and fire mass volleys at the enemy. Instead they charge up, loose their archers, and quickly retreat, often firing backwards as they did so (the so-called 'Parthian shot'). It is easy to model the close range aspect, require the unit contact the enemy in order to fire, essentially having them engage in hand-to-hand combat (from a game mechanic aspect).

"The bulk of the cavalry was made up of lightly-armed warriors, protected by no more than fur or hide jackets and headgear. The shock force of the Scythian host was the professional, heavily-armed cavalry commanded by local princes. Both horses and riders were well protected. They fought in formation, under discipline, and brought to the battlefield considerable experience of warfare. The engagement opened with a shower of arrows and sling-stones, followed at closer range with darts and javelins. The heavy cavalry then charged in close formation, delivering the main blow on the center of the enemy's array. … When the enemy had been broken the lightly-armed mass of the Scythian horse closed in to finish them off."
— The Scythians, 700-300 BC
"When battle began the light cavalry advanced through the gaps in the heavy jaguns [battle formations] and poured a devastating volley of arrows and javelins into the enemy ranks. At the same time either or both the wings of light cavalry began an encircling movement to take the enemy in the flank or in the rear, a tactic known as the tulughma, or 'standard sweep'. If any light troops were forced back by an enemy's determination they calmly withdrew, shooting as they went, and their place was taken by other units. Very soon the enemy would become disorganized, at which point a charge by. the heavy cavalry would be ordered."
— The Mongols

But, the primary rule in the Ancients, Dark Ages, and Medieval rules are that once contact is made, it can never be broken off. If we flip to the Horse and Musket period rules we can see that the author does model this behavior of engaging and then retreating; he does so for Cavalry in the gunpowder era. What is we use that same mechanic? What if we say that Light Cavalry can move into contact and attack, but if they do not eliminate the unit then they must retreat 6" back, out of contact? This mechanic would fit nicely with the horse archer/light cavalry tactics were are trying to model and yet is not simply pulled from thin air as the author uses this same mechanic elsewhere.

Light Infantry Skirmishers

Which brings me to the Skirmishers. Just like it makes no sense that the light cavalry be modeled as standing and firing at range, the same is true with light infantry skirmishers.

"The Greeks broke down the fortifications and charged out, but they were unable to catch the Bythynian [Thracian peltasts]. The latter fled from the charge, but kept hurling javelins from both flanks; every charge merely caused more Greek deaths. It was said that only 15 hoplites escaped from this massacre."
—The Thracians, 700 BC - AD 46

What about taking away the Skirmisher's ability to fire at range and replacing it with the ability to skirmish, as defined above. The unit moves into contact, rolls for hand-to-hand combat, and if the enemy unit is not destroyed, it retreats out of contact. Given that a Skirmisher's movement is normally 9", I was thinking that it keeps that movement rate when taking a Move action that does not end in contact, but gets a 6" movement rate if it skirmishes (ends in contact), then retreats back 6".

Enemy Contact with Skirmishers

So what happens when the enemy contacts your skirmishers (whether infantry or cavalry)? Should they be able to get their whacks in or not? I think it should depend upon a number of factors.

  • Are the chargers infantry or cavalry?
  • Are the skirmishers infantry or cavalry?
  • Are the chargers contacting frontally or from the flank or rear?
  • Are the skirmishers being contacted by more than one unit?
  • Do the skirmishers have room to retreat?

To my mind, an infantry skirmisher will never be able to outrun a charging cavalry unit, so contact will have to be maintained. A cavalry skirmish will always be able to outrun a changing infantry unit, unless some other factor comes into play. Otherwise, I think I would allow an infantry skirmisher to outrun infantry and a cavalry skirmisher to outrun cavalry, unless some other factor came into play.

If the contact is simply frontally, or from the flank, I would adhere to the rules above. If from the rear then you have been outmaneuvered so infantry can contact infantry skirmishers and cavalry can contact cavalry skirmishers. If you are contacted on two sides, your skirmishers cannot escape, regardless of who the chargers or the skirmishers are.

By 'room' to retreat I mean would the retreat movement take them off of the board. Which direction can the unit retreat? Always towards their baseline, never towards the enemy baseline nor laterally. If the retreat would take them off of the board they do not retreat and are contacted.

Summary

I know, I know. You should not tweak OHW. The whole point is for the combat model to be simple. I feel like this isn't too bad because it uses a model for hand-to-hand combat that already exists (for the Horse and Musket period cavalry) and represents Skirmishers better. Let's face it, unless it is a specific period and scenario were a Skirmisher is necessary due to terrain, you are probably like me and you groan when you roll up a Skirmisher.

Thursday, March 26, 2020

One-Hour Wargames Scenarios – Filling in the Blanks

In the last blog post Shaun Travers and I played scenario 10 in One-Hour Wargames and it turned out pretty disastrous for the attacker (Red). Although I like to flip the scenario and play it the same way, the way we played it just felt wrong. I do believe that some of the scenarios don't "work" with all periods, but in this case the math just makes it so hard to get the Red Infantry engaged against the defenders who will inevitably will Blue Infantry units. (There is a risky gambit involving defending initially with one Infantry and one Skirmisher, but that is beyond the scope of this discussion.) Basically, it takes turn three to four before Red can engage the Blue defenders. A big problem is that entry via the road is a huge bottleneck. How much of a bottleneck did Neil Thomas really intend this to be?

When Shaun and I played the first time we assumed that "entry via the north road" meant that the first square the unit had to move through was C1. This meant that, at best, you were going to occupy four squares on turn 1. (B2 and D2, only if you had Cavalry; C2 if you had Cavalry or Skirmishers; and C1. Basically all of the squares indicated by Red arrows in the image below.) Note that it means that by the end of turn 1, Red would only have one Infantry unit on board, two by the end of Turn 2, etc. Given that the Blue defenders could start in C3 and D4, and could theoretically push into C2 and D2 on their turn (although would be unlikely to do so), they could really jam up Red forces until this first line of defenders was eliminated. As was shown in the last blog post, if they do not accomplish that quickly enough, Blue can reinforce the line such that Red will never reach the town, having to break through two lines of defenders.


So, what's the alternative? Shaun and I talked about the concept of using an off-board square, in this case square C0. The idea is that all of the Red units start in the square north of the northernmost road square, just off board, i.e. square C0. If you did that, the number of squares that you could move to on the first turn are not only the ones with red arrows, but the blue ones too. More importantly, units with a 6" movement can move on and occupy squares B1, C1, and D1. This is three times the number than if you consider square C1 is the first square of movement (red arrows only).

How will this affect the game? Quite a bit.

The Game


Red's first turn looks a lot better than the last game. There are four units on rather than three, two of those being Infantry. (If I had rolled two Cavalry, I would have had another unit on the board too.)


My basic plan is to use the Skirmisher unit to flank Blue defensive line and break it faster. (Interestingly, Ross MacFarlane played the same scenario and had the same force that Shaun had when playing Red, used his Skirmisher to also make a flank run, but to secure the town instead.)

By turn 3 everything was engaged.


By turn 5, Red breaks through the portion of the line closest to the town.


Just in time for Blue to bring on their first reinforcements. Mind you, by this time in the first game it was obvious that these reinforcements could make it close to the original battle line, but Shaun, seeing that I had already broken through, decided not to advance but rather to occupy the town.

Infantry in the Ancient period take 1/2 hits as it is, with defending a town yielding another 1/2 hits. It is going to take some time digging them out. In fact, the only way to win is probably by attacking it from two directions.
As a side note, in square grid combat you have to attack from F5 and E6. If the attack comes from E5 (which is legal) it essentially makes an implied pivot that 'hides' its left and right flanks (squares E7 and G5).
Turn 8 saw the Blue Cavalry charge out and attack the Red Infantry that was attempting to move on its flank. This was a strong move by Shaun because with the Cavalry in E6 and its front facing D5, that puts its right flank in square F5.
Again, that is a quirk of the square grid rules we use, but the best way to look at it is that OHW only allows one unit to attack per face and to get on the flank each unit must have a square in between each attacker. So a unit could be in square E5, but it would not be able to attack the Blue Cavalry.


By Red turn 10, Red had the attack on the town secured. (I am not sure why Red Infantry in C5 is facing South and not West.) The Blue forces coming on can only enter from A6 or B6 and with the hill impassable, they have to go through me to disrupt the attack on the town.


By the end of Red turn 13, the town was secured.


This was a far-cry from the result in the first game (turn 10).


Summary


To me this was a huge difference in the result. The pendulum swung dramatically from "no way for the attacker to take the town" to "no way for the defender to retake the town". All because of the change of a single rule. (Shaun may disagree, but I remember that neither side had better rolls in either game, but this second game did result in both sides having bloodier results.)

I am curious. How do you interpret the rule that "all Red units must enter the board via the road"? When playing the scenario without a grid, you probably use the same method as we used here, which is that all Red units are artificially stacked up on the point where the road intersects the board edge. This is equivalent to the "square C0" concept Shaun and I used.

More importantly, does anyone map out the road march order and penalize the rearward units movement based on how far back in the march order they are?

Saturday, January 11, 2020

Botched Relief Scenario in OHW and Other News

My gaming buddy Shawn and I were able to get two games of One-Hour Wargames (OHW) in today (in two hours, no less) using some of my old medieval DBA troops. We decided to play Scenario 28: Botched Relief and, let me tell you, this is a very interesting scenario. Lots of choices to make and very quirky, although a simple design. Both games were very much until the end. (Okay, on game two you could do the math and figure out that Red was not going to inflict enough damage, but it was still a very exciting game.)

Botched Relief


The scenario notes indicate that this scenario draws inspiration from the Battle of El Molino del Rey (1847) from the Mexican-American War of 1846-1848. A smaller force defeats a larger force largely because the larger force commits itself piecemeal.

The Blue Army (attacker) is assaulting the town held by Red units. The majority of the Red Army, however, is on a hill on the flank, unengaged in the battle. Although the units appearing there are on the table, they cannot attack nor be attacked until they "activate". Additionally, only one unit can activate at one time. The second cannot activate until the first unit is eliminated, the third until the second is eliminated, etc. So although Red has 6 units to Blue's 4, Blue will never have more than 3 active at any one time.

I brought my medieval troops so we were playing that variant, which is good because occupying the town is part of the victory conditions and all troops can enter towns in this period.

I am not going to go for a blow-by-blow narrative in this battle report because I think, for the most part, people don't really like that. (Maybe it is just me.) What I like in battle reports are highlighting where key mechanics in rules come into play (especially when reviewing rules) and the key decisions made by the players. I am especially interested in the latter as I am trying to develop a series of programmed opponents specifically for OHW and its scenarios.

Game 1

I played Red and rolled up three Knights, one Archers, and two Levy. Darn! No Men-at-Arms to defend the town with. Blue Army was rolled up as three Knights and one Archers unit.


  1. The column of Blue Knights attacking up the road (not visible on the map, but trust me, it is there).
  2. The Blue Archers guarding the flank.
  3. The single Red Archers defending the town.
  4. The Red Knights defending the flank.
  5. The Red Knights coming in from the relief forces on the flank.
The key decision the Red commander has, after finding out their force composition, is which unit types to put where. With Knights having 12" movement and hitting with D6+2, they could afford to be in the relief column; they have the mobility to get engaged with the enemy the quickest. The Archers have a 6" move and a 12" range, so it is possible that they too can have an impact in defending the town (or re-taking it). The issue with Archers is that they are D6-2 in melee and Blue Army, using the road, would be on them in turn 2. So I now question my choice of selecting them for my initial forces. Putting a Levy unit in there would have lasted as long, but inflicted more damage over the long run. The main point was that there was no Men-at-Arms unit (i.e. dismounted Knights) to put in. As they only take 1/2 damage, they have staying power.

The first key rules moment came when I charge the Red Knights into the middle of the Blue Knights column.


As you can (barely) see, I intentionally charged my Knights past the lead Blue Knights at the head of the road column and clipped the flank of the second unit. My intent was not to claim "flank attack" (and in fact I did not), but rather to tie up the road column from moving any further. This action, as you will see, brought up a lot of questions on how to interpret the OHW rules. I would like to hear some of your ideas on how you would interpret them.

Despite my constant advocation of playing the Rules As Written, I find myself with OHW often "injecting" rules into the game that are not there, but are simply common conventions in other rules that I have played over the years. In this case I did not claim a flank attack because of the convention that you can only claim a flank attack if you are coming in more than 45º off of the front corner of the enemy unit, otherwise it is a frontal attack. It seemed cheesy to claim a flank attack when the charge clearly did not originate from the flank.

There are three interesting things about this attack though. First, that you could charge past the first unit. This felt right because I was coming in from the side. Second, because the Knights were all jammed up together, there really was no way to engage the front face of the second Knights unit. Charging a unit in column would have hit its flank. Third, the charging unit only has corner contact. Nowhere does Neil Thomas espouse "squaring up" units in hand-to-hand combat in these rules.

At this point, we had ruled it a frontal attack. Later we would both agree it should have been a flank attack, and thus caused double casualties.

One other point of note is that the Blue Archers unit failed to pivot at the end of the last turn. You can just barely see the second Red Knights unit coming up on its flank. If it had pivoted, it would have been able to fire at those Knights, but as it was, they were either going to fire at my engaged Knights and eventually be taken in flank, or they would pivot – losing their opportunity to fire – but able to face off against the flanking Knights.

That leads to another couple of questions: firing at units partially obscured and firing at units engaged in hand-to-hand combat.

When it comes to line of sight, Neil Thomas is silent. Generally speaking I use a simple rule. If the right-front edge of my unit can draw a line to the closest center-point of the edge of the target unit and it does not pass through a unit or terrain, then do the same from the left-front edge, I allow the unit to fire. This means that units can fire into a melee if they meet the above rules. Here are some examples of what I mean.
Allowed – Not Blocked by Unit or Terrain
Not Allowed – Blocked by Terrain
Is this how you play it?

The next significant event was the relief Red Knights hitting the Blue Archers on its flank. It rolled a '6', adding '2' and then getting doubled (see the rules for the order of operations; adding and subtracting come before halving or doubling), resulting in the Blue Archers being run down in a single turn.


Generally you think of OHW as an attritional game, given that it has 15 hits per unit, but you have to remember that hard-hitting units coming in on the flank can take out a fresh enemy unit 16% of the time!

One of the rules in OHW is the inability of most units to interpenetrate other units. Generally only skirmishers can interpenetrate, or be interpenetrated by, other units. In the medieval variant there are no Skirmisher units, so there is no interpenetration allowed. By the way, I like this rule because, as Neil Thomas wrote in a Slingshot article of his rules (paraphrasing): I don't believe in command and control rules because I think players do a good enough job of getting in their own way. This next turn showed that concept neatly. The Knights on the road are all bunched up and now a threat on the flank has appeared much more quickly than anticipated.


Although it is hard to see, the block of Knights on the left are actually two units, one behind the other. Due to the interpenetration rule the Knight unit in the rear cannot pivot. Interpenetration. Units may never pass through each other. So, it is not merely a matter of clearing the footprint of the friendly unit, one unit's footprint may not pass through another at all.

This leads to a second issue. Although the rules never state it explicitly, movement is always straight. The following passage makes no sense otherwise. "Movement is depicted according to a simple model, whereby rapidity is reflected by faster movement rates rather than, for example, allowing some units to turn more rapidly than others. Turning is instead depicted in a simple manner, by pivoting units on their central point. This avoids the complexity of wheeling manoeuvres, where wargamers have to precisely measure the movement distance of a unit’s outer corner. The difficulties of turning are instead provided for by only allowing evolutions at the start and/or the end of a unit’s move, but not during it. This reproduces the historical effects, but makes the tabletop process much easier."

That said, no word is mentioned of a unit backing up, reversing its movement. In the above situation the last Blue Knights unit would be stuck in place, unable to pivot, until the Knights unit in front of it moved forward or was eliminated. We decided to allow a unit to move straight forward or backward with no left or right drift. We felt the intent of the passage above was that there is no turning or oblique/drift in movement as the rules allow a free pivot both before and after the movement.


Is that how you play it? Or would you have disallowed it because the commander inadvertently bunched his troops up? As it happened, this command and control issue still had a penalty. It allowed the Red Knights to get the jump on the Blue Knights, inflicting the first hit.

The game ended with a Red loss. The Blue Knights eventually ground down the Red Archers while only taking 10 hits. The flanking Red Knights cut through all of the Blue Knights caught on the road, but in the end exposed its flank to the Blue Knights in the town. With the clock run out the Blue Knights turned around and re-entered the town long before the next relief unit could arrive and challenge ownership. Four determined units beat six cautious ones. It was a very close game.


In hindsight I do think having a Levy unit in the town rather than the Archers unit would have resulted in a Red victory. That -2 in combat resulted in the loss of 6 hits on the leading Blue Knights, which would have destroyed them first.

Let see how I fare as the attacker.

Game 2

Blue force rolled and got three Knights and one Men-at-Arms. Men-at-Arms (i.e. dismounted Knights) are notable in that they take 1/2 casualties due to their armor. Although they are slower, I wanted to have them attack the town. I wanted to make sure they survived the assault, leaving my Knights to clear the field. My strategy was going to be much different. (By the way, even though I did not plan it this way, I think the person that goes second as the attacker has the advantage as he can see what does and does not work.)

Unfortunately, Red force rolled and also got one Men-at-Arms! In addition they received four Knights and one Archers unit. Here is how we deployed our troops.


As you can see, Red went with the Men-at-Arms defending the town and the Knights protecting its flank. Red also chose the Archers unit as the unit from the relief force.

I decided to attack on a broader front. Now that I knew I would be attacking Men-at-Arms in a town – they take 1/4 casualties – I knew that I would have to keep the flanking Knights and all of the relief forces off of my back to allow me as much time as possible to whittle down the defenders. Also, I knew that mathematically with him taking 1/4 casualties (armor and town defense) and me taking 1/2 casualties, I would have to get a second unit in there hitting him on the flank as soon as possible. So my plan was to use one Knights unit to engage his Knights unit, another to engage the Archers unit, and the final Knights unit to take the Men-at-Arms in flank.


As you can see by the image above, I pushed my Knights all the way to the hill to take out the Archers. It did not matter much because the one shot they took was to the (white) Knights. But the problem was that I was now inflicting 1/2 casualties for attacking uphill. At the time I was not too concerned about that. In my game I only got one unit from the relief force activated until Turn 15 hit. If I could keep the relief forces pinned down as long as possible the second unit might not have enough time to take back the town, as happened to me. That said, my math was a little off. The Archers would inflict an average of 0.7 hits per turn (D6-2) while my Knights would still inflict an average of 3 hits a turn (D6+2 / 2). So as soon as I wiped out the Archers, he would have a Knights unit on my Knights' flank, which would likely wipe them out instantly.

That said, all was playing out well. My Knights in the center had his engaged frontally and on flank. I missed blowing out his unit by one hit, however. Once that unit was eliminated, I had another interesting decision.


The Archers had been inflicting a few good hits, so with the Red Knights in the center gone, my (white) Knights were free to slam into the Red Men-at-Arms defending the town. But what to do with the other Blue Knights unit? I knew that as soon the Red Archers collapsed the Red Knights immediately to their right would spring on the flank of my Knights attacking the hill. As they only had 5 hits it was possible that they could survive a flank charge (if the Red Knights rolled a 1-2). Even if they did not survive, I wanted to be in a position to immediately counter-charge their flank, if possible. So I moved my Knights forward to threaten any relieving Red Knights.

My opponent thought it was a bad move. What do you think?

As it turned out, the Archers collapsed, the Red Knights sprang on the flank of my Blue Knights, which were rolled over in a single charge. My Blue Knights then counter-charged (without getting a flank position), but were apparently still blown from the previous combat as they were rolled over by the Red Knights in turn. (There is something about Knights in the relief force being particularly effective as in both games they wrecked several units in succession.)


However, by this time my (white) Knights had hit the Red Men-at-Arms in flank and helped eliminate them. (My troops had been getting very good rolls while his Men-at-Arms had been getting horrible rolls. After three turns at D6 / 2 they had only inflicted 5 hits on my Men-at-Arms!) So I turned my Knights around to intercept the Red Knights coming off of the hill. We were both at 8 hits ...

I charged and rolled a '1', while he countered with a '4', leaving me with 1 hit remaining. That was enough to allow me to eliminate his Knights in the next turn. But that meant ... another fresh Red Knight was coming from the relief force. It charged off of the hill and took my last Knight unit out.


I had 5 hits, but he was going to hit at D6+2 / 4 each turn, so basically a '1' to '4' was 1 hit and a '5' or '6' was 2 hits. His first hit he rolled a '1' ... and his swing on turn 15 ...


Summary


Two really great games, both with the attacker winning (as it was historically). OHW, like Memoir '44, due to its quick games and simplified play, lends itself to playing a scenario twice, once as Red and once as Blue, then seeing who did better overall across the two games. For this scenario, it was definitely  hard-fought draw, going down to the wire.

It was interesting to see what kind of biases I brought from playing other rules, things I did not even question as to whether or not they were in the written rules (such as flank charges having to originate outside of the front 45º, or that there was no backwards movement defined). It was also interesting to see how close or far apart Shawn and I were on 'how things should be'. (Shawn is one of the few people that can stand playing with me, so I figure we must be closer in our gaming opinions than not.)

The more I play OHW the more I am impressed with how rich a game whose combat mechanic is 'roll D6 to accumulate hits up to 15 then remove the unit' and how tightly designed the scenarios are. I have used the scenarios for other rules, but you always had to modify a few things (like forces, number of turns, etc.) so you definitely lost the sense of how tight these designs are.

It was also really nice to be able to break out the old DBA armies, blow off the dust, and game with large units that had a better feel of 'mass'. Originally I had been playing using these armies with one base per unit, making units 40mm wide (instead of the recommended 4" to 6" wide). That allowed me to play on very small board (12" by 12", in fact). For this game I decided that I wanted to use units of the proper size, and using free movement no less! Each unit was 120mm wide (about 4.75") and with 15mm figures, it 'felt' great.

I was digging through the closet looking for DBA knightly armies and found a whole (large) Norman force that I don't remember purchasing, and had definitely never played with. Shocking. But this game played so well, I can see a lot more medieval OHW games in the future.

Gaming 2019


I did not do one of those end of year posts outlining what I accomplished, etc., but I guess I will tack it on here.

My last year was mostly wrapped around computer gaming, online education, and vegetating in front of the television. I got very little painting done, no big miniatures projects done, very few games played, and very few blog posts written. It really wasn't until December that I pulled myself out of that pattern and started gaming again. In my Solo Battles blog I published six posts in December, five posts here since Thanksgiving, but unfortunately none in my Wooden Warriors blog. (I have one coming up, however.)

The biggest change to my gaming was trying to get into mainstream gaming rules, like Warhammer Underworlds and Star Wars: Legion (SWL). The former was largely unsuccessful because everyone around here has pretty much stopped playing it. The latter, however, seems to be just starting up in this area.

So, why SWL? I am not a big Star Wars fan. I am not a big 'popular games' fan. The system is actually the kind I generally do not like (competition oriented; players like to min-max lists; points driven; scenarios are that in name only; figures are expensive; lots of tokens on the table; uses special, expensive dice; rules are 82 pages long; units have lots of special abilities, requiring cards to remember everything (but you will still forget a few); uses eyeballing line-of-sight and estimating the percentage of the figure exposed; and other such goodies. So why am I inflicting this upon myself? To be more social, to be honest. I have a very hard time meeting new people and asking if I can join in. As I get older I find that I get pickier, so my natural inclination is to solo game more. But solo gaming, well, is a lot of work. And it is lonely. I need to break out of that shell.

Gaming 2020


So, SWL will be more on the menu this year. Don't expect any battle reports anytime soon though. My painting of commercial figures has slowed down, especially as my eyes seem to have worsened. (I am getting my 'painting hand' back though.) I really don't like to do battle reports with unpainted figures and I can see it is going to take quite some time for me to paint all the figures I have purchased already. (Trust me, Citadel contrast paints can be a real time saver, if you use them correctly. Which is to say, not the way Citadel tells you to use them.) So I will be gaming with others using some primed but unpainted units [yuck] largely against opponents that have unprimed units (if current games are any indication). I have no intention of photographing my shame. I will post pictures of my painted troops from time-to-time, however.

I thought about having the figures sent out for painting but Stormtroopers are black and white, for goodness sake, and my Rebels are Hoth-themed so they are black, white, tan, and gray. I cannot bring myself to pay someone to paint such simple schemes.

Shawn and I keep talking about how we would like to sell all of our miniature collections and start over. One scale for mass battles and one scale for skirmish, maybe. Maybe not get into every period you can think of (except Pike and Shot; I have still resisted that!). Maybe spend more time on terrain.

But, I can never bring myself to actually do it. So I duplicate periods in different scales.

I am resolving to get rid of a lot of rules and game systems that I know I am not going to play again. I may do some serious digitizing of the rules and magazines. But there are so many game systems I have that I cannot bring myself to throw into a landfill and I don't want to pay to have to have it hauled off. For my old collectible card games, for example, I am probably just going to give it to a FLGS just to get rid of it. That alone should free up some space.

If you have ever seen some of my cartoony wooden figures that I make, well, I will probably be doing a lot more of that. When I was about 13 I started making figures out of wooden beads. Knights mostly. Now that I am grown (HA! my wife would say) I still find I like the style. Also, I very much like painting freehand. It is much easier than painting modern commercial figures with an incredible amount of sharp detail cast into the figure. It may not sound like it, but trust me, it is. And "making" a figure these days is pretty much gluing one bead on top of another and adding a toothpick for a weapon. I am currently working on making vehicles using "granny grating". My first attempt is a pickup truck for my modern African army. (It will debut on the Wooden Warriors blog when I am done.)

My temperament is such that I tend to rotate between activities and projects. For a long time that was computer gaming. Right now non-wargame computer games have diminished appeal. I need to paint and that can take a lot of time, but as my eyes fail I won't be devoting as much time to that. My solo gaming efforts are going strong, probably stronger than my non-solo gaming efforts. I am trying to change that, but I don't see myself ever moving away from solo gaming completely. So, hopefully, this year you will see more activity on this blog and my Solo Battles blog.

Tuesday, December 11, 2018

One-Hour Skirmish Wargames Review – Part 2

This is a continuation of my test game of One-Hour Skirmish Wargames by John Lambshead and published by Pen and Sword Publishing. If you did not read Part 1, you might want to start there.

Turn 2

When we left off the British had inflicted three casualties on the French, who had inflicted two in return.
One note I should make is that I read the scenario wrong. It is the British that must get within 6" of the cannon at the end of the game, not the French. I wrote it correctly in the last post, but my brain did not register it correctly. Change of plans! Thank goodness I am playing this solo!
The French gain the initiative and get 8 Action Points (AP). The French infantry behind the rise continue to fire at the British line in the woods, while the main body of infantry head towards the British right flank in order to clear out the woods of enemy. The French cavalry retreats back to the woods, not wanting to be picked off by the rifles, and an infantryman moves to cover the mounted French Lieutenant.
If a target is behind an obstruction that is ½ its height (or more) line of sight is considered blocked. I have been playing that a model on foot qualifies as such a blocking obstruction. If not, Mounted Leaders would be bullet magnets. Further, in this mission a British Rifleman has infinite range and a bonus to shooting Mounted Leaders, so it seemed rather strange to make such a critical model so vulnerable. I wanted to allow an opportunity shot or two for this scenario, not make the Officer's demise a foregone conclusion.


The British also receive 8 AP. They use those points to fire with four line and two rifles, downing four of the French infantry that were foolish enough to run into the open.
What I am finding out is that you have a basic choice when receiving an 'average' number of AP: move a few figures multiple times; or move a lot of figures once each. So far, moving a lot of figures at once has not worked as they have been shot down. I suspect had the French been the second player, there would have been a possibility of being the first player in the next Action Phase, giving them a 'double move'.


The French again get initiative, but only gain 5 AP. The cavalry makes a double move and charges the closest British infantryman in order to make it harder for the British to bayonet the downed French. The Chasseur succeeds in cutting the infantryman down. Given that the British has the next action, will it be a sacrifice?


The British get 7 AP and they make the cavalryman pay. One soldier shoots the cavalryman (making then 'downed') while another advances and bayonets them.
By the way, I do not consider a 'downed' model to be literally on the ground (although they may be). For example downed cavalry might be the rider trying to bring a rearing or wounded horse under control, making them easier to defeat in close combat. Basically I see this as a decisive combat mechanism that requires you provide at least two models cooperating against a single model. The first model shoots them successfully, getting a downed result, with the second coming in and finishing the task.
As the threat in front of the British has largely been neutralized – at least for the remainder of the turn – the Line Sergeant makes a move towards the cannon, but does not have enough AP to get there.


With the Joker drawn the turn ends.

The British have three casualties, a 3 motivation, so they pass morale automatically. (The British will draw a minimum of an Ace (1), add your Motivation score (3), and have to exceed the number of casualties (3) that you have. So the British automatically pass. You should still draw the cards, however, as it might affect Casualty Resolution later.)

The French have four casualties, a 2 motivation, so they need to draw a 3 or higher. Because they have a Leader with a Leadership (2) skill, they get three cards, discarding the lowest two. They easily pass.

After casualty resolution, two of the French infantry were determined to be dead, while two have recovered.


Turn 3

The British win initiative this time, effectively giving them a double move. I must say that so far, the British have generally had more AP to spend and more double moves.

The British receive 9 AP. The Line Sergeant finishes his move to the cannon and fires at one of the French in the open, as do other line soldiers. Finally one of the line moves twice, bayonetting the downed French soldiers, ending the threat to the woods.


With 8 casualties and the British in possession of the cannon, things are starting to look desperate for the French. Worse, the French draw 1 AP. The soldier behind the rise downs the British infantryman that bayonetted the French soldiers.


The French get the initiative, giving them a double move, but draw a miserable 2 AP! The soldier behind the rise fires at the Sergeant taking cover at the cannon and downs him. Meanwhile the soldier by the road advances on the cannon in an attempt to bayonet the Sergeant before the end of the turn.


There appears to be a lull in the action as the British also draw 2 AP for the Action Phase. The soldier at the edge of the woods succeeds in downing the advancing Frenchman, stopping the threat to the downed British Sergeant.


The French again get the initiative, getting 10 AP. This allows for a bold move by the French cavalryman by the road. He charges the downed British Sergeant and cuts him down. Noting that he is within 12" range of the Rifles Sergeant, he decides to take a potshot at him, despite him being in cover. He must have caught the Rifles Sergeant unawares as he downed him with a single shot!

The French soldier guarding the mounted French Lieutenant decides to take the opportunity to charge the downed British, bayonetting him, and then firing his musket at the British soldier hiding behind the tree. (A Joker comes out and the turn ends making him automatically miss.)
Although I knew that I could move and fire with a figure, if I spent the two points, initially I did not take advantage of that combination, to my detriment. You see a lot more figures on both sides starting to move an fire. I don't really have a problem with that in a Napoleonic skirmish game, but it feels a little too much like modern maneuver warfare.


The French have 8 casualties, a motivation of 2, so they need a 7 or better. They still have their Lieutenant so they draw three cards and pass the morale check.

The British have 5 casualties, a motivation of 3, so they need a 3 or better. They have lost one leader and the other is downed, so they will only draw one card. They still pass their morale check, however.

Casualties are resolved and it appears that the Rifle Sergeant was indeed dead from that lucky Chasseur's shot. So the British have now lost both of their leaders. One of the French soldiers also proved to be out of the fight.
Although I use terms like 'dead', 'killed', 'bayonetted', etc. I am just using those terms for color. The figures are really all just out of the fight for the rest of the scenario. If you are playing a campaign game all figures that were casualties at the end of the game would have a card drawn for them, just like for Casualty Resolution. Red is Dead and Black is Back, so it really takes two red cards to kill a figure or take it out of the campaign.


Turn 4

The French have been maintaining their casualty spread – about 50% more than the British – but they have a Leadership advantage. Although the card they must draw is higher in value than the British, they draw three cards to the British one due to their leaders still being in action.
So far I have kept the French leaders out of the fray in order to protect them. Leaders, however, not only draw additional cards during the end of turn morale check, they also draw extra cards when they are attacking or defending. So leaders are better fighters, but if you lose them, your whole force may rout from the loss.
The French get the initiative and receive 5 AP. The French Lieutenant advances forward, so I can use his combat on the following Action Phase. As he is mounted he is better in close combat, in addition to being better because he is a leader. For example, he would draw five cards in close combat when attacking (four when defending) compared to the one for an infantryman. When being shot at in the open, he draws three cards rather than one, making him harder to down.

Meanwhile the French infantry shoot at the British in the woods, downing one (who is subsequently bayonetted by an advancing French soldier), but missing the last one.

The French Chasseur, fresh from his victory over the Rifle Sergeant, charges the British line at the rear and cuts him down.


The British need to hold on as they are losing figures at a rapid rate. They draw 10 AP.

With the French Lieutenant exposed, the sniper moves twice to a new position where line of sight is not obscured by the rise. He raised his rifle, aims, shoots, and downs the Lieutenant. (Three cards firing versus three cards defending, so a 50-50 shot.)

The other remaining rifleman takes a shot at the Chasseur but misses. The last remaining Line soldier, seeing his position flanked by the charging Frenchman, moves back into cover before taking a potshot at him. (He also misses.)


The British gain initiative, giving them a double move. They draw 9 AP.

The sniper, seeing an opportunity, moves twice to the cannon, draws a bead on the French Sergeant, and drops him with a single shot. (Note that the sniper does not get a bonus for shooting leaders, just the French Officer. So this was another 50-50 shot.)

The second rifleman draws a careful aim against the Chasseur and also drops him with the shot. Finally, the Line soldier shoots and downs the French soldier, but runs out of AP so he cannot bayonet the downed foe. Three shots and three hits. That really hurt the French. They only have three models remaining that can act.


The French draw 6 AP. Both soldiers fire at the sniper and miss. The Joker is drawn, so the turn ends.


The French have 9 casualties, so they need an 8 or better. As both French leaders are downed, they have only one card. They draw a Queen and pass the morale check.

The British have 8 casualties, so they need a 6 or better. They draw the Ace of Clubs, the lowest valued card in the deck, and fail their morale! The British decide that this cannon is not worth the blood that has been shed and retreat, ending the game in a French victory.


The British that were taken out of action.


The French that were taken out of action.

Initial Thoughts

I obviously changed the way I played as I got a better feel for the rules. All of the play after Turn 1 was done in about an 90 minutes, but that includes taking notes, picture taking, and the actual gameplay itself. It really felt like the action was moving very fast. Also, I did not have the rules at my side with this session, so once you get the hang of it, you really do not need the rules any more. The odds of success are basically I have X number of cards, you have Y number of cards, whoever draws the highest card wins. Determining how many cards you draw is easily memorized.
Ironically there is one strange rule (to me): determining who has the highest card when you draw the same card value, but with different suits. The author uses the card suit ranking system from bridge, which I have never played, and indicated the best way to remember the order is some little mnemonic that I could not remember. Rather than fetching the rules I went to Wikipedia to determine the suit ranking and they had a much more memorable method for remembering: the suits are ranked in alphabetical order, ascending. So Clubs is lower than Diamonds (C comes before D), then it is Hearts, and finally Spades. His little was something about Super Heroes Do C...? Hell if I remember.
The rules are dead simple. The play is very fast once you get the hang of the mechanics. It makes for a good game where you want to throw figures on the table along with some terrain and get to playing quickly. One hour? Not sure about that, but that is okay. It matches the concept even if it runs over the time.

Rules Ratings

Using the review system from before, here are the game ratings for One-Hour Skirmish Wargames (OHSW).

Drama – do the rules create tension during play?

For the most part, combat actions have a 50-50 success rate. Many times both sides were drawing one card in the attack and two cards in defense, but because both sides had the same odds, it largely felt even. In either case, fortunes could swing wildly from phase to phase.

One element that supported that drama was close combat being so decisive. Losing meant you were out of action, rather than merely downed, and if you were downed when attacked, you automatically lost. This led to lots of action around downed figures. Maybe as I play it more and understand the risks better, the drama will reduce, but there were several time where I had 50-50 shots and got four hits in a row. That can decimate a force's ability to act in a heartbeat.

These rules rate 3 out of 5 in Drama.

Uncertainty – are there enough elements that introduce uncertainty into the game?

The three primary mechanics that create uncertainty are: will I act first or second; how many AP will I receive; and when will the turn end. This last element, when will the turn end, could cause the turn to end rather quickly, generally not impacting you in terms of accomplishing something that turn, but very probably ruining your chances at winning the scenario. If you are not playing a time-restricted scenario, this element will probably not produce much tension.

The order of acting being randomized allows you to gamble with your actions when you are second player. If you get first player next action phase and get a sufficient number of action points, you will likely look like a tactical genius. As for the opposite occurring, well it was a great plan but the cards were against you.

These rules rate 4 out of 5 in Uncertainty.

Engaging – do the rules allow the player to make meaningful decisions that lead to consequences?

Moving out of cover into the open definitely changes your odds. The basic combat is the attacker shooting with one card. A defender would have two cards in light cover and three cards in hard cover, Not impossible to overcome, but still not in the attacker's favor. Move out into the open and suddenly you defend with one card, a 50-50 shot.

I see spending AP like managing a hand of cards in a Command & Colors game. You need to be patient and take no rash actions until you build your hand. With OHSW you need to turtle when you draw low AP and make the bold moves when you have high AP, especially when you are second player.

These rules rate 4 out of 5 in Engaging.

Unobtrusiveness – do the rules get in the way?

No. Obtrusive have lots of exceptions for special cases. These rules have few such special cases to worry about.

These rules rate 5 out of 5 in Unobtrusiveness.

Heads Up – are the rules playable without frequent reference to a quick reference sheet?

Basically you need to memorize the stats for your troops at the beginning of the game, but given that most figures are the same, this is not really an issue. Stats may change as you switch from period to period, but within the period being played, pretty much everyone is the same, save for a few key figures.

The majority of my test game was played without the rules being nearby. Once you get the hang of the rules, you will only access them to refresh on stats before you start a new game.

These rules rate 5 out of 5 in Heads Up.

Appropriately Flavored – do the rules 'feel' like they represent the period or genre being played?

If anything, this is where the rules 'fail'. Yes, there are differences between weapon systems, even within a period. For example, in the Napoleonics test game the Rifles were infinite range, the Muskets an 18" range, the Carbines a 12" range (if the cavalry was firing while mounted, otherwise it was the same range as a Musket), and the Pistols 6". Everything was one shot per Fire action. Compare that to a single-shot breechloader in the Colonial period, where it has an infinite range and a single shot. The issue is not the range, but: a) the weapons are equally accurate; and b) the firing rate – every action phase – is the same.

Only time, and playing other periods, will tell if these have the right flavor. Right now, it feels really good for Age of Machine and onwards. It felt funny for Napoleonics.

These rules rate 2 out of 5 in Appropriately Flavored.

Scalable – can the rules be scaled up or down – in terms of figures or number of units played – from a 'normal' game?

Although the number of figures may vary from scenario to scenario, that really does not address scaling. The two primary mechanisms for 'how much can I do' are determining action points and determining when the turn ends. There is no scaling mechanism based on any factor, much less the number of models you are using. If you use a small number of models per side you will find that a higher percentage of models will get used in a game compared to when you use more models. Activity tends to cluster around a few models making aggressive moves. This system is designed to limit the number of points a single model can spend, so high AP draws will tend to allow figures on the periphery of combat to act, When you have the same number of points but more models, the periphery of combat will expand, so I suspect larger games will feel like more figures standing around doing nothing. But hey, you got the figures on the table!

These rules rate 2 out of 5 in Scalable.

Lacks Fiddly Geometry – do the rules require fiddly measurements or angles?

Anything with freeform movement will result in games in which you are 'just out'. Infantry moves 6" per move action and cavalry moves 9". Being forced to pay for a second move because you are 'just out' is actually very costly as second moves take more action points than first moves. This game would benefit from a grid. (Note that I say that with all games.)

The other aspect of the game that is fiddly is determining cover. Part of this may be that I do not like area terrain for a low scale skirmish game. Trees should not move around on a piece of felt and be 'just wherever' at this scale; they are immovable trees. So because I played that way I was basically eyeballing line of sight, which I find fiddly. Playing solo. this does not bother me, but I would never play it this way competitively.

These rules rate 3 out of 5 in Fiddly Geometry.

Tournament Tight™ Rules – are the rules clear and comprehensive, or do the players need to 'fill in the blanks'?

Let me start by saying that my preference is towards tighter rules, where everything is spelled out clearly by the author, not looser rules where the author leaves certain mechanics up to the individual players, gentlemen's agreements, and a roll of the die where agreements cannot be found. So a high value means 'tight' and a low value means 'loose'. If you like looser rules, subtract my rating from '6' and that would probably be your rating!

Although the author defines the different periods and weapon systems pretty sharply, he clearly intends that players develop their own modifications to suit their taste. Clearly a set of rules that covers from Muskets to Laser Rifles is not going to lock everything conceivable down.

That said, there is one area that they left wide open and clearly state they intend the players to work out before starting a game: terrain effects. They give you some basic game effect that you can apply to terrain, but leave it to you to determine which ones are in effect by talking it over with your opponent when going over the scenario. This is very much like Flames of War version 2 was. Effects described, suggestions made, few hard and fast rules.

Only one situation came up where they do not resolve it in the rules. Because there are two Jokers in each deck, and the turn ends after the first Joker is drawn, it is very possible that a Joker will be drawn while checking morale or resolving casualties. The rules state that a card's value is from 1 (Ace) to 13 (King), but if a Joker is drawn it is undetermined. (I ruled that it counts as a 0.)

Many decks have a Red Joker and a Black Joker, so if you draw one during casualty resolution, just use the color of the Joker to determine Dead or Back.

I think the lack of hard terrain definitions is significant, hence scoring this factor as average. Otherwise I cannot think of any ambiguity during play. Then again, that is pretty typical of solo play.

These rules rate 3 out of 5 in Tournament Tight™ Rules.

Solo Suitability – do the rules have elements conducive to solo play?

There are no hidden elements to the game so that alone usually grants the rules high solitaire suitability. Having a mechanism to randomize which units act next is usually an element that solo gamers inject into other rules, sometimes with disastrous results. So having that mechanism built in and accounted for is just icing on the cake. Because it does not have a mechanism for which figure acts, it is not given a perfect rating.

These rules rate 4 out of 5 in Solo Suitability.

Component Quality – are the components provided made with quality?

This is a new rating, meant primarily for board games and books, which addresses the quality of the physical components.

These rules only come printed. This is a paperback book with quality binding. However, it is not a lay-flat binding. Given the thinness of the book (just over 100 pages) it is capable of having a lay-flat binding. The quality of the paper and the legibility of the type screams quality. At $23, I think this book is a good value. I wish it had more scenario material, but I am happy with my purchase.

These rules rate 4 out of 5 in Component Quality.

Summary

There is much of this book that I did not cover – such as the scenarios for the other periods, the differences between periods, the points system (it is a little lightweight), and the notes on running campaigns (again, pretty lightweight) – for the most part I review rules, not books. These rules are very accessible, in my opinion clear and understandable (moreso when you break out the figures and try them), will possibly lead to disputes about terrain and 'just out' cases, and can provide a decisive game in a reasonable amount of time.

Will everyone like these rules? No! Every rules author must decide where to add detail and where to abstract them away and players will not always agree on where that line should be drawn. If you think that there is "no way" you could play a set of rules that don't have modifiers to your probability to hit based on range or a myriad of other circumstances, you probably won't like OHSW. If you think there is "no way" you could play a set of rules that don't care about facing, then you probably hate board games and probably won't like OHSW also.

If you like Neil Thomas and wish he had come up with skirmish rules closer to his later design principles – after Wargaming, An Introduction but before One-Hour Wargames you will probably not like these rules. Neil Thomas liked tables and modifiers in that design period and these have none. If you like the raw simplicity of One-Hour Wargames and were always tempted to tweak them (or did), it is very possible that you will like these rules. This is probably why Pen and Sword decided to brand these under the One-Hour label.

Recommended.

Postscript

Even though I think this feels better for Age of Machine and later skirmishes, I cannot understand why the author felt this system should focus on the Age of Firearms. I think they would do well for ancient and medieval skirmishing too.

Blog Archive

Blog and Forum Pages

Popular Posts

Followers

About Me

My photo
Huachuca City, Arizona, United States
I am 58 yrs old now. I bought a house in Huachuca City, AZ working for a software company for the last three years. To while away the hours I like to wargame -- with wooden, lead, and sometimes paper miniatures -- usually solo. Although I am a 'rules junkie', I almost always use rules of my own (I like to build upon others' ideas, but it seems like there is always something "missing" or "wrong").