My blog about my wargaming activities. I collect a lot of 15mm miniatures for the American War of Independence and so collect a lot of rules for this period. I started miniatures with Napoleonics, so I have a number of armies in 6mm and 15mm figures for skirmishing. I have15mm WW II figures that I use for Flames of War, Memoir '44, and someday, Poor Bloody Infantry. Finally there is my on-again, off-again relationship with paper soldiers that I sometimes write about.

Showing posts with label solo gaming. Show all posts

Monday, June 20, 2022

Map Campaign Part 5

Wow, even though I only fought two battles on April 14th, it feels like a lot has happened. Certainly in terms of scenario and rules development it has.

Campaign Update

The Second Battle of Firnskuppe did not produce any casualties, but it should have. (I am still experimenting with a campaign casualty system and both sides got off lightly in this battle and the first.) The Ambush on the Forest Road, however, was a bloody affair as the Battle Frenzy Twist card came up, allowing units to fight in circumstances where they normally would not be able to fight at all (but at reduced effect). The downside, however, was that it increased casualties.

One of the things that this last battle has helped me to develop is the backstory of this campaign. You would have thought I would have worked all of that out, but I sort of go with the idea that you don't try and figure out details until they become necessary. Granted, this makes the backstory fit the narrative after the fact, but I am okay with that.

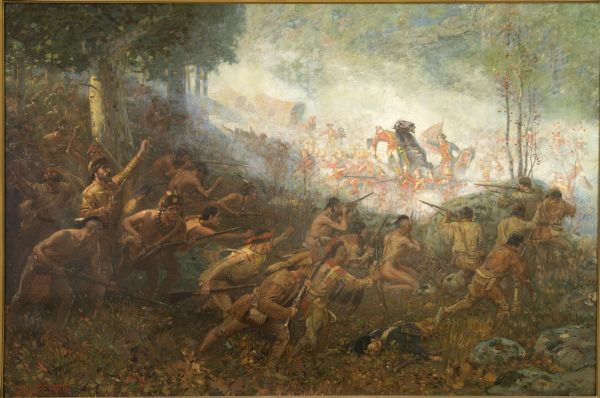
The Ambush on the Forest Road felt very much like playing out Braddock's Defeat (a.k.a. The Battle of the Monongahela), which I would never have even considered gaming out normally. (Okay, that is a lie, I did try it out in a game of Clash for a Continent by Worthington Games. I have also played The Battle of Oriskany, another bloody ambush. But generally I avoid them, and have never played them with an opponent.

This campaign was ostensibly between two neighboring countries – Westonian to the West and Eastonia to the East – and was developed by my (long-distance) gaming buddy Justo. He saw the campaigns on the Joy of Wargaming YouTube channel (hosted by Jon Mollison) and he decided to create his own version of The First Elopean War, but he never completed it. When I suggested a campaign based on another campaign from that channel – which was a skirmish campaign, not a "two nations at war" campaign – and it fell through, Justo convinced me to try his campaign.

Basically the campaign takes elements straight from The Solo Wargaming Guide (TSWG) – which Jon uses quite heavily in his own campaigns – one of which is force generation. Each village, town, and city produces a certain number of troops and garrisons for the campaign, which is the currency that the player has for the campaign. Basically A- and B-class cities produce regiments and C-, D-, and E-class towns and villages produce companies. Normally, a regiment consists of five companies.

Here is where something interesting took place. Justo wrote up his troop muster and orders (for Westonia) separate from me, while I wrote it up for Eastonia. I wrote up some campaign rules to fill in the gaps that TSWG left and one area that I touched upon was what to do with these independent companies. I allowed players to convert a certain number of independent companies to Artillery companies for one thing, but I also had conversion rules for turning them into light infantry and light cavalry. I used those light troop rules, but Justo did not. Justo wanted all of his independent companies not designated as artillery to muster and consolidate into line troops – both infantry and cavalry. Essentially Westonia was a nation with no light troops while a considerable portion of the Eastonian troops – about ⅓ of them – were.

Westonia was Great Britain in North America before it realized that it needed to develop light troop capability and Eastonia were the French and their Indian allies.

The Ambush on the Forest Road was not The Battle of Monongahela, but The Battle of Bushy Run! The "Battle Frenzy" that the Westonians displayed were the Highland troops. The only problem was that the Westonians took far more damage.

So, I am left with a campaign where one side has no light troops and the other side does. That may definitely be an advantage to the Westonians on the set piece battlefield, but as you can see, they have 15 miles of woods to travel through, and hard-riding skirmishing cavalry caught them on the march. Worse still, light infantry and more light cavalry are only 1 ¼ day behind. Even if the next battle on the forest road is not an ambush, I fear it will me much worse for the Westonians if they try and push through to Tierwalt (the destination town they have orders to capture).

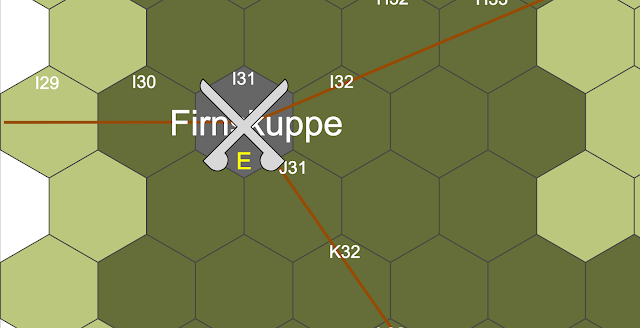
Even worse, even though Westonian troops have captured Firnskuppe with a surprise attack (Eastonia was hit here first), the troops are stuck when it comes to advancing on Erlenloch (the east road route from Firnskuppe) as it goes through heavily forested roads.

The route southward is even worse.

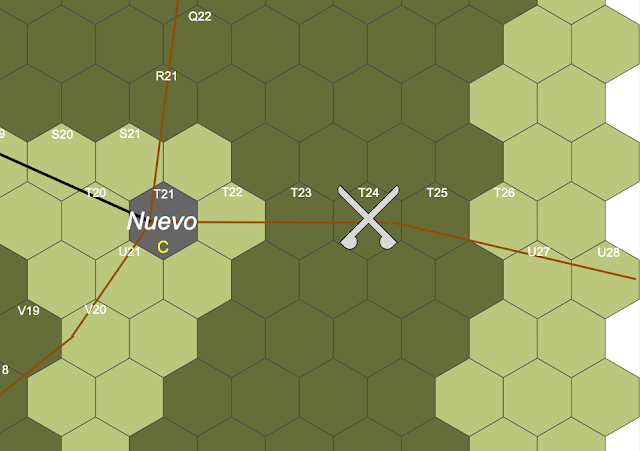
This makes for a very interesting problem for Justo. (I have lit up the Justo Signal and have asked him how he wants to proceed.) As Eastonian forces converge on the Westonian troops in the forests, I think the latter are going to get torn up while they are in march columns. As for the Eastonians, they may be able to push the Westonians back, but can they take the eastern Westonian villages and keep them? (My objective for the campaign was to only occupy Nuevo, the first village on the southern road (see the second image above), and sue for peace, gaining some advantage in the ensuing peace negotiations.

Campaign Casualties

I tried to get slick with my previous campaign casualties rules, but they simply do not work. I am not going to go back and alter the casualties for The First Battle of Firnskuppe, as those troops have already been used in a second battle, but I am going to alter the casualties from that second action.

When a unit is eliminated, it takes 33% permanent casualties if it was eliminated by musketry, 50% if by artillery fire or close combat with foot troops, and 67% if by close combat with mounted troops. This is the "killing blow"; you do not have to mark hits by type and figure things out proportionally. For units not eliminated the casualty rate is 25%. All hits lost round up. These losses are permanent for the duration of the campaign although we can look at replacements if this campaign runs long enough.

First Battle of  Firnskuppe: no casualties.

Second Battle of  Firnskuppe: one Eastonian Skirmisher unit was eliminated by musketry so it drops from 12 health to 8. One Westonian Infantry unit lost 14 hits so it drops from 15 health to 11.

Ambush on the Forest Road: one Westonian Infantry unit was eliminated by musketry, so it drops from 15 health to 10. Another Westonian Infantry unit was reduce lost 14 hits so it drops from 15 health to 11. The Eastonian Hussars lost 2 hits so they drop from 18 hits to 17.

One thing I have realized is that casualty rates will determine how decisive each battle is, and how short your campaign will be.

Saturday, June 11, 2022

Map Campaign Part 4, Other Updates, and Eye Candy

Map Campaign

This is the continuing saga of my solo map campaign, using The Solo Wargaming Guide (TSWG) for the campaign rules and Neil Thomas' One-Hour Wargames (OHW) for the tactical rules. If you missed it, here are part one, part two, and part three. So far I have fought the First Battle of Firnskuppe and the Second Battle of Firnskuppe. Much of this was inspired by the campaigns of Mr. Wargaming on The Joy of Wargaming Youtube channel. The goal of this campaign was to create a series of linked battles where each battle has some context and is not just a random, disconnected scenario. I wanted to produce some interesting scenarios, especially unbalanced affairs that you might never normally play in a face-to-face game. (So far, it has done that, but I am just getting started.)

The Action So Far

The Westonians launched a surprise attack, declaring war on the Eastonians five days after they had already started mustering their troops for a war. Because of this the initial action has been between the vanguard of the Westonian Northern Army and the frontier defense forces of a few towns in the line of attack, centered around the Eastonian village of Firnskuppe. Firnskuppe has been temporarily lost to the Westonians, but the Eastonians are mustering their Northern Army to take it back before the bulk of the enemy army arrives.

Meanwhile on the Southern flank, the Westonian Southern Army has started marching on the Eastonian town of Tierwelt. Unknown to them, Eastonian frontier forces are waiting for them in the extensive forest lying between the two countries. That engagement is the subject of today's post.

The Forest Battle

One of the other goals of this campaign is to use some of the various game accessories that I have collected over time and gauge how useful they really are. In the First Battle of Firnskuppe I used a (now out-of-print) deck of cards called Kings of War Battlefield Cards. This provided me with objectives and stratagems for each side and conditions for the battlefield. The Second Battle of Firnskuppe allowed me to experiment with Warcry Battleplan Cards. This provided me with a deployment plan for each side, victory conditions, and a twist to the battle. One might say that there is some overlap between the two, but I think it would be very possible to combine both in a game. Something to ponder.

Today, however, I want to explore another resource and that is something that more people praise OHW for than the rules: the scenarios. A lot more people play the OHW scenarios than do those that play the rules. The OHW scenarios cover a variety of issues, so why not list out the one sentence summary of each – ambush, flank attack, meeting engagement, etc. – and use that for picking a scenario. But how do you figure out which scenario to pick?

In 2006 I 'discovered' a set of rules called Mythic Role Playing (and the stripped down version Mythic Game Master Emulator). Here is a quick explanation of Mythic:

Mythic Game Master Emulator
Create dynamic role-playing adventures without preparation. For use as a supplement with other systems.

Mythic Role-Playing brought true, solo play to the world of tabletop role-playing in 2003, kicking off a solo revolution that continues today. The blue book Mythic Game Master Emulator contains the ground-breaking solo emulation rules from the Mythic red book, giving you everything you need to play any RPG system without a Gamemaster.

Mythic adventures are meant to be played off the cuff, with perhaps a few minutes of brainstorming to come up with the initial setup. Through a Yes/No oracle system, Mythic guides you through your adventure as you test your expectations. A Random Event mechanic throws narrative curve balls at you, and the Chaos Factor keeps tilting the story throughout your adventure to change up the pace.

So the basic idea is to ask a series of Yes/No questions – generally the ones you consider having the highest probability of occurrence first – and use die rolls to determine what the answer is. Using these answers you have critical decisions made about the 'story', in this case the scenario. I used Mythic for gaming solo with miniatures some time ago and it worked well.

Scenario Generation

For this battle I had it in my mind that the Eastonians, as they are much faster (Light Cavalry), and a smaller force, that they have some chance of scouting out the Westonians. Using Mythic I asked a series of  questions to drive me towards a scenario.

  • Have the Eastonians out-scouted the Westonians, i.e. spotted them first? Yes.
  • Have the Eastonians detected the enemy without being detected? Exceptional Yes.
  • Have the Eastonians been able to get into an ambush position? Yes.
  • Have the Eastonians been able to get into a position where they can disrupt the Westonian supply line? Yes.

This gives me an idea of what the scenario should be like. Because the Eastonians can ambush the Westonians they will be allowed to start any place on the board, save a few locations. Further, they will be given the opportunity to achieve an objective that will allow them to disrupt the supply lines of the advancing Westonian army. Let's take a look at the board first.

Terrain Generation

The battle is taking place in the middle of an extensive forest with a poor road cutting through it. This road runs from a C class town in Westonia (Nuevo) to a C class town in Eastonia (Tierwelt). Imagine a road cutting through the North American wilderness in the 1750s from a British frontier town to a French frontier town and you have a pretty good idea of what I was envisioning.

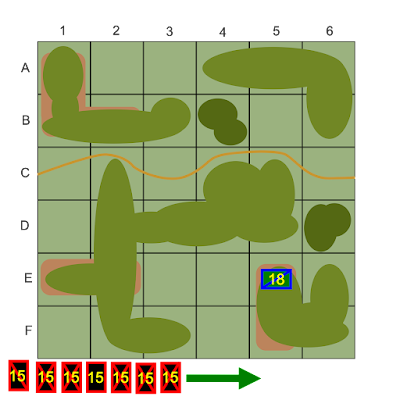
Because the hex was forest with road, and all surrounding hexes were the same, or just forest without a road, I decided to use the same card system for terrain generation, but with some changes. Draw one playing card for each square of the grid (there are six rows of six columns, so 36 cells) and there would be a 50% chance (any Red card) of the square containing light woods, a 25% chance (Spades) of being clear of terrain, and a 25% chance (Clubs) of having special terrain. If special terrain was indicated draw another card and that indicated if it were light wooded hills (the second card being Red) or a heavy woods (the second card being Black). Once you have determined the terrain for each square, draw a road in a logical place from West (left) to East. Here was the board generated.

Battle Plans

The Westonians have two basic battle plans that I can see.

  1. Push through as quickly as possible, trying to exit off of the East side of the board. (50%)
  2. Exploit the gaps in the woods (C1, C3, C6, and D1) to deploy troops and destroy the Westonians. (50%)

The Westonians will use battle plan #2.

The Eastonians have two basic battle plans.

  1. Ignore the minor victory objective (moving troops off of the board) and fight as hard as possible in inflicting damage on the ambushed troops. (50%)
  2. Attempt to obtain a minor victory. (50%)
    1. Attempt to get just the small Mounted Skirmisher unit off of the West road. (50%)
    2. Attempt to get both units off of the West road. (50%)

The Eastonians will use battle plan #1.

Deployment

The Westonians will enter the board at C1 and are trying to get off the board at C6. That said, there is no requirement for the Westonians to exit the board during the battle. As the Eastonians can ambush the enemy they are not allowed to setup in rows B, C, or D, but can set up in any column in rows A, E, and F.

The Westonians will be marching on the board (BG Don NoSeLasTraga prefers to put his Cavalry in the rearguard, not the vanguard). Their forces are unaware of the Eastonian presence, so they must advance down the road at one square per turn until at least one Eastonian unit reveals itself.

Artillery, Infantry and Cavalry on roads may move through woods squares, but because they cannot deploy into that terrain, they are limited in what they can while in those squares. Infantry may only fire from squares that are clear of woods terrain (light or heavy). Cavalry may only charge from squares clear of terrain if the target of the charge is also in clear terrain, and all squares moved through are clear terrain. Artillery may fire from clear terrain to any other square as long as they have line of sight from the center of their square to the center of the target square. Artillery may always fire on an adjacent square that they are facing, even if they are on a road going through the woods.

Deployment for the Westonians is a march column, with three Infantry units in the lead, followed by the Artillery, followed by two Infantry, and the Cavalry unit bringing up the rear. The first Westonian unit will enter C1 on turn 1.

The only stipulation to Eastonian deployment is that they not be deployed in rows B, C, or D (red striped area) and that it not be a square visible from C1. Once the Westonians take their first turn, however, the Eastonians may move to any square.

Because of the Eastonian battle plan, all three light cavalry companies have decided to form into a single, over strength unit.

Conditions, Stratagems, Minor Objectives, and a Twist

For this game I am mainly relying upon the scenario to determine victory. The Westonians win by being able to exit the East (right) side of the board (via the road). The Eastonians win by preventing that.

However, the Eastonians can obtain a minor victory by exiting a unit off of the West side of the board (via the road) before all of the Westonian units exit off of the East side (or are destroyed). If the Eastonians obtain this minor victory not only will the Westonians be forced to spend one day regrouping after the ambush (if there are any casualties), but they will require one additional day chasing down the Eastonians, driving them back down the road Eastward as the Eastonians will be disrupting their communication and supply lines.

Previously I experimented with the Kings of War Battlefield Cards, but also the Warcry Battleplan Cards. This game I will use both.

Because the Condition cards are so powerful, I decide that there is only 25% chance of there being a Condition (drawing a Heart from a card deck). There wasn't.

The Stratagem cards drawn were Sudden Faith for Westonia, and Advanced Scouting for Eastonia. Sudden Faith allows one unit to get a die roll modifier to a Nerve test. See the Thoughts on Changes to One-Hour Wargames (below) on how this might be incorporated. Advanced Scouting only applies to normal games in which troops deploy forces. As this game has specialized deployment rules as it is, this simply means that the Eastonian troops are hidden and their location is indicated on a map until they are revealed. (Not much of an advantage in a solo game!)

The Objective cards for both sides were appropriate only for games in which both sides are attempting to command the field of battle. As this scenario does not fit that model, they are ignored.

The Twist card is Battle Frenzy. The description is as follows: "A killing madness has enveloped the combatants, and they hack and hew at one another in a frenzy of blades and blood." This is an interesting card for two reasons: 1) I was considering whether the Westonians should be allowed to become desperate given that they cannot fire when jammed in march column in the woods; and 2) when I started developing this scenario – an ambush in the wilderness on a poor road – I immediately envisioned the painting of Braddock's Defeat.

Also, Bushy Run comes to mind but in that story the Highlander's desperate charge lead the British to victory.

Because I drew this card, I need to allow the Infantry a chance to fight their way out, despite the Horse & Musket rules for OHW forbidding it. Because of the Battle Frenzy card, I will allow all units (except Artillery) to charge into close combat with the following modifications:

  • Cavalry charging units in the open do so using the procedure indicated in the main rules.
  • Infantry may charge the enemy in the open or light woods, but do so inflicting D6 - 2 hits. If the enemy unit  are Skirmishers or Mounted Skirmishers, they will retreat one square to their rear, otherwise the attacking Infantry must retreat if they did not destroy the enemy unit. If the enemy retreats or is destroyed, the Infantry take the square.
  • Cavalry may not charge the enemy in light or heavy woods.
  • Skirmishers may charge the enemy in any terrain other than impassable terrain. Mounted Skirmishers may charge the enemy in any terrain other than impassable or heavy woods terrain. Both unit types inflict D6 hits, but must retreat if they did not destroy the enemy unit.
  • Skirmishers and Mounted Skirmishers do not get half casualties in close combat, although Cavalry continues to get that benefit.

All the scenario modifiers are done, so now it is time to play the battle. But first…

Thoughts on Changes to One-Hour Wargames

I have been trawling through the various blogs and forums of late, looking at how others have been tweaking OHW. Although I have previously stated my desire not to do that, I have committed probably one of the larger tweaks out there: converting this freeform movement game to a 6", one unit per square, grid-based game.

So what are some of the things I have seen out there?

Skirmishers

I noticed that MarkusB of the Wargamer's Block blog has been putting out a number of OHW-related posts. His post on changes he would make to OHW combat has a lengthy bit on Skirmishers. The three major changes he suggests are: 1) enemy units fired upon by Skirmishers cannot reduce their hits due to cover; 2) fire from Infantry and Artillery are halved; and close combat hits from Cavalry are doubled.

The shift in the power dynamic between Infantry and Skirmishers would definitely shift. Currently, Skirmishers in the open firing at Infantry in a town inflict D6-2 hits, halved (rounding up). The return fire from the Infantry is D6. So this is an average of 1 hit per turn versus 3.5 hits per turn. Under MarkusB's proposal it would be 1.67 hits per turn versus 2 hits per turn.

Note that Skirmishers shooting at one another are D6-2, not D6-2 halved. 

Hussars, Cossacks, Chasseurs a Cheval, etc.

I all honesty, no one else is talking about this; it is me. These are basically alternate names for Mounted Skirmishers. Mounted Skirmishers move 12" (maybe it should be 15"), can move through most of the terrain that Skirmishers can move through, and can fire (d6-2).

In light of the Skirmisher changes proposed by MarkusB, which of those should be carried over to Mounted Skirmishers?

First, I do not see Mounted Skirmishers as Sharpshooters, which is the justification behind Skirmisher fire negating cover benefits.

I do see their dispersed formation and lower unit size as justification to grant them half casualties from Infantry and Artillery fire.

The biggest question I have always had is whether Mounted Skirmishers should have any capability to enter close combat. I cannot see them being allowed to charge Infantry or Cavalry, but what about Artillery, Skirmishers, and other Mounted Skirmishers? My inclination to the latter question is "yes". I could see giving them D6 in close combat, but not halved casualties against hits caused by Cavalry (or Mounted Skirmishers).

Activation Tests

This is one I have seen mentioned in Facebook groups and is often also called a morale test. The most common version I have read is to force a unit to roll dice each turn to determine whether it acts or not, whether than be moving or firing. I have read about both rolling against hits and against remaining hits. Given that I use understrength units in my games, I like the idea of rolling against remaining hits.

An example system might be to roll 3D6 each turn and if the roll is equal to or lower than the remaining number of hits in the unit, the unit can act this turn, otherwise it cannot. Note that in this system a roll of 16, 17, or 18 would mean that a fully strength unit could not act, satisfying those players that want that 'combat friction/fog of war/chaos factor' in their game. Also note that a unit with only 1 or 2 remaining hits would never be able to act. For those that believe a unit is perfectly functional, even with a few casualties, you could use 2D6, meaning your unit is immune from effects if it has 13 or more hits remaining. You could also go to a 1D12 or 1D20, so a unit would never not be able to act (if it rolled lucky enough).

Rolling against hits, rather than remaining hits, can get a bit tricker if you use units with hit values other than 15 as then you would need to track the number of hits lost and the number of hits remaining. Logically, you would also be saying that a unit that started at, say, 12 hits has the same morale as a unit starting at 15 hits. I personally think that as units get smaller in relation to other units, their morale tends to go down too.

Resolving Combat

There have been several proposals to changing the combat system while not messing with the odds that Neil Thomas uses. The first one I saw was Kaptain Kobold's Five Hits System.

Units roll one, two or three dice when firing, corresponding to 1D6-2, 1D6 and 1D6+2. Each score of 4 or more is a hit. Units can take 5 hits.

Then came John Acar's Three Hits and Six Hits Systems.

Six Hits System: We can have each die hit on a 3+ instead of a 4+.  Each unit will take 6 hits.  With this you can match more closely the hit rates of the original rules.  Thus 1D6 (.67) will take 9 hits to kill a unit.  2D6 (1.33) will take 5 turns to kill a unit.  3D6 (2) will take 3 turns to kill a unit.  You can simply double or halve damage as necessary.  Round fractions up as per the rules.  It occurred to me that instead of halving the damage you could simply change the hit number to 5+ for half damage.  Double damage becomes more problematic though.  You are still doubling numbers…which is fine but perhaps slightly cumbersome.  If you like this system, you can simply use a single D6 per unit to track damage and still apply the rest of the rules as is.

Three Hits System: So, a normal chance to hit is now 5+.  Each unit can take 3 hits.  So, 1D6 (.33) still kills a unit in 9 turns.  2D6 (.67) still kills a unit in 5 turns.  3D6 (1) kills a unit in 3 turns.  Now for the cleanup.  If the rules call for half damage, simply halve the probability to hit.  So half damage is the same amount of dice but hits are on a 6 only.  If the rules call for double damage, hits will occur on a 3+.  With this system, you only need two kinds of colored markers.  Yellow, for example, represents 1 hit and red represents 2 hits.  The third hit removes the unit of course.  This system will provide the greatest degree of uncertainty.

I am fairly certain I tried the Three Hits System, but I cannot find the battle report. As John points out, what these systems do is create more chaos and less certainty, which is another way of saying that the combat will be more luck-driven. By reducing the number of die rolls, each die roll becomes that much more critical. As it is there are not that many die rolls in OHW, so reducing them to even fewer seems like you are swapping … what? … for using fewer dice to mark your hits? (By the way, I now use dice to mark remaining hits, given units can start with more or less than the standard 15 hits.)

MarkusB suggested another method (Same Chaos Variant), which I have seen with other rules, but not seen suggested for OHW.

You’ll need four types of tokens, labelled “4”, “6”, “8” and “x2”. Every time you attack an unit, put a token corresponding to the maximum damage that attack could do. So an 1d6-2 attack on the flank would put a “4” token stacked with a “x2” token on the damaged unit. Every time you acquire a new token, tally the total of potential hits so far. Only if and when the total potential hits reach or surpass 15 (or the number of hits the unit has, for understrength and overstrength units), roll all of the dice corresponding to tokens. If those ‘actual’ rolled hits a total 15 or more, the unit is destroyed. If you roll a lower number, the unit is still fine – but it still keeps all the tokens it acquired so far.

I like this method as definitely increases the 'fog of war' by not defining precisely when a unit will break while at the same time not reducing the number of die rolls.

Changing the Turn Sequence

In the same post cited above MarkusB proposes changing the turn sequence from Movement → Firing → Close Combat → Unit Elimination to Firing → Movement → Close Combat → Unit Elimination. Essentially Movement and Firing switch positions in the sequence.

The complaint, and thus the justification for the change, is that you cannot coordinate actions between units with the current sequence. For example, you cannot fire with your Artillery or supporting Infantry while your Cavalry charges as the charge move will generally block line of fire to the enemy unit, or you may have ruled that a unit cannot fire on an enemy unit in close combat.

By conducting fire first, units will have clear line of fire as charging units will not have moved yet, so it allows for units to double up on the enemy, which is pretty powerful. The following images show the difference. The left image shows that, because the Cavalry moves first, the Artillery's fire will be blocked. The right image reverses the order in the turn sequence, so the Artillery will be able to fire before Cavalry can move.

The net effect of this, of course, is that it allows units to double up on the enemy. So is this a good thing or a bad thing? Also, is it a realistic thing?

One of the complaints agains OHW is whether or not each period feels different from the next. I think it does, but do wonder whether sub-periods within the larger period have enough feel. For example, the Seven Year's War and the Napoleonic Wars both fall within the Horse & Musket period, but should their battles feel the same? Obviously I don't think so as I wrote my own AWI Variant for OHW.

If you look at other game designs, such as Richard Borg's Command & Colors (CC) series, the big difference you will see between Command & Colors: Napoleonics (CCN) and Command & Colors: Tricorne (CCT) is the use of a Combined Arms mechanic that the former has, but the latter does not.

The rules for CCN state that, for combined arms combat "When an ordered infantry or cavalry unit is about to attack an enemy unit in melee, one or more ordered artillery units may combine their battle dice with the attacking unit. A combined arms combat must be declared before any battle dice are rolled." Changing the turn sequence in OHW would allow that sort of tactic to be replicated.

Another tactic in CCN is to threaten an Infantry unit with a Cavalry unit, forcing it to make a decision on whether it should form square, and if it does, to hit the Infantry unit with Artillery or Infantry fire. Although this is harder to replicate in OHW – especially if you are not using the optional Square rules – it would be very hard in the current turn sequence unless you are approaching the enemy from two directions, i.e. going after different faces of the enemy unit.

For me, the question of whether this change should be made is centered around time. I used to think that if a unit moved and the other unit did not, then the moving unit should be penalized because it was not spending its full time shooting whereas the other unit was. Sort of a "volume of fire over time" concept. When you realized that many of these rules have turns representing anywhere from 30 minutes to one hour you can't rightly assume that the non-moving unit is actually firing the entire time. If you have ever played the fascinating, but exceedingly tedious Chef de Bataillon (CdB) by Scotty Bowden and Jim Getz you know that the idea of battles lasting hours could not have meant that troops were firing two-three rounds per minute for very long. You would run out of your 60 rounds in 20-30 minutes, not even one game turn. (In CbD, turns were much shorter, however, as they were trying to use realistic time and ground scales, hence the tedious nature of the game.)

So, is allowing a unit to fire effectively – represented by the full D6 of hits they inflict in a turn – and allow another unit to make a full move distance charge all in the same turn realistic? Probably, because much of combat is "hurry up and wait". Most games use non-charging rates of movement as units did not quick march all over the field constantly. There was a lot of wasted time reordering the troops, dressing the line, waiting for orders to be delivered by signal or messenger, etc.

A better way to think of combat is a lot of waiting with short bursts of furious action. By changing this turn sequence you would be implicitly saying that units can coordinate their actions in a single turn.

The question to my mind remains: at what point in time should this effect start to occur? Certainly by the time of the Napoleonic Wars, but not at the time of the American War of Independence, according to Richard Borg. That would split the Horse & Musket period and maybe that is what it needs. Maybe that is one more thing that the rules need to get a better period feel. (Squares are another. I do not allow troops before the Napoleonic Wars to form square. Certainly by the Rifle & Saber period, in Europe, they had stopped. In the Colonial wars it was less a "wall of steel" defensive formation against cavalry and more of a "stop from being surrounded" defensive formation against superior numbers.)

Changing the Range of Horse & Musket Firepower

Another suggestion by MarkusB is to change Infantry shooting range and firepower from 1D6 for 12" to 1D6+2 for 3" and 1D6-2 for 12", the idea being that their deadly firepower is really only at very short range, otherwise it is terrible.

I think if I wanted to simulate that I would grant Infantry the ability to go into close combat with Infantry, and consider that the short range firefight. You could also use the old Ancients and Medieval rules of units in close combat cannot move, accurately simulating the pinning effect of the inability to get unstuck when you are in a hot firefight. That would also grant you the 1D6+2 for that close combat roll. The one change would be that a unit turning to flank while 'contacted' by the enemy would not get to fire on the turn it moves. (If you get flanked and contacted by Infantry, you deserve what you get.)

Secondly, I don't think I would adopt 1D6-2 for normal shooting. If anything, I would probably drop the range to 6". But at this time I think that is too much of a change. I look forward to reading MarkusB's battle reports on how it went. (Hint, hint.)

Enfilade Fire

I've seen mention of enfilade fire before, essentially a unit firing down the length of a unit in march column or down the line (flank) of a deployed unit. Basically the effect is to increase the damage inflicted on the unit being enfiladed.

To me, the farther a unit is away, the less likely the enfilade fire will have must effect. Also, I only consider massed fire as gaining an advantage. If I were using the 'Infantry Firefight' rule above I would only allow it to count if attacking from a flank, i.e. the double effect of a flank attack in close combat would be called 'enfilading fire'.

For Artillery I would allow it better firepower if it could claim enfilade. I would allow enfilade if firing at: an Infantry unit is in square; an Infantry or Cavalry unit is on a road moving through terrain that it cannot normally move through, e.g. woods, marsh, etc.; and the flank face of an Infantry or Cavalry unit in terrain that it can normally move through, e.g. it is deployed into line. I will leave it to you – like Neil Thomas does – to determine exactly what angle it is a flank face or not. Oh, and what should the bonus be? I would grant Artillery 1D6, not 1D6-2 x2.

March Column

A march column essentially grants a unit the ability to move faster on the battlefield in exchange for being exceedingly more susceptible to damage by enemy fire and close combat. A unit commander generally will not risk entering into this formation unless they believe they are out of the dangers of combat, i.e. out of the line of sight or range of enemy attacks. That said, a unit commander will use that formation if they need to move faster on the battlefield, such as shifting a position behind their own lines.

As mentioned previously, a march column can be inferred is a unit is currently on a road moving through terrain that it normally cannot move through, such as Infantry or Cavalry moving through woods. You can either always consider moving Artillery to be in march column or not. (I tend towards not.)

One way to model the unit commander choosing to use march column is if the unit starts and ends their movement outside of 12" from all Infantry, Cavalry, Skirmisher, and Mounted Skirmisher units and outside of all line of sight or 48" (if in line of sight) of Artillery.

The benefit of a march column move is that it provides +6" (one square) of additional movement.

I'll Pause Here

I intended to include the battle report for The Ambush on the Forest Road here in this post, but decided that it is getting too lengthy. Look for the battle report (and the rule changes to OHW that I am going to experiment with) on my Solo Battles blog.

Painting Update: Marvel United

Our group continues to play Marvel United once a week. (Actually, I was able to sneak in an extra game as my wife and I went to a friend's house, and his wife seeing that my wife was playing, decided to learn the game too.) This continues to motivate me to paint more villains (red band on the base) for us to fight and more heroes (blue band on the base) for us to use, keeping the game fresh.

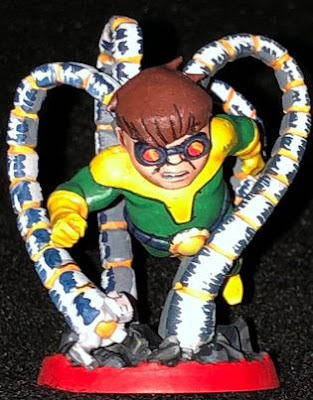
We start with Doctor Octopus for the Spiderverse and part of the Sinister Six expansion. He is destructive to the game's locations, which is an interesting twist for a villain. We have fought him several times on Easy Mode and always won. I had fun painting him, but this was the second attempt on painting the tentacles. I wanted to get a 'shiny metal' look without using metallic paints. (In fact, the only time I use metallic paints is on the base.)

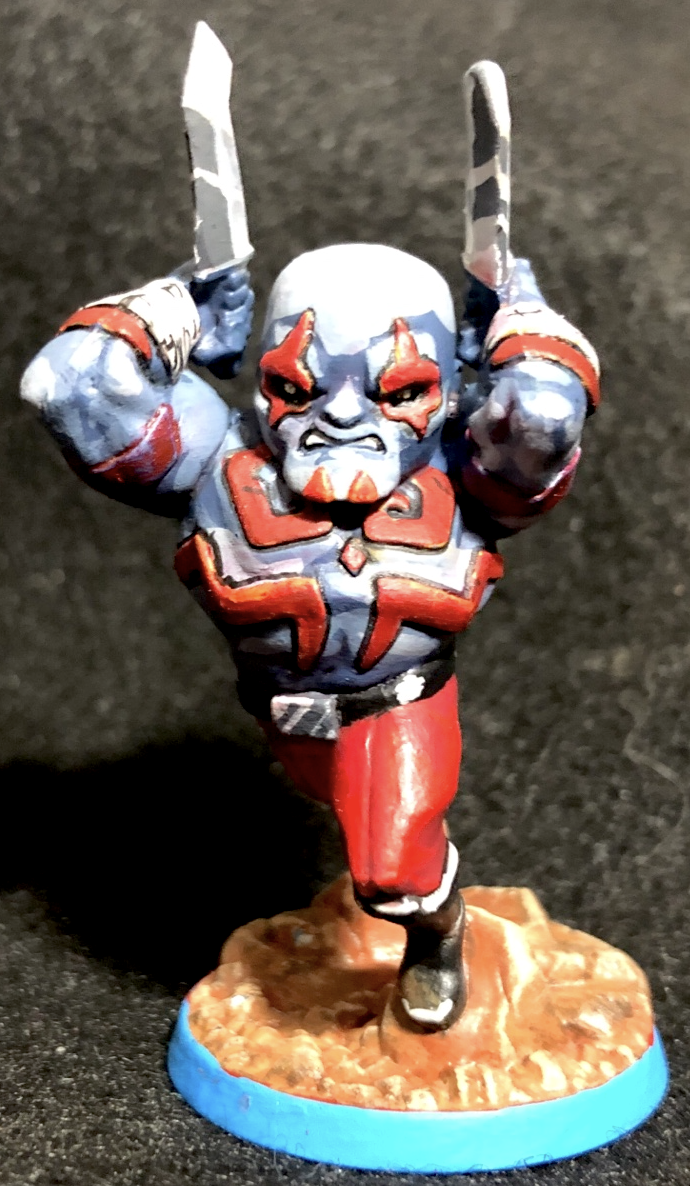
Next up is Drax the Destroyer from Guardians of the Galaxy. Interestingly, the skin color scheme for him was what you see, which is different from the green tint they used in the movie. I wasn't too happy with my painting efforts here, but he looks good on the table.

Next is Kraven the Hunter, also from the Spiderverse and one of the Sinister Six expansion. I just finished painting him, so we have not fought against him yet. Again, this color comes from the game; his hair was black in the comics.


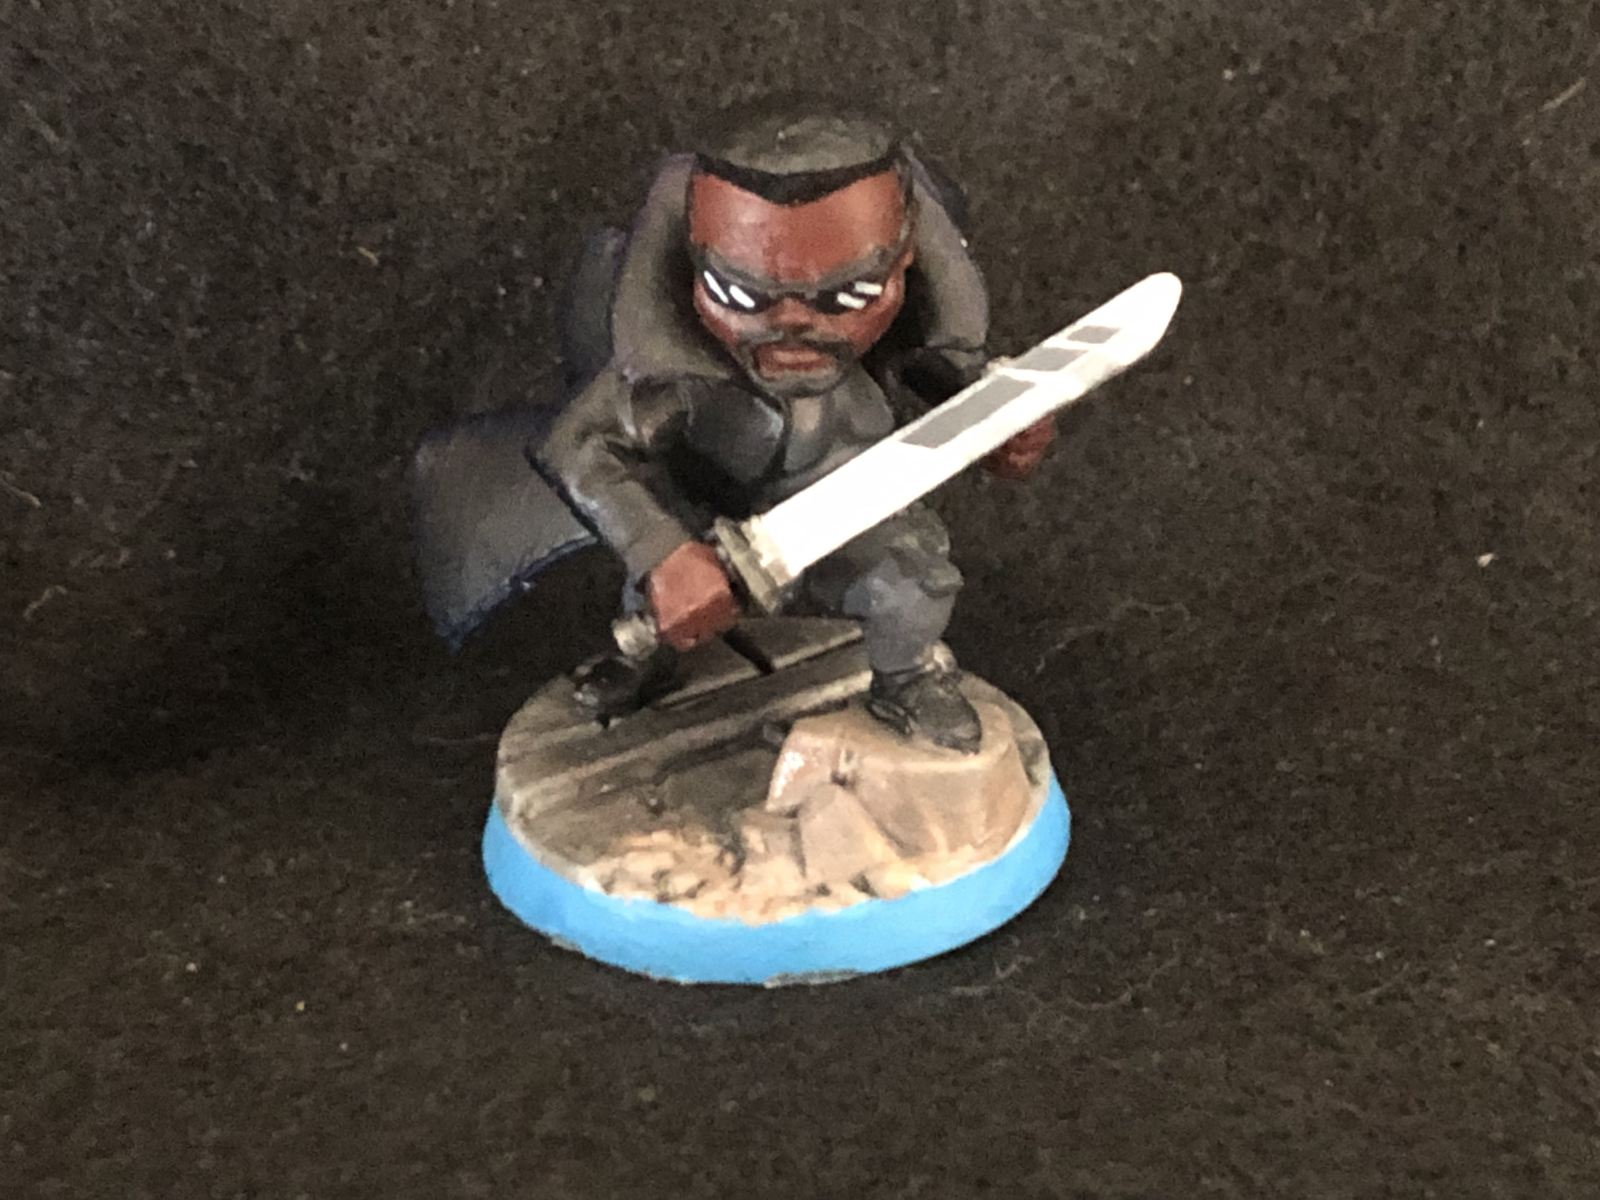
Next up is Moon Knight. He was a request from one of the players. I need to clean up his cape a bit as the shadows look too ragged to my eye. I like how the moss turned out on the stone pillar he is standing on though.


Next is Sandman, from the Spiderverse and the Sinister Six expansion. The sand was contrast paint with dry brushing on top. I really like how he turned out. He is tough as an opponent as he gains health as the game goes on, but we still managed to beat him.

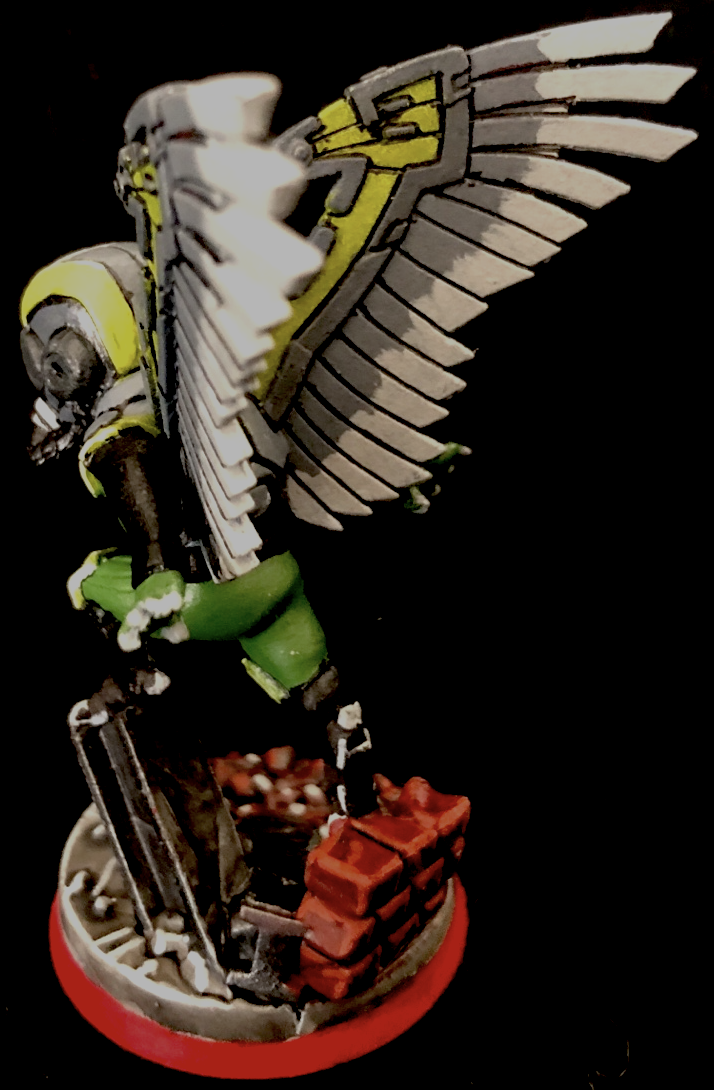
Next is the Vulture, from the Spiderverse and the Sinister Six expansion. He is obviously the new 'model' as the one when I was a kid (in the 1960s) was an old, bald-headed guy in a green suit that eventually got cancer. In Marvel United he is, for some reason, exceedingly tough. You cannot go after him with just any team of heroes as you will lose horribly, as we did four times in a row. He has yet to be beaten. (I need to paint some more heroes in order to have the right combination of movement and healing to defeat him.)


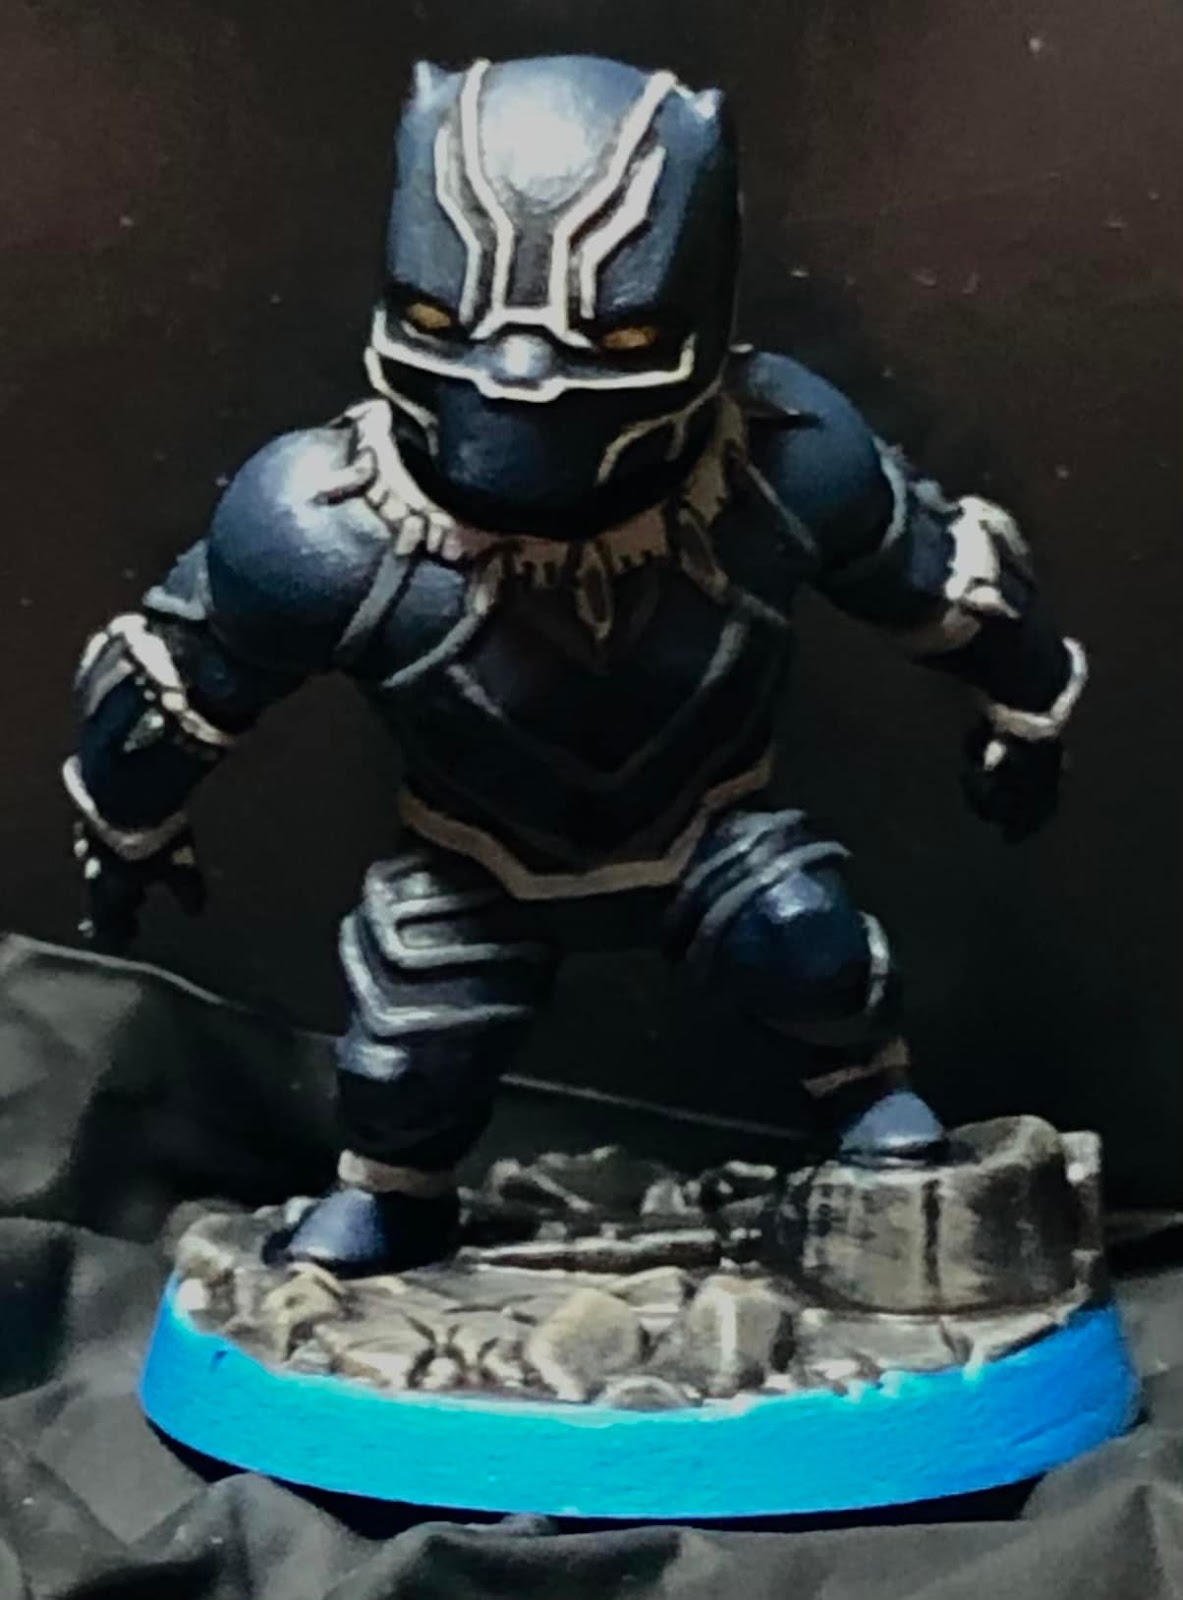
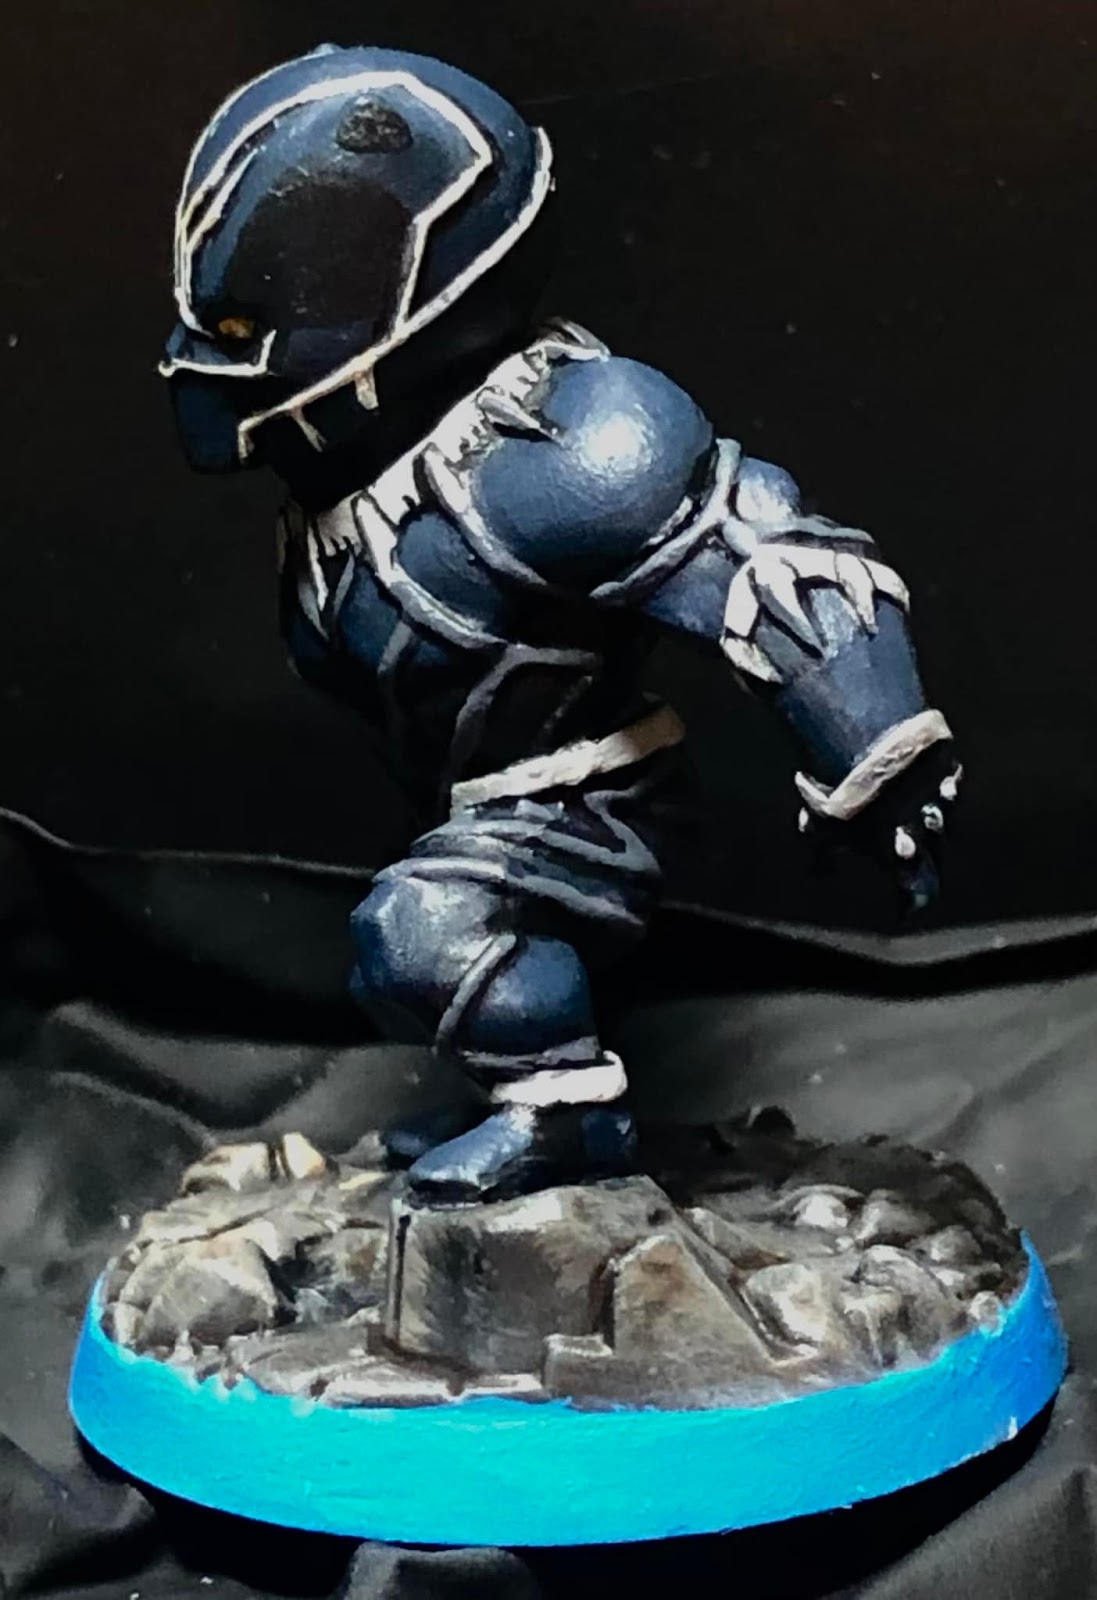
Next is Black Panther, also a request from a player. I wanted to trying a blue-black style for his black suit, but I think it ended up way too blue. I like it though. All those little white and gray lines were a pain though.


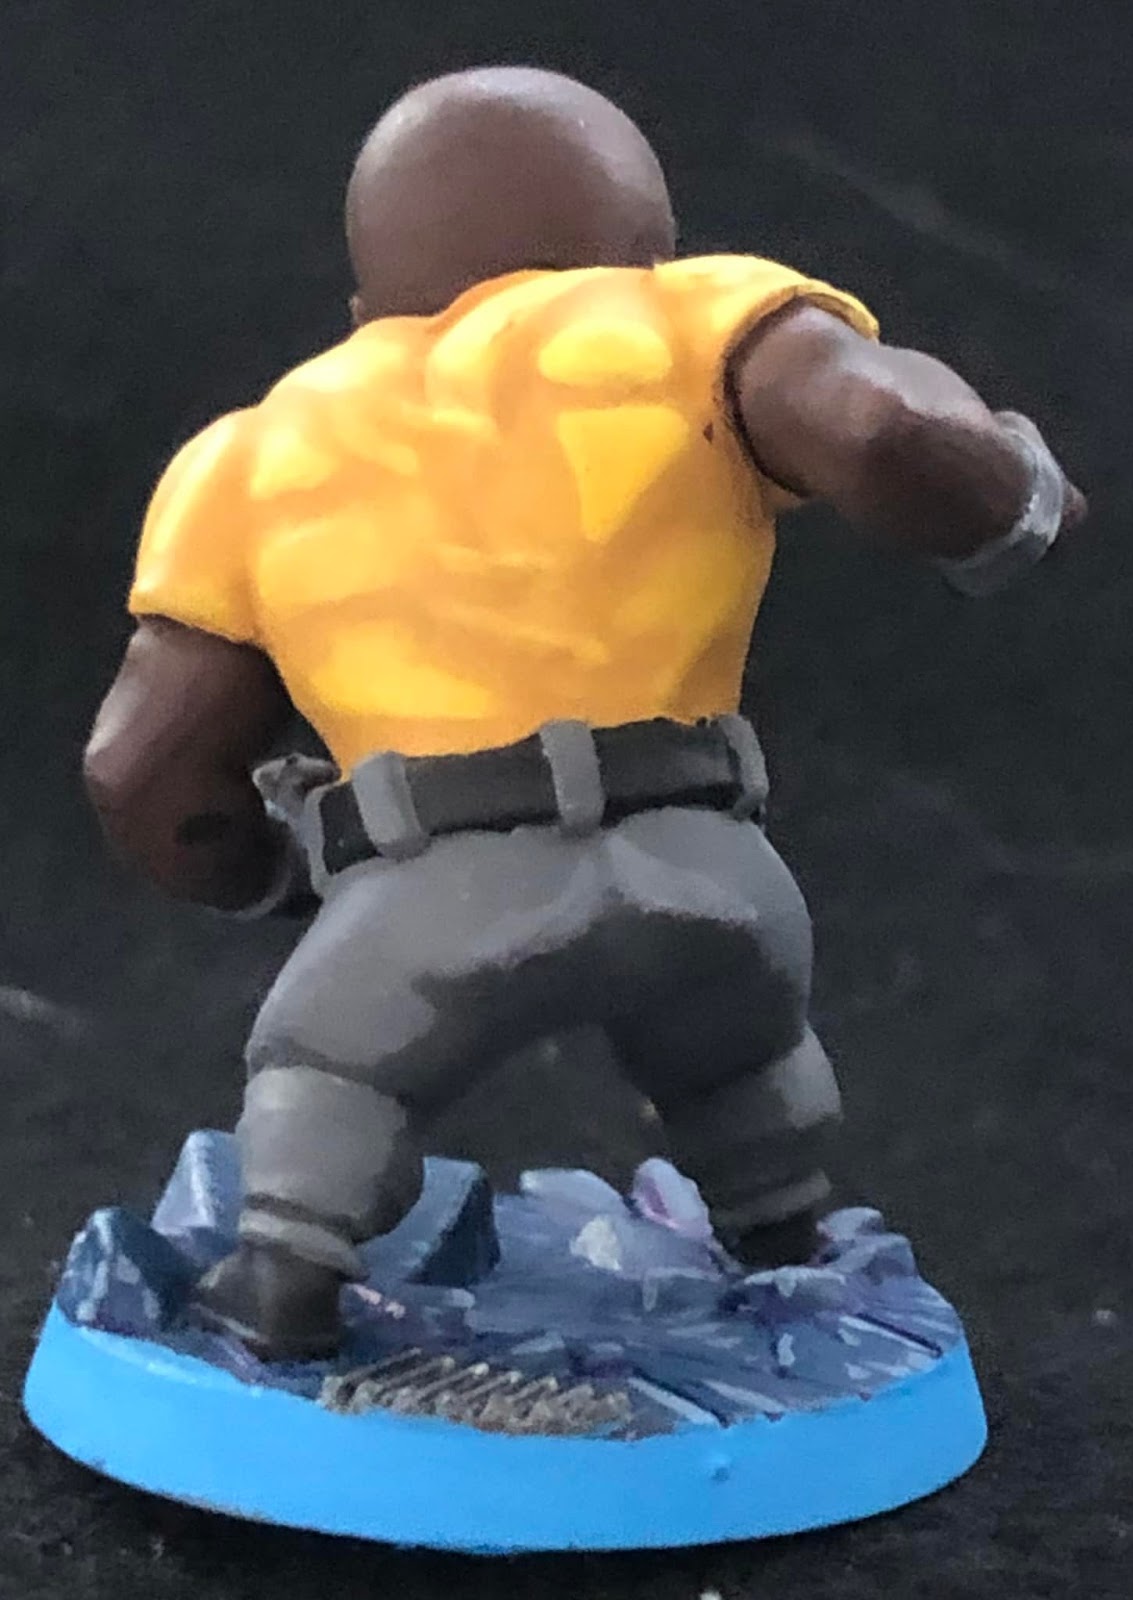
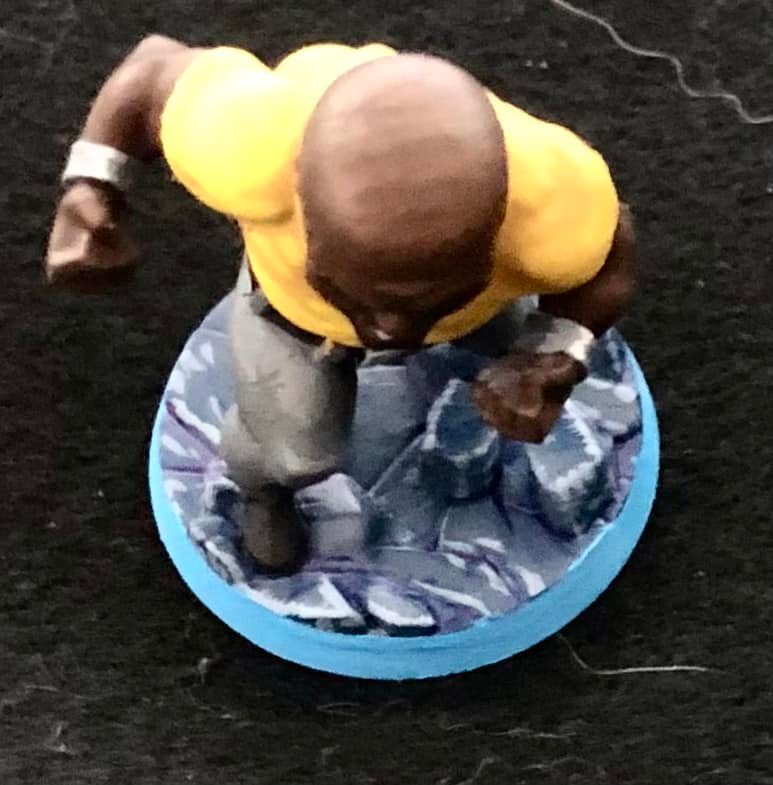
Last is Luke Cage. I painted him for two reasons: 1) I saw a painting video on how to get good yellows by first underpainting with pink, and I wanted to try it (it worked); and 2) I wanted to try and paint the wrinkly effect on a bald head, and he had one (it worked). I think I also did well with the Borderlands cel style using high contrast colors (three shades of yellow and three of gray) with no blending, just hard lines. You can see that in the other figures, like the wings of the Vulture, the suit of Black Panther, and the tentacles of Doctor Octopus.


Saturday, May 14, 2022

Map Campaign Part 3

 No, I have not given up on the map campaign, The First Elopean War. While I admit that most of my time had been spent painting of late, what stalled the campaign most was trying to organize it. To be honest, I sort of rushed the moves in order to get to my first battle and so I kicked some organizational tasks down the road. Well after the first battle all of that came due as I could not really pick up where I had left off with complete confidence. So I basically started over, so to speak, by calculating where every unit was.

But in order to do that accurately, and not end up with the same issue every time I stopped for a battle, I needed to fix my maps. The hexes needed grid numbers on them so I could make references in my campaign diary as to where each unit was on any given campaign day.

Reorganizing

At first I tried putting just the row letters and a few column numbers on the map. That worked for a little while, but I found myself counting hexes so frequently that I decided the only logical thing to do was note all the grid numbers for each hex that I would use. As the campaign rules require you to stick to the roads in order to maintain supply, I really only needed numbers for each town, city, and road hex.

Although it is hard to see without clicking on the images to expand it, there is a letter followed by a number for each of the hexes containing towns, cities, and roads. Now I have an easy reference for unit location. Needless to say, this took a bit of time to modify.

Once that was done I could go back and create a campaign diary, listing each unit of each army, by day, and note their position on the map.

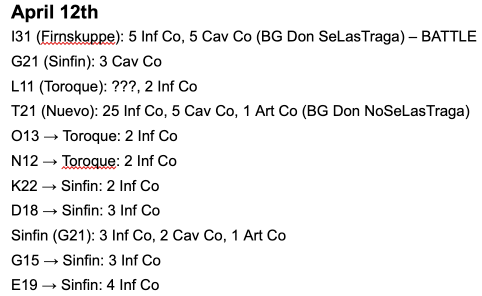
In this example I have a section for the weather, by day, and the entry for April 3rd for the Westonian Army (which mobilized first and it attacking Eastonia). Each entry shows the city where units were starting, which city they were mustering into Brigades, and how many companies, by type. On subsequent days they would show hex grid references.

Here it shows units in motion, plus the two Brigades that have fully mustered by April 12th (and with Brigade SeLasTraga in battle at Firnskuppe, Eastonia).

Campaign to Tabletop and Back

As I was mulling over some of the comments on the blog and in Facebook (both the Solo Wargaming with Miniatures and Wargaming Neil Thomas Rules groups)

Hearkening back to the discussion about how Neil Thomas treats casualties in One-Hour Wargames (OHW), the real losses to personnel do not occur until the unit has taken quite a few hits or has been eliminated from the board. I decided that I wanted to revamp the table. Rather than focus on losses in 'companies' I decided to keep the units whole and track the number of hits it had.

Given that the initial hit losses, according to Neil Thomas, are morale and not very many men, most of those hits can be shrugged off.

OHW Combat Result TSWG Campaign Effect – All rolls are 1D6
6-10 hits remaining on Infantry or Cavalry Lose 5 hits on '1'.
1-5 hits remaining on Infantry or Cavalry Lose 5 hits on '1' or '2'.
Infantry or Cavalry removed by musketry Lose 10 hits on '1', 5 hits on '2' or '3'.
Infantry or Cavalry removed by Artillery Lose 10 hits on '1' or '2', 5 hits on '3' or '4'.
Infantry removed by close combat Lose 10 hits on '1' or '2', 5 hits on '3', '4', or '5'.
Cavalry removed by close combat Lose 10 hits on '1', 5 hits on '2' or '3'.
1-5 hits remaining on any Skirmisher Lose 5 hits on '1'.
Any Skirmisher removed by musketry Lose 10 hits on '1', 5 hits on '2'.
Any Skirmisher removed by Artillery Lose 10 hits on '1', 5 hits on '2' or '3'.
Any Skirmisher removed by close combat Lose 10 hits on '1' or '2', 5 hits on '3', '4', '5', or '6'.

Note that Mounted Skirmishers count as Cavalry for casualty determination in the above table.

As it stands, the outcome of the first battle has not changed. Neither unit lost any hits permanently.

Campaign Progress

On April 14th, after having regroup from the clash at the town of Firnskuppe, and being joined by additional forces, Eastonian forces close in from the East and South onto Firnskuppe in an attempt to harass the Westonian vanguard garrisoning the town.

Meanwhile, East of Nuevo the Westonia Brigade NoSeLasTraga clashes in the woods with Eastonian light cavalry.

Again, this will be two clashes in which the Westonian forces outnumber the Eastonians. The latter are desperately trying to hold back the Westonian armies while the Eastonians continue to muster units and form their one brigades.

I will post the battles on my Solo Battles blog, as I experiment with more techniques for solo gaming.

Sunday, May 01, 2022

Marvel United is Truly a Co-operative Superhero Game

 One of the diversions from playing the First Elopean War Map Campaign is, after a long period of self-imposed lockdown, I want to get back out and socialize in the local gaming community. That generally means playing a popular game put out by Games Workshop. (By "popular" I mean that at least one other person is playing it, has their own figures and rules, and you do not need to plead with them to get in a game.) The last one I played like that was Warhammer Underworlds Harrowdeep. I thought that I would not like the new format, which is to play using the game decks straight out of the box, as it takes away the deck-building aspect of the game. But as I look upon my Warhammer Underworlds (WU) journey, that was actually the aspect of the game that made it expensive and ultra-competitive. By Games Workshop removing that 'pay-to-play' aspect from the game, it became much easier to grab a pre-defined deck, a warband, your core box, and go. That said, it is not a game for the sleepy (or the sloppy) as one mistake in the game can cost you a win.

Back in March 2021 I received my first box from the Marvel United Kickstarter. I joined the Facebook group for it and started watching the posts of people painting the miniatures and playing the game, but my copy sat on a shelf, unplayed.


The next Kickstarter campaign, for Marvel United: X-Men came along, and Fear of Missing Out struck again, and I bought the whole thing despite not having played a single game of the original Kickstarter campaign. Worse, I had bought another copy of the core set from someone because he had painted all of the miniatures and was selling it for a mere $60! So I had two core sets, all the expansions, and was buying all in on the second campaign without having played a single game.

Why? Well I definitely liked the miniatures. You see, they are in the 'chibi' style (big heads, smaller bodies, tiny limbs).


One day, the wife says she wants to 'bond' because she feels like I have been locked up too long, so "Let's play a game." As it so happened, I had just finished re-reading the MU rules for the umpteenth time and decided that this was the least 'war-game-y' and was co-operative rather than competitive, to boot! So I finally broke out the game. I was waiting for my second Kickstarter to arrive after all, so if she liked this, I would seem like a genius for buying more! (Right.)

We played the game and at the end she said "That was fun. Let's do another." We have since played it several times. Within a couple of weeks the wife and I played several sessions and she (nor I) had tired of the game.

Another part of this story is that I had a local painter paint up the Guardians of the Galaxy expansion (which is selling for an insane amount on Amazon) and that had not been cracked open either. When the painter asked me if I wanted to start up the Monday night gaming sessions I quickly suggested we try MU and put his figures into action.

How the Game Plays

Each player selects a superhero and gets that character's deck of 12 cards. Their cards are unique to them and reflect the style of the superhero along with their superpowers, making their gameplay thematic.

Every card contains action icons on the bottom of the card. Some of them also have a Special Effect that represents the superhero's special power.


In the image above Captain America gets on Attack icon and can use the Leadership special effect, which allows Cap to give a Wild token to another hero on the team.

Here are the four action icons that are in the game.


There are only four icons in the game total, one of which is Wild, which allows you to substitute that icon for any of the other three (Move, Attack, or Heroic). We will look at the actions later.

In general the game has one supervillain, which is controlled by a set of rules and a deck of cards. Just as with the heroes, the villains are unique with their own powers, villainous plots, threats to the heroes, and deck of cards. Instead of using action icons, like the heroes, their cards represent whole actions that they take for the turn, including a move, any attack(s) they make, any crisis they create, and any special effects they create.

Basic gameplay is for either the villain or a hero to play a card from their hand to the Storyline, which is a chronological sequence of played cards that forms the narrative. The villain always plays the first card from his deck of 12 cards called The Master Plan deck.


In this example above, Red Skull plays a card into the Storyline. Reading from top to bottom, he moves four locations clockwise, attacks ("BAM!"), and then adds four thugs (mooks, or minor henchmen) to the board, two in his location and one each to the locations to his left and right.


The image above shows a typical setup of the board. There are six locations spread out around the board in a circle. The best way to think about locations is as they are in comics; they a places where action occurs. The game plays out cinematically as the villain moves throughout the city/country/world/galaxy carrying out their villainous plot. The heroes deal with the effects and then eventually catch up with the villain, beat the stuffing out of them, and then the episode(s) are done. Next issue, a new villain!

So in the example above the villain (cast in red plastic) is at '6'. Their card indicates they move four locations clockwise. That would land them at '3'. As there is no hero figure at '3' (they are at '7' in the image), he has no one to attack, but there are other effects to a BAM! After those are resolved, he draws two thugs and places it on the card at '3', and adds one thug each to the locations to the left (clockwise) and right (counter-clockwise) of the location where Red Skull ended his move.

After the villain plays a card and resolves it, play goes to the heroes. In the beginning, the heroes will take turn in rotation and play three cards, one from each hero, before the villain gets to play another card. Note this is three cards regardless of the number of heroes. In this example above there are actually four heroes being played – Captain America, Captain Marvel, Iron Man, and Black Widow – so only three would get to play before Red Skull takes his second turn. After that, the fourth, first, and second would play one card each, then Red Skull, and so on.

At each location there are up to four different elements: civilians, thugs, a threat card, and an end-of-turn effect specific to that location. There are three basic missions to the game (indicated in area '1' on the board, represented by Mission Cards): clearing threats, defeating thugs, and rescuing civilians. So if a location has a civilian token on it, you can rescue the civilian, placing it on the Rescue Civilian mission card. Same with thugs at a location. Your hero can defeat them, placing their token on the Defeat Thugs mission card. At the bottom of each location is a Threat Card, which is unique to the villain you are fighting. For example, Red Skull has three cards representing his three henchmen that need to be defeated: Bob the Hydra Agent, Lady Mantis, and Crossbones. Other threats require heroes spend actions to clear the threat. Once a threat is cleared from a location, a threat token is placed on the Clear Threats mission card.

Completing missions is the first objective of the heroes. This is because the heroes cannot damage the villain until at least two of the three missions (Clear Threats, Rescue Civilians, and Defeat Thugs) are completed. After that, they can start beating the stuffing out of the villain. You can complete these missions in any order.

The rub is that after the heroes complete the first mission, the villain gets a little anxious, realizing that the heroes are onto them, and they start playing their Master Plan cards after every two hero actions. So timing the completion of the first mission with the second becomes critical to success. (By the way, if you finish the third mission the heroes get an extra benefit.)

So, how does this tie back to the action icons? A Move icon allows a hero to move one adjacent location, clockwise or counter-clockwise. An Attack icon allows you to defeat one thug, remove one hit point from a Henchman, or remove one hit point from the villain. A Heroic icon allows a hero to rescue one civilian and (frequently) allows the hero to clear ⅓rd of some Threat cards.

Why is This a Great Game?

It is co-operative. So what makes it so? The one element I did not tell you about is that when a hero takes their turn not only do they get the action icons from the card they played, the special effect (if any), and the action icons from the card played by the previous hero. So when you play a card, not only are you trying to make sure you have useful actions, but that the next hero does too. That leads to a lot more conversation between players, especially when you get towards the end and you are desperately chasing down the villain while trying to stack enough Attack icons to bring them down when you catch up.

Every decision you make is meaningful. Besides the villain-specific loss condition there are two additional general loss conditions that the heroes face: if a hero has no more cards to play; or the villain must draw a Master Plan card and there are no more cards to draw. Therefore, there is a time limit the players face. Heroes cannot afford to throw away action icons unused. Further, your card play impacts the following hero's turn, so playing cards with icons unusable by the next hero is not doing the team any favors.

It can be played solo with little effort or loss of quality. There is a documented system for playing solo (S.H.I.E.L.D. mode), but most players I have spoken to simply play the heroes as one would do normally with two players each controlling a separate hero. The key to successful solo gameplay is that the opposition is already programmed, so reducing the number of cooperating players is relatively simple.

It is a very simple game and easily taught to new players. There are essentially nine pages of rules, all large print and with lots of illustrations. I recently taught three people how to play in about five minutes. Two were seasoned gamers, but the third was a relative novice, especially to these types of games.

There is a lot of replayability given the combination of number of heroes being played, which heroes are used, and which villain is fought. Here I am just talking about having either the core Avengers or X-Men set. Adding in the dozen (plus) expansions adds so many heroes and villains you could easily play this game every week for years without playing the same game twice. In fact, there is probably too much right now.

Given that I am trying not to play anything that is not painted, I am using the same set of heroes and villains more frequently and I still do not feel like the games are cookie cutter. Yes, Red Skull has a distinct feel much different than say, Taskmaster or Ronan. But multiple games against Red Skull, even if I keep using Captain America and Iron Man, don't play out the same due to the random elements in the game. There is the order of the villain's cards, the order of the hero's cards, which locations are used (you use sic out of eight possible choices), and where the threat cards are placed. That is a lot of potential variation.

Have you seen the miniatures? Okay, so chibi-style is an acquired taste. Because the figures are a softer plastic, details are not as crisp as you might expect. In a way, though, I like that. I prefer painting on details.

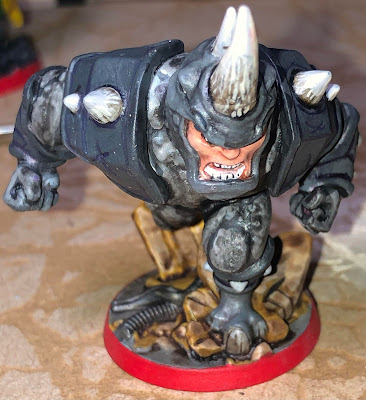
For example, the lines on Rhino's horn is not texture on the figure, but all paint effect.

Summary

This is not a 'war' game, but it is a game featuring combat, as you might expect with the superhero genre. Because of this I feel like it is more 'acceptable' subject matter for players that don't want to play a pure, historical wargame. For people that don't want to learn a lot of rules and simply want to get started, this game is also ideal. Like chess, it has few real rules; the depth is in the play.

MU has a flavorful feel. It is not a tactical battle like Marvel: Crisis Protocol nor an RPG game like Champions. You have the superhero cinematic feel of moving to a location NYC Central Park, battling it out with the villain's minions, rescuing the civilians, then moving on to the next crisis that the villain has created. Eventually you collect enough clues (complete missions), close in on the villain and finally battle it out with them, determining whether you have defeated them once again, or whether you are going to have this issue's cover showing your hero's broken and battered body with a tagline of "Death of [Your Hero]?"

More importantly, all types of gamers will find MU fun. It can be tense as you are down to the last few cards and you haven't whittled down the villain enough. It can be exciting as you envision the move that will allow your hero to end it all in victory. If you are analytical like me you will love devising the strategy for how to defeat the villain, i.e. which missions to clear first, and so on.

Highly recommended if you want casual, fun play, especially with other casual gamers. This, however, will not scratch your tournament-level competitive itch.

Sunday, April 24, 2022

Map Campaign Part 2

For those that have not been following I decided to try my hand at a map campaign using the tables and ideas in The Solo Wargaming Guide (TSWG). Part one of the campaign laid out the basics, then another post spoke about how I was going to convert from Regiments and Companies that TSWG uses, to the units and hits that Neil Thomas' One-Hour Wargames (OHW) uses so that I could use the latter to play out the tactical battles. I played out the first 'battle' – The Battle of Firnskuppe – on the Solo Battles blog. There I showed how TSWG creates terrain layouts for the tabletop and puts some of the factors in TSWG – like the Commander Competency Rating (CCR) assigned to each Brigadier General and force commander – into play.

The basic scenario for the first battle was that the vanguard of the northern Westonian forces – a Regiment of Infantry and a Regiment of Cavalry – sprung to the attack while the Eastonian forces were still mustering. All that was there to defend the Eastonian frontier town of Firnskuppe was an understrength Mounted Skirmisher Regiment. (Note that Mounted Skirmisher is a new unit type for OHW. It is basically a Skirmisher unit that moves 12" as it is mounted on horses.)

I used some old Kings of War Battlefield Cards to determine the battlefield condition both sides had to deal with, the objectives for each side, and the stratagems they had available to them. Looking over the condition cards (there are 14 of them), five are normal conditions, six had easily interpretable conditions, one useless condition, and two hard to interpret conditions (they were written for the Kings of War game system). I think in the future I would prefer to produce my own table of conditions, and increase the odds that the conditions are normal. That said the Reduced Visibility condition had a very good feel to it – the Westonians had surprised the Eastonians and attacked first and although the latter knew the former were across the border, the Westonians had decided to attack early one foggy morning in an attempt to achieve surprise…

One thing of interest that I noted after the battle is how easy it is to become invested in one side or another. There are lots of ways to play solo, but generally you are either playing one side and trying to program the other, non-player side, or you are trying to program both sides. I told myself I was doing the latter, but the reality is that I did the former. I was more emotionally invested with the underdog Eastonians (who I had generated the campaign orders for both Justo and I), so when the Westonian Cavalry flanked the town by moving into the fields at B4, I immediately bugged out.

The whole point of the campaign is to provide interesting scenarios, especially ones you might not normally want to play out on a game night with a face-to-face gaming buddy. The Battle of Firnskuppe (BoF) was just such a scenario. First, it featured two units versus one in a game where it is normally six units versus six. Second, the one unit was the weakest unit in those rules versus the stronger units. So why play it, other than "because you need to know the results"? Well, for one thing, I did not know what the result would be, in terms of campaign impact. BoF was very terrain dense for a OHW game. I added a new Mounted Skirmisher unit type that had all of the weaknesses of the Skirmisher unit type, was more restrictive regarding terrain, and had only a marginally better movement rate of 12" rather than 9". (In hindsight I think it should probably be 15", but that is another discussion.) When we play games unlinked to campaigns, we tend not to think of battlefield casualties – or we minimize the impact – but only of victory conditions. Did we win the battle?

In OHW terms one side took six hits while the other took two, resulting in no lost units. One side 'won' because they achieved more victory points than the other. There wasn't even an obvious reason why the Eastonians retreated because they were giving better than they got.

The Eastonians were firing with 1D6-2 each turn (1.67 hits per turn), while the Westonians were firing 1D6-2 but would have to halve the hits (1 hit per turn) due to the cover the Eastonians were in. If the Westonian Cavalry charged they would hit with 1d6+2 hits (5.5 hits per turn). The Eastonians firing at the Westonian Cavalry would have had 1D6-2 with ½ casualties (1 hit per turn) so once the Westonian Cavalry got into position it should have immediately charged, dispersing the Mounted Skirmishers.

So, why did it play out the way it did? Clearly my own personal bias crept into the stupid play of the Westonians. The Westonian Cavalry could have hit on turn 2, effectively ending the battle with much higher losses to the Eastonians. Or maybe I am just not as analytical 'in the moment' as I like to think.

Even though I am declaring myself a cheat I am going to let the results stand. So how does this affect the campaign?

Converting from Tabletop Back to Campaign

TSWG offers a simple method for adjudicating casualties for the victor: ½ of the total casualties are killed; ¼ are severely wounded; and ¼ are lightly wounded. Killed casualties are replaced after one month; severely wounded casualties are replaced after two weeks; and lightly wounded casualties are replaced after one week. For the defeated the breakdown is the same, but the wounded will be captured – meaning they will not be replaced unless there is a prison exchange – if the victory was decisive.

This begs the question, however: how do you determine total casualties? Let's start by looking at Neil Thomas' notes in OHW:

"My combat rules work on the principle of having units acquire hits throughout the game, to be eliminated after garnering 15. They retain their full fighting ability until destroyed; this reflects a model whereby real casualties are at a fairly low level, but that the sustained experience of combat will steadily degrade a unit’s morale, at which point it routs. This is both simple and historically accurate: most casualties in any ancient battle (and those of most other periods too) were inflicted when the enemy fled, rather than the initial clash of arms. Essentially, loss of morale is reflected in elimination, rather than having to make frequent checks on a unit’s status, which tends to be a feature of complex wargames rules."

With this it is obvious that the six hits sustained by the Infantry Regiment do not reflect a loss of two companies of men, but that morale of the Regiment was down 40% because of ammunition depletion, fatigue, the morale effect of a few men being killed or wounded, and unwounded men leaving the firing line to resupply ammunition, help the wounded to the rear, or simply being ineffective out of fear. he unit did not have two of five companies become casualties.

If the emphasis on unit loss and not hit loss then it is better to come up with a table reflecting casualty effects of a unit loss.

OHW Combat ResultTSWG Campaign Effect
4-9 hits remaining on Infantry or CavalryLose one company on '1' with 1D6
1-3 hits remaining on Infantry or CavalryLose two companies on a '1', one company on a '2' with 1D6
Infantry or Cavalry removed by musketryLose two companies on a '1' or '2', one company on a '3' or '4' with 1D6
Infantry or Cavalry removed by ArtilleryLose three companies on a '1', two companies on a '2' or '3', and one company on a '4' or '5' with 1D6
Infantry removed by close combatLose five companies on a '1', four companies on a '2', three companies on a '3' or '4', two companies on a '5', and one company on a '6' with 1D6.
Cavalry removed by close combatLose four companies on a '1', three companies on a '2' or '3', two companies on a '4' or '5', and one company on a '6' with 1D6.
1-6 hits remaining on any SkirmisherLose one company on '1' with 1D6
Any Skirmisher removed by musketryLose one company on a '1', '2', or '3' with 1D6
Any Skirmisher removed by ArtilleryLose two companies on a '1', one company on a '2', '3', or '4' with 1D6
Any Skirmisher removed by close combatLose three companies on a '1' or '2', two companies on a '3' or '4', and one company on a '5' or '6' with 1D6

I have no idea if these numbers are any good, but I need to try somewhere. Note that the table determines total casualties, so ½ of the companies are replaced after one month, ¼ are replaced after two weeks, and ¼ are replaced after one week. How do we deal with fractional companies? Roll dice to see if you round up or down.

You might question how realistic this table is. What does it mean by "removed", for example? (It means the unit or combat type that rolled the die that caused the unit to be removed, by the way.) What if the unit removing your only inflicted one hit? Won't this lead to unrealistic play like trying to use Cavalry to run down your unit in close combat in order to get a deadlier result? Well, yes, but I don't see it as being 'unrealistic'. If you were routed by Cavalry, for example, they probably ran you down, rather than you outrunning them. Artillery fire was particularly deadlier than musketry, so their casualties tend to 'stick'.

So, how do the casualties play out from BoF?

Westonian Infantry: 9 hits remaining, so it loses one company on a '1'. If it does, that is ½ company killed (50% chance), ¼ company severely wounded (25% chance), and ¼ company lightly wounded (25% chance). So roll a D100 and 1-50 counts as killed; 51-75 counts as severely wounded; and 76-100 counts as lightly wounded.

I rolled a '5', so no company was lost.

Eastonian Mounted Skirmishers: 10 hits remaining, so no losses.

Rest and Recuperation

TSWG is silent (as far as I could tell), on the need for rest and recuperation after a battle, although The Joy of Wargaming hinted at it being otherwise. I noticed that he indicated that it took a day for rest and recuperation after a battle, but he took note, for example, whether light cavalry was uncommitted at the end of the battle. Those troops could be used in pursuit of defeated enemy forces.

The Westonian Infantry spent the remaining day and the next day resting and bringing the town of Firnskuppe under control. Meanwhile the Westonian Cavalry patrol around the town: two squadrons down the road towards Erlenloch, where the Eastonian Cavalry retreated; two squadrons down the road towards Grimme Hutte; and one squadron into the woods north of Firnskuppe.

This leaves a possibility of a skirmish between two squadrons of the Westonian Cavalry and the two squadrons of the Eastonian Cavalry that headed down the road to Erlenloch. But first I need to think about how to handle some of these tactical decisions – such as what to do when you are pushed out of your muster point – better. So that's it on the campaign front for now.

In Other News

So, not that I am looking to garner any sympathy, but more to explain delays in this campaign and other blogging activity I thought I would let everyone know what is going on with me.

About two years ago I was formally diagnosed with high blood pressure and diabetes (type 2). Part of my general problem was that I had hallux rigidus, a degenerative arthritis of the big toe, in both feet. The result is that I would get bloody sores on my big toes, making it difficult to walk as well as spreading blood all over the carpet, which really upset the wife. After months of treatment I decided to have surgery to correct the problem. In October 2020 I had my first surgery and they removed the defective left toe joint and replaced it. That surgery went as well as could be expected, so I decided to follow it up and replace the right toe joint in October of 2021.

Before any surgery you doctor has to clear you. Well the second checkup was worse than they first in that my diabetes was worse than previously. How much worse? Truth be told I was borderline acceptable. A score on my A1C of 9.0 was considered a fail and I was at 8.9. But I think I browbeat my doctor into clearing me anyway – I just wanted to get back to 'normal' and be able to fully walk again – so I went ahead with the second surgery.

The first sign of a problem was when I woke from anesthesia. I was flopping around like a fish out of water. Despite having been under anesthesia twice before in my life (all after the age of 50), I had never had a bad reaction nor found that I was allergic to any medication. This time I apparently had.

After getting home I did not strictly follow the recovery regime of icing and elevating my foot that I had the previous year. That plus the stress I had put on my stitches after the surgery caused my stitches to pop open, introducing an infection to the metallic implant. I did not even know an implant could get an 'infection', but apparently it can and it is bad if it does. Antibiotics cannot really work on digging out an infection from an implant. So after three months I was back on the table and they were removing my implant.

The doctor took no chances and essentially removed the implant and would not put a replacement in. Ironically, by the time of the second surgery on the right toe I had radically altered my diet and brought my diabetes almost under control. Basically an A1C reading of 6.5% means you are diabetic, while 5.7% to 6.4%is pre-diabetic. I had brought it down from 8.9% to 6.2%. Although it would not matter with regards to getting a replacement implant, it has mattered tremendously in healing after the second surgery.

The wound to extract is much larger than the wound when the implant went it. I am pretty sure she took more than the implant; what they call the 'grandma method', which is to basically fill it up with flexible cement. I would still be able to walk, but I would not have as much strength in the foot to push off, so no more hiking and mountain climbing for me. (I never did those things anyway.)

Because the wound was much larger it was going to take longer to heal than the last one (and that had been three months), so they were really worried about it getting infected. The first therapy they wanted to try was a wound vacuum, which is to seal the wound in a vacuum, 24 hours a day. The negative pressure not only stimulates the cells to heal faster, but it helps keep infections out. The downside is that you have to wear a purse-sized pump that sucks the air out of the wound. As the wound was on my bog toe, that meant an air hose ran from the dressing on the wound up through my pants leg, out of the top into the vacuum pump unit at my waist. Thank goodness I work from home. I suddenly discovered the benefits of old-timey nightshirts! It allowed me to look like I had a t-shirt on while attending Zoom conference calls.

So, three times a week I had to change the dressing on the wound. Once per week I went into the doctor's office so she could inspect the wound and measure progress. Well, it turned out that I was healing very well, but the special adhesive they use on the wound dressing is something I was allergic to, as I was breaking out in a very bad rash wherever the adhesive was put, which was largely around the wound. So after about a month the doctor called an end to that given that my rash was just getting so bad. But the wound was healing nicely. New cell growth.

The other issue is that because the wound was so large, and the risk of infection was so high, I was on very strong antibiotics. These were so strong apparently that the doctor had never prescribed them before. My wife is a nurse and she looked them up and this is sort of an antibiotic of the last resort. She was surprised it had been prescribed and that I had been on it so long. Well these antibiotics have a lot of side effects, one of which is killing your gut biome very effectively (the natural result of which is always having diarrhea) and that you can break out in a rash. So not only did I have a rash about the wound from the allergic reaction to the adhesive, I had a rash breaking out all over my body.

When the doctor took me off of the wound vacuum she also took me off the antibiotics; I had simply been on them too long. I was fine with that because it caused a lot of nausea, so my quality of life was down pretty badly. Mind you, I was still wargaming face-to-face with people during this period, but I was always dragging. To counter the antibiotics she told me to get some probiotics to help repopulate my gut biome and bring my gastrointestinal issues to heel. So I did.

Well, it turns out that some people can be affected by heavy probiotic usage and it comes in the form of acne. I would like to think that once upon a time I would not have been one of those people, but after all of this heavy pharmaceutical usage and sickness I should not be surprised that I am one. I broke out in pimples all over the body. Seriously, I thought that somehow bedbugs had gotten into the house and they were bug bites because I would have more red spots every morning. Finally they formed the heads and I looked at the side effects of the probiotics.

One of those pimples turned out to be a monster though. It was on my shoulder, very painful, and I finally had the wife attend to it as I had recently lost an entire weekend to fever. My guess was that it was from all of the inflammation from the acne and rashes, but it had apparently come almost completely from this one pimple/cyst?/whatever. My wife used about a dozen medical sponge gauzes to drain the pus and blood from it that night. We patched it up and I had a fever spike, but the fever broke that night and I felt a lot better the next day. But my weekend was lost.

I would like to say that the campaign has been trudging along because of all of this, but that would not be strictly true. First off, the wound is healing really well. I have moved on to silicon skin graft every week now to higher grade skin grafts every other week. The wound continues to get smaller and not show any complications. So my mobility is up, especially now that I don't have a pump to deal with and dressings to change every day. No the campaign is slow because map campaigns are a lot of work. Plus, the people I game with face-to-face are all climbing out of their lockdown routines and becoming more active and social again, so I have more (welcome) distractions. I need to get out more. No, I chose the wrong time to start a solo campaign; I should have started it months ago.

So bear with me as I intersperse writing up about this campaign with other topics. The latest craze has been playing the cooperative superhero game Marvel United. I like the chibi style of the figures and the comic style that I am painting them. Here are two of the latest supervillains that I have painted.


These should be two tough supervillains to take down.

Blog Archive

Blog and Forum Pages

Popular Posts

Followers

About Me

My photo
Huachuca City, Arizona, United States
I am 58 yrs old now. I bought a house in Huachuca City, AZ working for a software company for the last three years. To while away the hours I like to wargame -- with wooden, lead, and sometimes paper miniatures -- usually solo. Although I am a 'rules junkie', I almost always use rules of my own (I like to build upon others' ideas, but it seems like there is always something "missing" or "wrong").