As you might expect, the Rifle and Saber variant is very generic. The 'problem' with using them to represent the Austro-Prussian War (also known as the Seven Weeks War, War of 1866, Unification War, Fraternal War, and the German War) is that this period represents the transition from assault to firepower doctrine for infantry tactics and from smoothbore to rifled technology for artillery. Even more so, the Austrians clung to the assault doctrine with their rifled musket-armed infantry and rifled artillery, while the Prussians had adopted the breechloading rifle decades ago, but still had smoothbore artillery. Basically Prussian infantry was technically superior to Austrian infantry while Austrian artillery was technically superior to the Prussian artillery. (Austrian cavalry was generally superior too, not that it mattered much.)
Here are the basic stats in the Rifle and Saber variant.
| Unit Type | Hand-to-Hand Combat | Shooting Combat |
| Infantry | Not Allowed | D6+2 |
| Skirmishers | Not Allowed | D6 |
| Cavalry | D6 | Not Allowed |
| Artillery | Not Allowed | D6 |
Of note, Cavalry that does not defeat its enemy in hand-to-hand combat must retreat 6"; it does not stay engaged in melee.
To reflect the ability of the breechloader to produce significantly more firepower than a rifled musket – in WNCE breechloaders produce twice the number of dice over rifled muskets – it is given the D6+2 rating, while rifled musket-armed infantry get D6. Because the Austrians were armed with the rifled musket and fought in columns and relied upon the bayonet, their shooting is further reduced to D6-2, but they gain the ability to charge into hand-to-hand combat (against all except Cavalry), where they get D6+2.
Bronze rifled artillery is granted the 48" range and D6 rating listed in the rules while Steel rifled artillery (Krupps) will be granted a longer 60" range, but no other changes. Smoothbore artillery, however, will be granted a D6+2 rating at 12" or less (to reflect their superior canister) and a D6-2 rating at up to 36". The shorter range reflects their additional vulnerability to rifle fire (rather than increasing the Bronze rifled artillery range).
| Unit Type | Hand-to-Hand Combat | Shooting Combat |
| Prussian Infantry | Not Allowed | D6+2 |
| German Infantry | Not Allowed | D6 |
| Austrian Infantry | D6+2 | D6-2 |
| Skirmishers | Not Allowed | D6 |
| Cavalry | D6 | Not Allowed |
| Rifled Artillery | Not Allowed | D6 (Bronze 48" / Steel 60") |
| Smoothbore Artillery | Not Allowed | D6+2 (12") / D6-2 (36") |
In WNCE there is one other huge differentiation between breechloader-armed and musket-armed infantry: the former can lay down will they fire and reload while the latter do not. This grants breechloader-armed infantry a saving throw, even while in the open. I decided to give Prussian Infantry and Prussian Skirmishers to count as in cover (take one-half hits), regardless of the terrain they are in. Note that this means that Prussian Skirmishers in woods are still only one-half casualties, not one-quarter casualties, as you cannot count cover twice.
You might be thinking that the Prussians have a huge advantage over the Austrians, and you would be right. But, if you have played them in WNCE you know that is the way Neil Thomas modeled it in those rules.
Just as a comparison between OHW and WNCE, in WNCE a full unit of Prussians roll 8 dice, require a 4+ to hit, and the Austrians get no save. A full unit of Austrians roll 5 dice, require a 6 to hit, and the Prussians get a 5+ save. That is inflicting 4 hits per turn versus 0.5 hits, respectively. Prussians have 8 times the firepower. In OHW a unit firing D6+2 would eliminate an enemy in 3 turns, while a unit firing D6-2 would eliminate a unit taking one-half casualties in 15 turns. Prussians therefore only have 5 times the firepower. That is further offset by giving the Austrian infantry the ability to charge Prussian infantry (and skirmishers and artillery, but not cavalry) and inflict equal casualties.
Against German infantry, Prussians roll 8 dice, require a 5+ to hit, and the Germans get no save. The Germans get 4 dice, require a 5+ to hit, and the Prussians get a 5+ save. That is 2.64 versus 0.88 hits per turn, or the Prussians delivering 3 times the firepower. In OHW, again the Prussians would eliminate a unit in 3 turns while a German unit would eliminate a unit taking one-half casualties in 8 turns. Again, that gives the Prussians less of a firepower advantage over the Germans in OHW than it does in WNCE.
Test Game
I decided to play Scenario #8 (Melee) from the OHW rules. I have been playing a lot of this scenario lately as I am trying to prove to myself that playing one particular scenario over and over does not have to be boring or tedious, and that changing periods really helps keep the scenario 'fresh'.At first I thought I would play one side programmed, but I quickly dispensed with that idea as I was not really sure what a good plan would be, especially with the Austrians as defenders. Given that the Austrians still fall under the assault doctrine, I thought it would be interesting to have them attack.
I rolled for the Prussians and received: three Infantry, one Skirmisher, and two Cavalry. For the Austrians I rolled three Infantry, two Skirmishers, and one Cavalry. I decided to switch out one of the Austrian Skirmishers for Artillery largely because I only have one Skirmisher unit for each side and I wanted to try the artillery rules out.
 |
| The Austrian Attackers |
 |
| The Prussian Defenders |
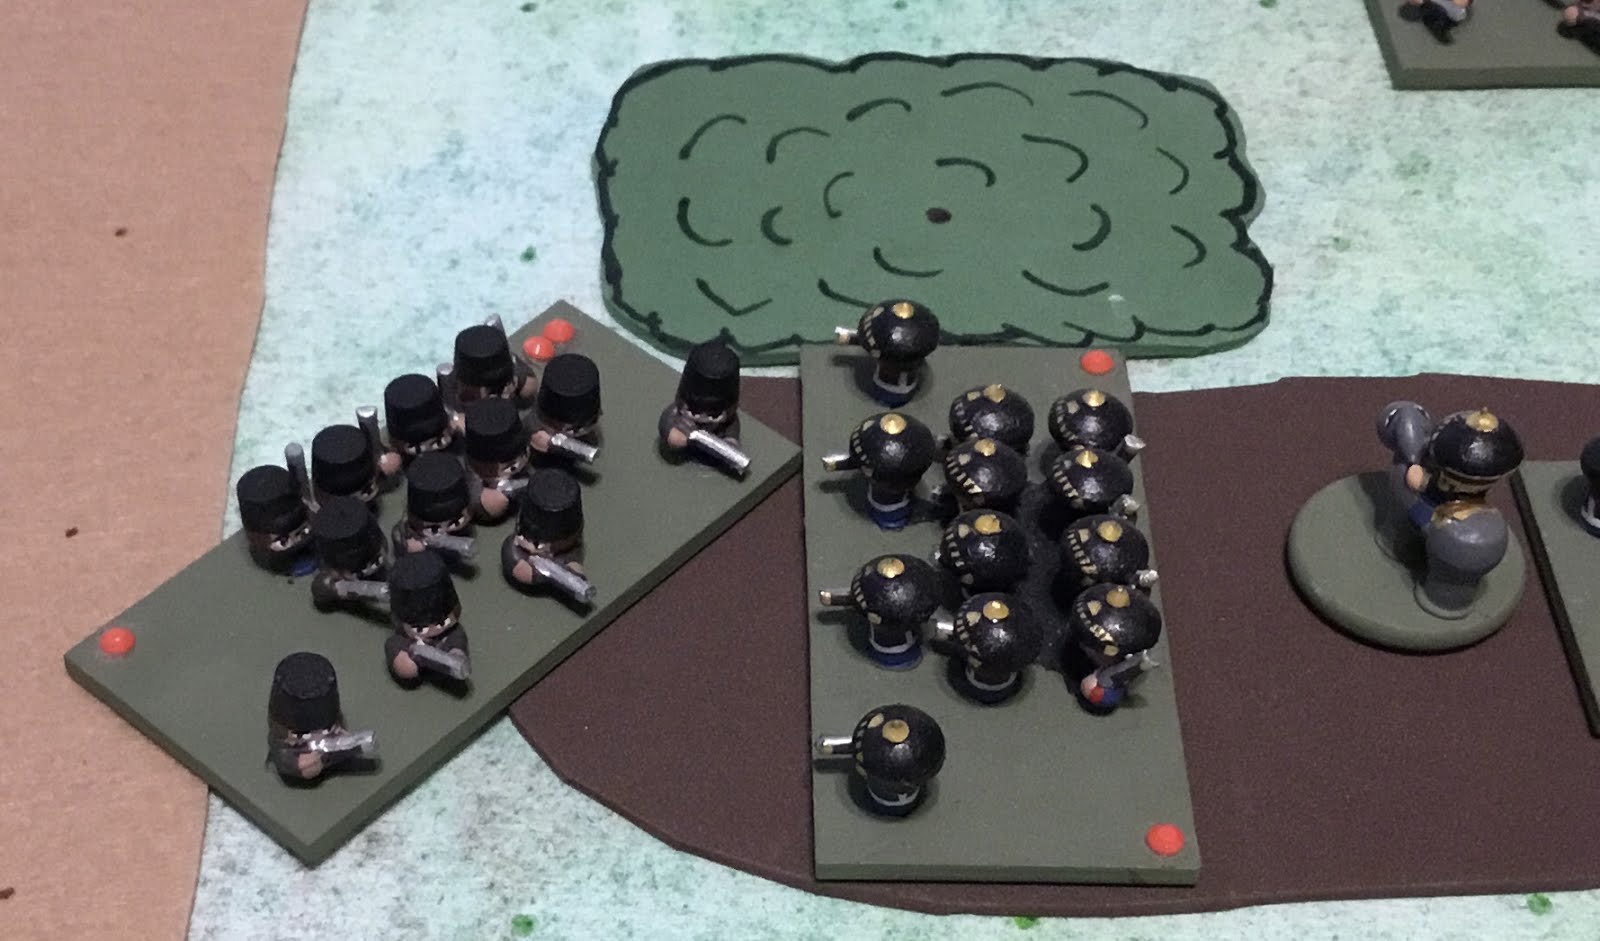
If you are wondering why the miniatures look 'funny' it is because they are made from beads and hot glue.
Turn 1
I decided to put two of my Prussian Infantry on the hill to defend. That would give them the ability to take one-half casualties from shooting (their natural ability) and also from hand-to-hand (defending uphill), so they should be very hard to dislodge, allowing the off-board reinforcements time to arrive and either hold the hill, or repel the Austrians that had gained the heights.
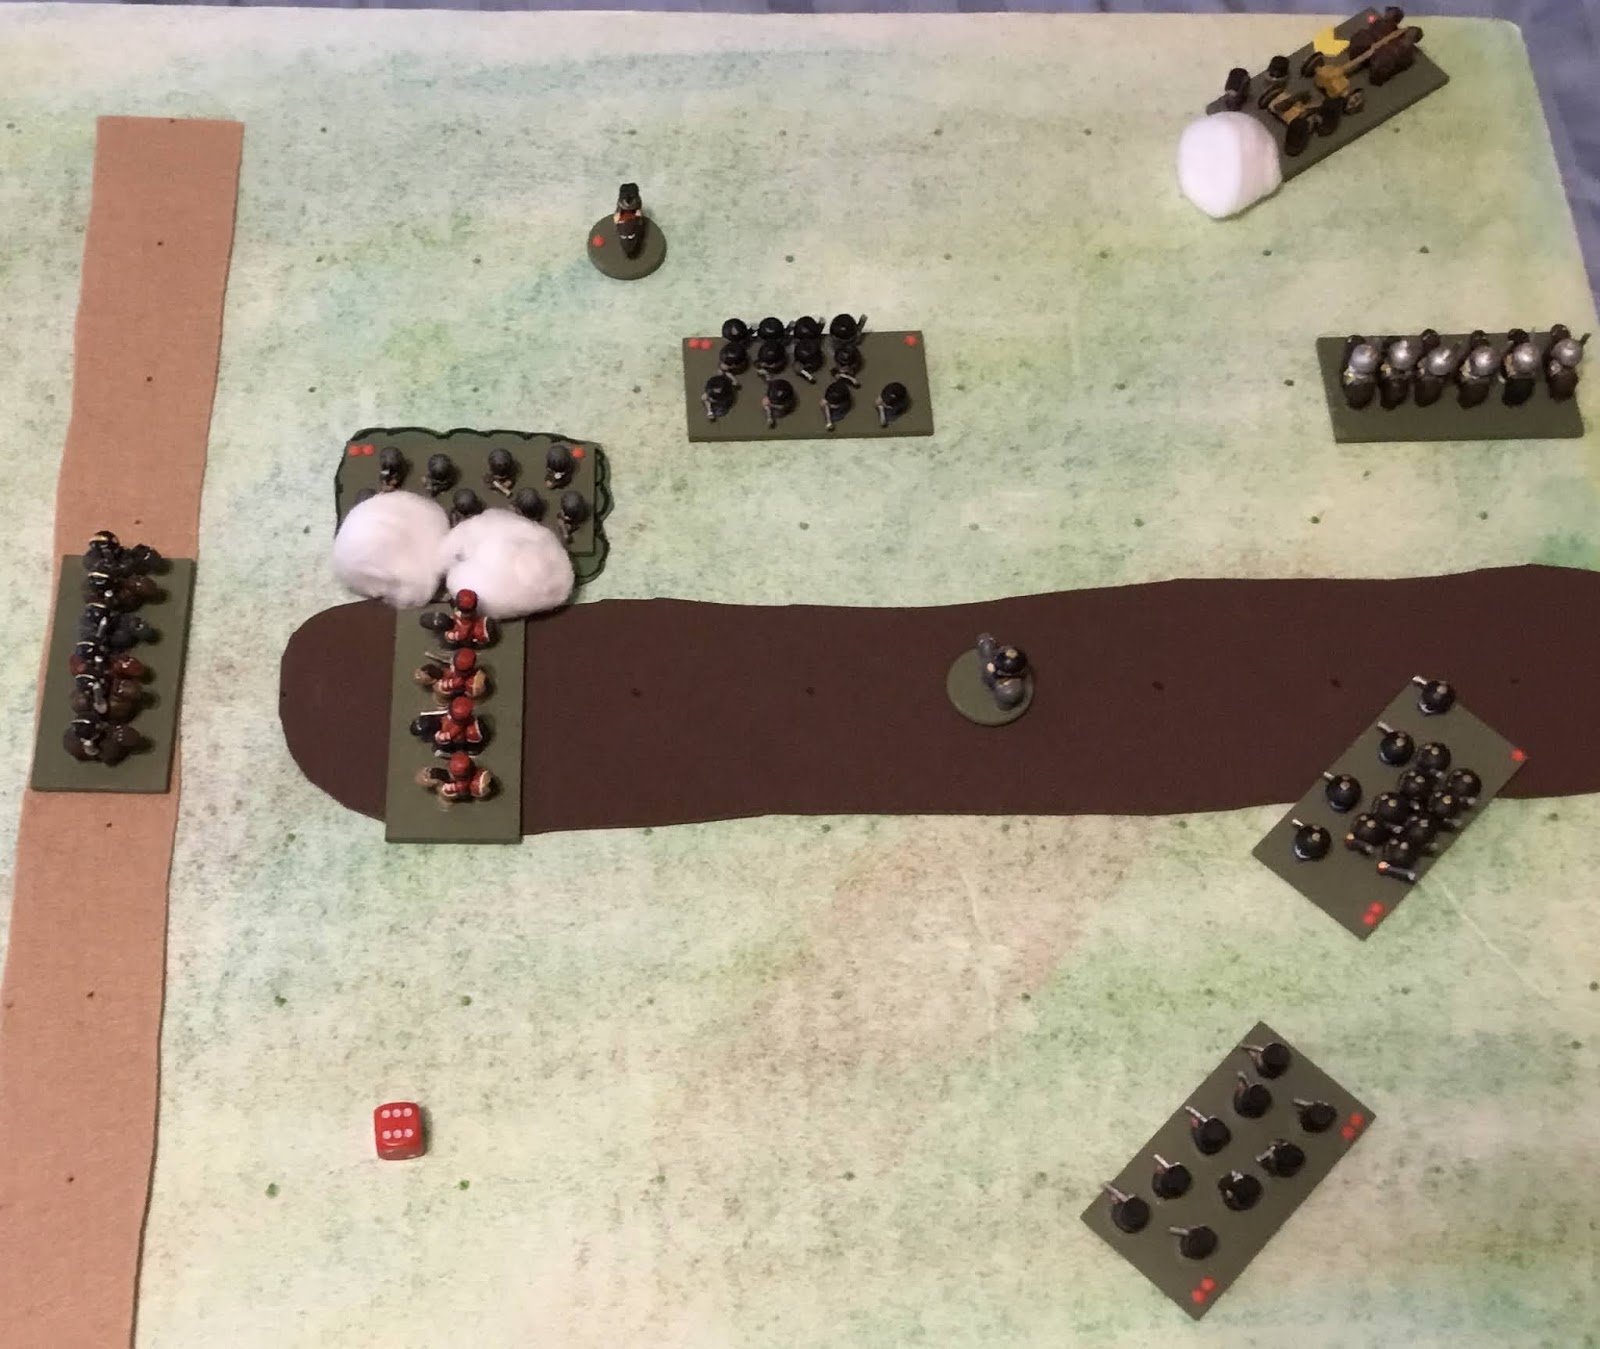
Meanwhile, the Austrians brought on their Artillery and two Infantry units.
 |
| End of Turn 1 |
Also of note is that I am using John Acar's 3-hits method for OHW. Generally, I think this is an interesting idea, and I like that John shows the math, but I am concerned that I may get a result where a unit is destroyed in a single turn to a lucky roll.
In game terms this means that a D6-2 attack rolls 1D6, a D6 attack rolls 2D6, and a D6+2 attack rolls 3D6 with each 5+ scoring a hit (double casualties scores on 3+ and one-half casualties scores on a 6).
Turn 2
The Prussians maintain their same position on the hill, however the right unit pivots in order to get a bearing on any Austrian infantry advancing up the hill. Meanwhile the Austrians flank left and right, trying to maneuver their infantry into position so they can attack. Meanwhile the artillery stays out of range and starts bombarding the infantry, inflicting one hit (out of three).
 |
| End of Turn 2 |
Turn 3
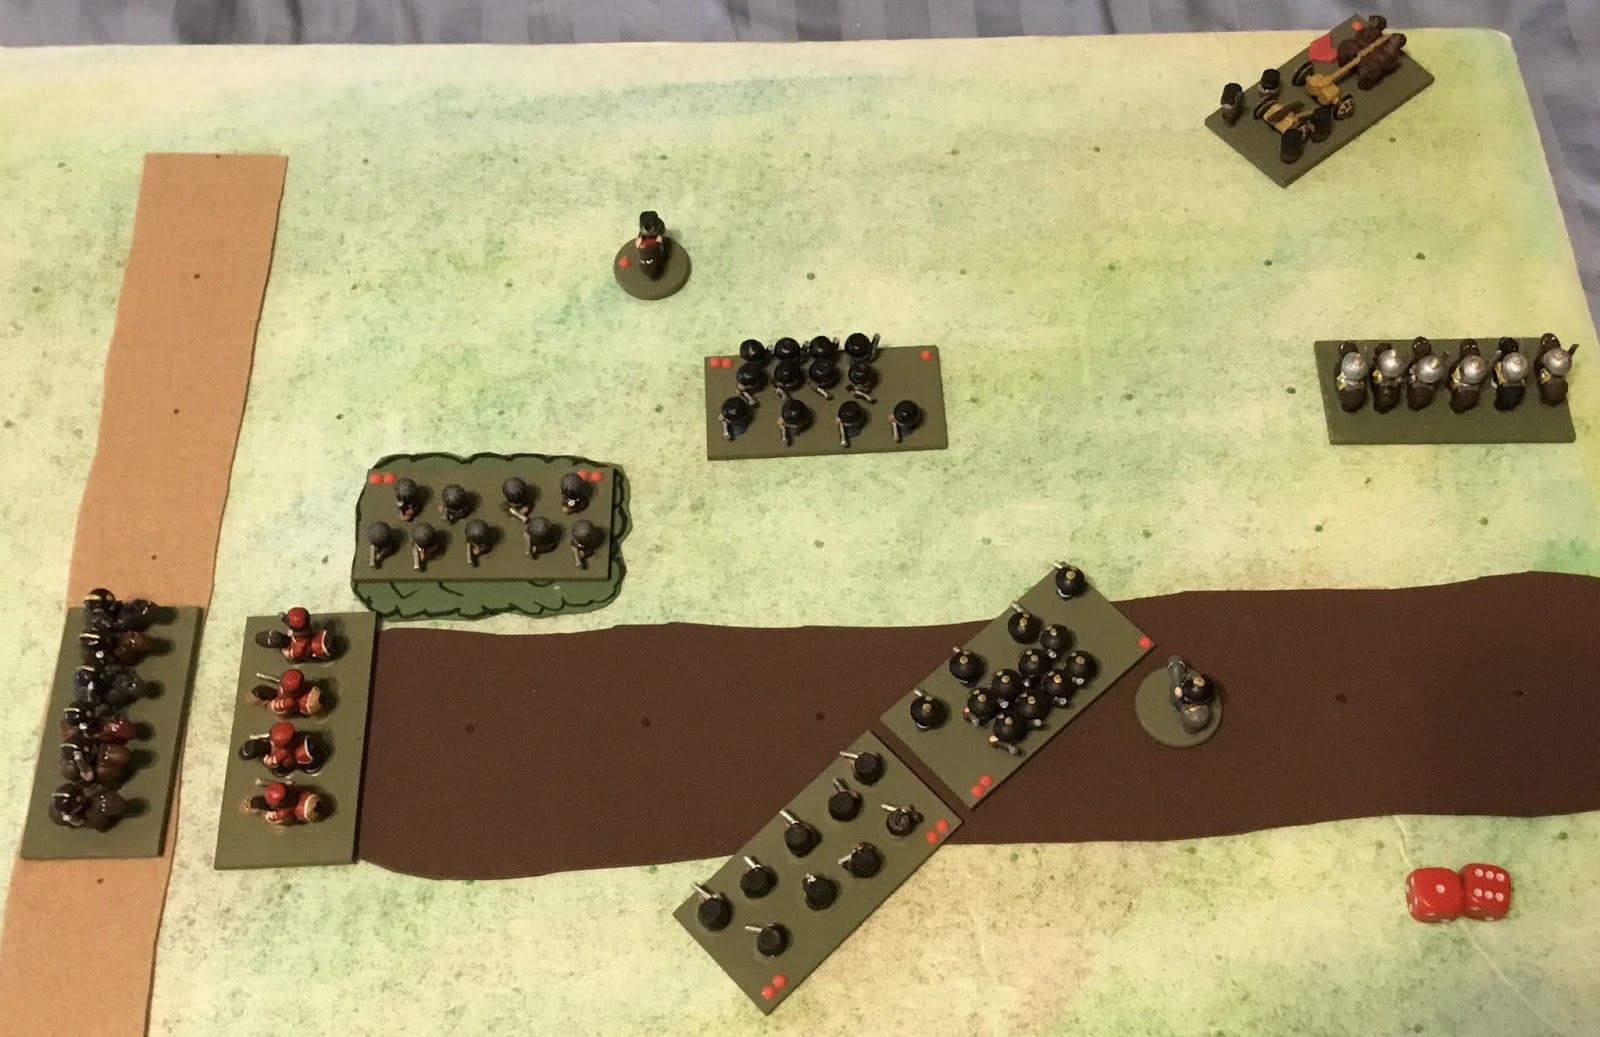
It is at this point that I notice a flaw with my game board. The hill is too long. Although it is hard to see, there is a dot on the left end of the hill, indicating that there is an open uphill position. Because I did not move the Prussian Infantry on turn 2, the Austrians can gain the hill. To try and block the maneuver, the Prussian Infantry both march to the left. This also allows the right-most Infantry to get out of the line of fire of the Austrian Artillery.
The Prussians bring on their first reinforcements, the two Cavalry regiments, from the road entrance. The Prussian Hussars swing wide on the left, outside of the firing arc of the Austrian Infantry, while the Prussian Cuirassiers move towards the right end of the hill.
 |
| Prussian Turn 3 |
As expected, the Austrians charge the hill. Because they get a D6+2 attack in hand-to-hand, they get to roll 3D6, so it is possible that the can wipe the Prussian Infantry in a single turn. All they have to do is roll three 6's ...
 |
| Austrians Charge Up the Hill |
They almost did it, scoring two 6's. But, given they did not succeed in eliminating the unit, they retreat 6" back. Meanwhile , the Austrian Infantry faces off against the Prussians uphill, while the artillery swings around to the Prussian right flank.
Honestly, I was not quite sure what to do with the Artillery unit. The woods block line of fire to the hill and eventually the advancing Austrian infantry would also. The alternative was to pivot to the left and threaten the Prussian Cavalry that was now threatening our flanking Infantry. What would you have done?
 |
| End of Turn 3 |
Although the Austrian Infantry is exposed to a flank attack, next turn more Austrian reserves will arrive via the road. The lead unit is itself a Cavalry unit, so it should be able to keep the Prussian Cavalry at bay while the Austrian Infantry continues to attack the hill.
Turn 4
The Prussian Hussars attack the Austrian Infantry from behind while the Prussian Infantry fire at it from the heights. The fire missed completely, probably indicating that the charged rattled them and they are still trying to reform, but the Hussars inflict two hits. Again, not enough to eliminate them, so the Hussars retreat. The Prussian Infantry on the hill fire down on the Austrians at the foot of the hill and inflict heavy losses. |
| Prussian Turn 4 |
More Austrian reinforcements enter the board and the Artillery slides right to get a line of fire on the hill.
 |
| End of Turn 4 |
Turn 5
Big turn for the Prussians as the Hussars ignored the threatening Austrian Cavalry and charged the Austrian Infantry on the hill, wiping them out. Further, the Prussian Infantry finish off the Austrian Infantry at the foot of the hill. Meanwhile, the Prussian Cuirassiers gallop over the hill, ready to charge the Austrian Artillery.
 |
| Prussian Turn 5 |
Given that the Prussian Hussars were outside of 45º of the Austrian Dragoons front, they cannot charge, so they ascend the hill, taking the open position. (Note that the Prussian Hussars are facing away, so they cannot charge the Austrian Dragoons next turn either. So the Austrians have the upper hand, even if they cannot immediately take advantage of it.)
The Austrian Jagers (Skirmishers) advance into the woods, ready to pour fire into flank of the Prussian Hussars.
The most important decision is what to do with the Artillery. The Prussian Infantry on the hill need one more hit. The Artillery get 2D6 and needs a '6' on either die to inflict that remaining hit. Alternately, they could pivot so that they face the Prussian Cavalry about to hit it on its flank. Which move would you do?I fired with the Artillery at the vulnerable Prussian on the hill and, unfortunately, miss.
 |
| End of Turn 5 |
Turn 6
Finally, the final Prussian reinforcements arrive. The final Infantry unit move to ascend the hill, plugging the gap to the right end. The Prussian Jagers (Skirmishers) move towards the weakened Prussian Infantry on the hill, should they fail to hold.
The Prussian Cuirassiers charge the Austrian Artillery, hitting them in the flank, inflict one hit, and bounce off.
2D6 inflicting double casualties (hit on a 3+) and only one hit! Note that in this period, even when you hit the enemy's flank, if you do not defeat the unit you retreat from hand-to-hand combat. This also means that defending units do not get a free pivot to engage a flanking unit as they are no longer engaged.
 |
| Prussian Turn 6 |
Despite the fact that the Austrian Dragoons charged the Prussian Hussars frontally while the Jagers fire at them from the flank, no hits are inflicted on the Hussars. The Dragoons retreat off of the hill. Meanwhile, I have the same decision with the Artillery and cannot resist the odds; I fire at the Infantry on the hill and finally eliminate them.
 |
| End of Turn 6 |
Turn 7
The Prussian Cuirassiers again charge the flank of the Austrian Artillery and again inflict only a single hit, forcing them to retreat. They only have one more chance to take out the Artillery before it will have pivoted and be able to fire upon them.
The Prussian Hussars could have charged the Prussian Dragoons, but instead chose to simply make a stand at the end of the hill. The Prussian Dragoons will only inflict one-half casualties charging uphill. It won't be until next turn that I realize that it was a bad move.
 |
| Prussian Turn 7 |
On the left the Austrian Dragoons charge uphill against the Hussars, while the Jagers continue to pour fire into their flank. Again the Jagers miss, but the Dragoons inflict a hit before retreating.
The Austrian Infantry also charge up the hill and attack the Prussian Infantry, but fail to inflict a hit, forcing them to retreat back down the hill.
The Artillery decide that they will be slowly killed if they keep firing at enemy on the hill, so they pivot to face the Prussian Cuirassiers. It may be too late though.
 |
| End of Turn 7 |
Turn 8
The Prussian Hussars stupidly stand at the end of the hill and do nothing while the Jagers move up to face off against the Austrian Jagers. The Prussian Cuirassiers charge the Artillery and finally eliminate them while the Prussian Infantry fire at the charging Austrians, inflicting a hit upon them. |
| Prussian Turn 8 |
At this point, looking at the match-ups, the Austrian Cavalry hits with 2D6, but need a '6', while the Prussian counter with 2D6 needing a '5' or '6'. The Jagers firing at one another both use 2D6 and require a '6' to hit. Finally, the Austrians will use 3D6 when charging, but require a '6' to hit, while the Prussians firing will also get 3D6 and require a '5' or '6' to hit. So, in the three match-ups the Prussians will inflict twice the damage. The third match-up is even. Even worse, the Prussians have a Cavalry unit that is unchecked.
End of Game
By the end of the Prussian turn 10 it was obvious that the Austrian cause was lost. I realized that the Prussian Hussars needed to charge off of the hill against the Austrian Dragoons, otherwise they would eventually be destroyed by the relentless Dragoon charges. Although the Austrians had inflicted the first hit, the Prussians won as they always retreated back up the hill and this got the benefit of defending uphill.
The Prussian Infantry on the hill also had the upper handed was able to eliminate the Austrian Infantry charging up the hill. The defensive quality of the hill just could not be overcome.
 |
| Prussian Turn 10 |
Summary
APW scenarios are hard to play in WNCE because Neil Thomas models the advantage of the breechloader as being so significant over the rifled musket. Those that play late war ACW know how devastating the Union units with single-shot breechloaders and repeating rifles can be, so it is not really that surprising. However, in the ACW it is usually only a unit or two that the Confederates have to deal with; here the Austrians have to deal with the entire enemy infantry force with such a firepower superiority.
I view periods like this as similar to the historical scenarios you find when playing Memoir 44. Those scenarios tend to be won by the side that won historically. When we played Memoir 44 as a tournament you basically had to play the scenario twice; once as each side. The player that scored the best over the two games won the round. I could see doing the same with playing the APW using OHW.
One reason why I think OHW might be a good ruleset for this period is that the games are quick, so playing it twice might not be so problematic. All in all, I think toning down the math of WNCE as I did here makes the Austrian side less dismal to play. Of course, the only way I can prove that is to play the scenario again, with the Austrians defending the hill.

The APW is also one of my interests, nice variant. If the 3 hit variant is too random, try the Six it variant. Units have six hits, throw 1,2 or 3 dice as in the 3 hit variant, but hit on 3+, 5+ for armour/cover. This also makes it easy to halve again (armour plus uphill for example).
ReplyDeleteActually, I forgot to address that. The one time in which I rolled three hits in a single turn – which would have wiped out a fresh unit in a single turn – it happened to a unit that already had two hits on it. So it never really came up.
DeleteI do prefer the 3 hit system because that can be represented by two colored markers (the yellow and red arrows showing in the pictures). Six hits would require a die, which aesthetically I do not like as well, because I cannot remember five different colors and the order they would be applied. :)
great stuff, dale. I've may FPW rules inspired by the 19th C. NT book, and I think that the mechanics are extremely important in a game where two sides have very different strengths but are both being forced to play the same scenario. There's really FOUR games to be played here: both sides attacking and then defending.
ReplyDeleteThis is a scenario I've played a shedload of times, in Medieval, WWII and other periods. sometimes with other rules like AMW or W:aI rules. Great scenario.
Personally, I think the key to the hill is actually the woods. Were I the Austrian and faced with two Prussian Infantry on the hill, I would have entered with an infantry, a skirmisher and an artillery. The skirmisher goes into the woods where they get cover and last longer. The Artillery and infantry flank the hill - note that the weak part of the hill is behind the woods, where only one defending unit fits! If flanked, the hill can become a deathtrap in a firepower period as the defender has only one Unit facing 3. Anyway, IF one's game mechanics [not provided by NT] allow the artillery to fire at a target on the hill over a friendly unit at the base of the hill, you now have 3-1 on a defending Unit occupying the hill behind the woods. If the defender pulls back from the pressure, attacker now has a foothold on the hill and is twice as effective [or 1/2 instead of 1/4'd by your mechanics].
When the Prussian cavalry enter as reinforcements, the Austrian artillery can begin firing at them immediately, and their reinforcements have only a short way to go to get into the action.
Attacking the hill from along the long side loses in every period. So attacking up the road is the only option, IMHO. The attacker must eliminate at least 1, and preferably 2 defenders by mid game and own the woods and a portion of the hill.
Note that if the Prussians take a skirmisher and an infantry, they can seize the woods on Turn 1. Again, the question is how do your mechanics allow a unit to fire out of or be fired at from outside of the woods? That will determine how the woods defense goes down. As Austrians cannot enter the woods unless they are skirmishers, there is an interesting challenge here.
This is how I end up playing a OHW scenario 8 times in 1-2 days...I keep realizing new possibilities in the attack and the defense, and game mechanic questions that need to be addressed - and that's why I'm always finishing up NT's rules!
oh, and if the hill was shorter and there was a gap on the West side as there should be, it wouldn't matter - the attack on that side NEVER works as the final defending reinforcement group comes in there and wipes out the weakened attackers holding the gap / hill. I think the ONLY attack plan is to leverage the woods while attacking up the road, and go for eliminating 1 hill defender at least, and 1 of the reinforcements. In your case, one Prussian Infantry Unit and one Prussian Cavalry Unit.
ReplyDeleteYou should write a Blue Programmed Opponent and publish it so I can play against it. See http://solo-battles.blogspot.com/2019/12/playing-against-mr-babbage.html and subsequent posts for more information. That is one of the reasons I played out this scenario, as I wanted to get a feel for this variant in order to write another programmed opponent.
Delete