My blog about my wargaming activities. I collect a lot of 15mm miniatures for the American War of Independence and so collect a lot of rules for this period. I started miniatures with Napoleonics, so I have a number of armies in 6mm and 15mm figures for skirmishing. I have15mm WW II figures that I use for Flames of War, Memoir '44, and someday, Poor Bloody Infantry. Finally there is my on-again, off-again relationship with paper soldiers that I sometimes write about.

Showing posts with label Napoleonics. Show all posts

Monday, August 14, 2023

Skirmish Scenario Design (Part One)

The game of Song of Drums and Shakos that I played at the last convention not only convinced me to play more skirmish games (where I can), but to possibly try my hand at running a game at the next convention I have lined up, SouthwestCon 2023 in Tolleson, AZ. To that end I decided to start designing a scenario to play and then do a few dry runs to refine it.

The first decision to make is what rules to use. Because the Song of engine re-kindled my interest, I am going to go with that. It is a relatively simple game that you can add as little or as much 'crunch' as you like, by adding in the special abilities. Also, every turn the player has numerous little decisions to make such as how many activation dice to use, so player engagement is relatively high.

The next decision is what period to play. My initial inclination was to use my wooden 43mm Dark Ages figures, to get them out on the table again. (The more I think about it, the more I realize I probably use them the most, of all the 43mm wooden figures I have.) Another alternative is Napoleonics. If I want to drop down to 28mm (and blow off some serious dust) I could make it WW II, but I would have to seriously tweak the Flying Lead rules (which I ranted about more than 10 years ago).


Several Playtests

So far I have played two Dark Ages and one Napoleonics version of a 'King of the Hill' scenario (where possession of the hill determines the victor) and the results brought up some interesting points, all of which make the scenario rather stale.

The Only Objective is to Eliminate the Enemy

The official scenario objective was "at the end of the game to have more figures on the hill than the enemy". However, there was always one overriding victory: elimination of the enemy, typically accomplished by them hitting a breakpoint and failing morale. If you did that, then it was assumed that you would take the hill unopposed after the enemy's rout.

In one scenario I remember losing enough figures early that I determined the only way to win was to break the enemy and thus capturing the hill was totally irrelevant. I ended up pursuing his leader attempting to run him down. If I had been able to accomplish that, half of the enemy forces would likely have routed and those that had not would either have vacated the hill, or if they had stood, been isolated and picked off.

Combat Becomes Static

Although this might sound like an inevitability with Dark Ages troops, as everyone gets into melee and maneuver essentially ceases, but it happens in Napoleonics too as troops settle into cover and start sniping at one another. This is either because the primary objective (the hill) is a static location or because everyone is 'stuck in' and movement only occurs when some figure is eliminated.

The Rest of the Board is Fairly Useless

Unless you both decide to ignore the primary objective and simply go for breaking the enemy force everyone is likely to be heading for the hill. Potentially terrain close to the hill might be of value as you snipe away at people on the hill, but in the end you have to be on the hill to win. But any terrain out of line of sight of the hill is essentially just window dressing.

A recent scenario is a good example of this. In the scenario depicted below, when I first reported about it, I left out all terrain detail, other than the town (in the lower right-hand corner). That is because everything other than the town was irrelevant. As it happened there were forests on the left, a ridge line on the French right flank, and roads. In this battle the town was worth 5 VP, a road on the enemy's baseline was worth 1 VP, all other terrain worth nothing, and destroying enemy troops worth variable VPs. (By way of comparison, I was able to score 3 VP for troop elimination against the enemy while they were able to score 2 VP against me.) I did not bother to draw other details because the town was the sole piece of terrain that mattered.

The 'King of the Hill' scenario feels the same way. Any terrain off of the hill just seems like window dressing.

Skirmish Scenario Design Objectives

So, what are the objectives of a good scenario design, especially for skirmish games? Let's start by taking a look at some rules and scenario books to see how they present victory conditions and scenarios.

Star Wars Shatterpoint Scenarios

One of my recent regrettable purchases was the game Star Wars Shatterpoint (SWS).

The game design looks good, but is just way too crunchy for my old brain. Like Star Wars Legion, but at a skirmish scale. The figures and terrain are really nice looking though, although some figures are a nightmare to assemble. I could have learned all of this had I watched more videos as content creators put them out, but I am generally a latecomer to rules and I wanted to be an early adopter this time. That will teach me!

SWS does have any interesting objective-based victory condition system. You start by picking a mission card, which defines where the objective markers are placed. All objectives are initially inactive (circles marked in gray).

SWS currently only has one mission card – the one shown above – and it evenly spaces out nine objective markers range 4 from the board edges and range 5 between each. If a marker appears where multi-level terrain is, it is placed on the upper level.

SWS has three different phases of the game, called Struggles. At the beginning of each Struggle a card is drawn which identifies which objective markers are active. In the example below, on the left, there are five objectives active, with the remaining four inactive throughout Struggle I. After the victory conditions of Struggle I are met, Struggle II is revealed, showing which objective markers are inactive and active. In the example below, on the right, a die is rolled on each player's turn to see which single objective marker is made active.

The net effect of this system is that it generally keeps players moving as they try and capture active objectives, keeping the enemy away from them. Between each struggle a winning position – in terms of who is successfully holding active objective positions – may turn into a losing one as the objectives have moved and you hold few or none of them. Players camp on positions, but generally not for the entire game.

Although an interesting concept and one that gives these rules the reputation for cinematic movement and action, one wonders how long before the shine comes off because players don't actually do anything at these locations, they just simply control them by outnumbering the enemy within a certain distance from the marker. In the example above, on the left, the objectives are supposed to be representing "stealing the secret plans", but there is no guarantee that there will be a computer terminal or a safe at each of these points; just an orange marker. Players are not required to have a figure perform an action, only that they are standing within a certain distance from it. They might have been full engaged moving or fighting. Still, it gets players to move into locations that might be out in the open rather than in cover, or have them move rather than make another attach in order to get 1" closer to the marker to contest. Put another way, it gets players to make sub-optimal moves rather than having them sit in heavy cover safely sniping away. At that it succeeds.

SWS has one of the best cures for people settling into cover and turtling there: you lose the game because you don't receive victory points for that. You get points for moving to and capturing points on the tabletop.

Intermission

You may not believe this, but it has taken me more than a week to write just this. My writing style is … chaotic. I sort of write in a stream of consciousness and edit it a bit afterwards. It is not so much that it is a lot of 'work', just that I want to get ideas out there and flowing and I sometimes wonder whether this is the best platform.

If I want to just send it out to you, with feedback limited to plain text comments, then I suppose this is the best method. But I am not sure that is what I want. I have been watching how Twitter/X has been changing as a platform and wonder whether that might be more suitable. I tried podcasting, but that is just as intensive as blogging – if not more so – and sort of limiting for the consumer. Twitter, on the other hand, is rather easy to consume. I can limit each thought to 280 characters (unless I get verified, then it is 4,000 characters I think). More importantly I have learned how to use the thread feature, so you can keep adding bits to a topic thread as ideas come to you.

I am thinking of trying that – maybe as a way of sorting out my thoughts and getting feedback – and then posting a completed thread here. There are lots of wargamers on there. If you are (or are not) interested, let me know. The account I use for this will not contain any personal posts, like vacation photos or political topics. Just straight up wargaming ideas. When I get the Twitter/X account sorted, I will post it here.

I'll pick up more on scenario design in the next post.

Tuesday, July 18, 2023

Attended Twisted Lords Convention in Oklahoma City, OK

I was able to take a few days off from work and drive to Oklahoma City, OK to attend the gaming convention Twisted Lords 2023. (For those in other countries, Oklahoma has tornadoes, a.k.a. twisters, hence ‘Twisted’.) It is a 14 hour drive each way – nothing is close by in the US West – so it was a bit of a commitment to come. out here. But that was okay because I was going to meet up with a gaming buddy from Texas and probably get in a game or two with him, in addition to the games I had signed up for. (He, unfortunately caught COVID from his wife, so he did not attend in the end.)

The Drive

My drive was along Interstate-10 to just outside Las Cruces, NM, where I switched to US Highway 70, which is a highway I have not been on for any serious distance. It is a great drive because it takes you past White Sands Missile Range, White Sands National Park (with its white sand dunes), into the Sierra Blanca Mountains.

By the way, this is in the heart of the Mescalero (Apache) Indian Reservation. Before you get to this scenic viewpoint, however, you go through the town of Mescalero and as the road bends and goes over a rise, you see this amazing church, St. Joseph Apache Mission.

Unfortunately construction was going on and the exit was closed. There was some detour to get there, but I was not feeling adventurous – being a man on a mission – and kept going. But I did read up about it later that night. stjosephapachemission.org

I stopped after 10 hours of driving and stayed for the night outside Amarillo, TX. This is another area I had never been through. It is actually amazing as – although it is “West Texas” – it is the green part. Being flat, you can see for miles, all of the wind turbines and massive grain silos and elevators. (The buildings are so massive and tall you think it is a skyscraper in the distance.)

The second day was a short jaunt into Oklahoma City where fortunately, the hotel let me check in early, where I promptly took a name.

Event 1

My first game (and only game scheduled on Friday as I anticipated that I would arrive by 6 PM, not noon) was 15mm Napoleonics (using home brew rules) entitled “Prelude to the Battle of Jakobovo (1812)”, where the Russians are attacking a French covering force, guarding the French line of communication and supply. On the Russian right flank is a four-section town, with one section containing a castle, which the Russians are to take. Each town section is worth 1 VP, with the castle section being worth 2 VP (so the entire town is worth 5 VP). The Russians also get 1 VP is the take a road exit on the French baseline. (As there is no turn limit, just a time limit, it is possible to take it, but highly unlikely. So the Russians have two missions: take the town; and keep the rest of the French forces from reinforcing or retaking the town.

Unfortunately I did not take any pictures of the game, but the image above shows the flow of the battle. I (as the Russians) focused three divisions on the town, surrounding it on three sides, taking all sections, including the castle. Meanwhile, the remaining Russian forces made spoiling attacks to keep the French pinned in place, retreating when things got too hot.

After it was all over, with the Russians winning 8 VP to 2 VP (you also get VP for breaking enemy brigades) – a major victory – I was told that after about a dozen times playing this scenario, no one had ever taken the castle. In fact, no one had ever taken more than two town sections. I was rated as one of their most aggressive Russian players. Ironically, I tend to play ‘recklessly’ whenever I try rules for the first time because I want to push the system and see how it reacts. So I was charging into the town without any significant bombardment, or firing muskets for several turns. Just fix bayonets and ‘Ura’!

Event 2

My second event was Saturday morning and was a game of good, old Songs of Drums and Shakos with the Ottoman Turks facing off against French dismounted dromedary troops. French quality versus Turkish quantity. It was also a game of skirmishers versus formed troops because I (as the Turks) decided to keep our mob formed as mush as possible, to offset the bad odds of using low quality troops.

We started with a very nice board with various light cover scattered about. The two walls are high enough that you cannot fire over them unless on the very ends where it is sloped down. The French (top) have much more cover (the smaller rocks are decoration that have no effect on play). Ironically, no one ever entered the building to fire from the windows, where they would have had hard cover.

The game started off with the French skirmishing onto the board. The Turks, meanwhile, formed up off-board, but could not coax anyone to enter the board until the fourth turn. The French were razzing the Turkish troops for their lack of elan.

Finally the Turks come on and they show them the power of volley fire. Before the French can stop laughing, their two forward scouts lie wounded on the ground.

The Turks continue to pick off the French with volleys. (Even though they are behind cover the math of volley fire almost ensures one wounded Frenchman for every volley.)

After more volleys the Turkish squad out in the open decides to shift right and get out of the crossfire. The Turks have dropped five Frenchmen while only losing one.

The French then sneak a single trooper around the corner of the building and shoot the Turkish leader, forcing the Turks into a morale check, which four fail!

The French player accomplished this by making sure that only the leader was visible to the trooper as figures are forced to always fire at closest target. This was how he was able to target the leader in the rear. It was a helluva’ shot!

With their leader lost, the NCO takes over. He quickly reforms all of his troops (save one flank guard) and has them reload.

Marching the Turks smartly around the corner of the house they loose a volley and wounding the trooper guarding the French officer. While the officer shoots his pistol at the Turkish NCO and misses, the troops calmly reload.

The soldier guarding the flank (played by my team mate) gets a bit ambitious and tries to shoot the two Frenchmen hiding in cover, They draw their swords after he misses…

The French NCO and a trooper spring from the rocks and quickly puts the flanker down. However, the French officer calmly looks at the reloaded Turkish line, doffs his hat in salute, and goes down to the blistering fire of the Turks. French morale breaks and the skirmish is over. They have lost nine wounded to the Turks three wounded and four who shamefully fled.

Song of Drums and Shakos is an amazingly simple yet fun set of skirmish rules. The core mechanic centers around activation of figures and gambling, rolling 1, 2, or 3 dice to determine the number of actions you receive. However, if you have two or more failures, you end your turn, regardless of the number of figures that have not gone yet. This trade off between trying to accomplish as much as possible with each figure versus beating the odds against two failures is the primary tension that the rules provide.

Event 3

The last game was the Battle of Utitsa, where the Russians are defending against the Duchy of Warsaw (Polish) army is attacking. Because I was the attacker last time, and it looked like the only people signed up were the same ones for the first event, I decided to stay as the Russians and defend. I was commanding the Corps on the left.

Basically the Russian left is defending a hill line with all Grenadier battalions. Our only objective is to keep the Poles off of the hill.

Strangely, to the extreme left flank there was a Cossack division. I was told that they were not on the battlefield and I did not know when they would be made available, if ever. (My opponent opposing me on this flank was told the same.) Apparently in previous games the Polish cavalry would sweep around this flank and simply run down the Russian line. The idea was that if the Poles made for the empty hill to my left, it would trigger these Cossacks as reinforcements. Again, neither my opponent nor I knew this. I was begging for them every turn and the Polish commander was getting uneasy about when they would come on. He took the bait, nonetheless, and triggered the Cossacks entering the fray.

Although the quality of the Poles was equal to French Line, they were not equal to Russian Grenadiers. These rules have an initiative system that forces players to make their moves when the initiative number they rolled is called. So attacking is very much influenced by timing, as in do you get to move first or second. (All combat is simultaneous, however.)

Initially the hosts had told me that I would be the Russian CinC, but it was obvious that my team mate had very specific ideas about what to do. (He was apparently the scenario designer, so he knew much of what reinforcements there were and where they would come on.) I had no problem listening to his recommendations, but they weren't … recommendations. They sounded more like orders. He would tell me what to do with each unit and I would smile, chuckle, and nod agreeably. Of course, I threw much of his orders out. I could hear him several times muttering to the hosts that I was "an insubordinate player" and "much too aggressive". He was sure that I was going to get too far away from the hill and lose it.

The image above shows you how the initiative can play out. Firing range is 8" and infantry in line move 8" (12" in column). The Poles moved up into very close range, but did not contact. Russian Grenadiers were at an advantage if they charged (rather than stand to receive a charge), so I charged! (The Russian CinC, of course, was telling me what a blunder of a move it was.)

This image shows the result: the Pavlov Grenadiers utterly wiped out the first Polish brigade to come into contact with the Russian defensive line. I continued to parry and thrust like this over the next few turns while simultaneously shifting my troops to the left (onto the next hill) to counter the flanking threat.

The Poles never broke through the Russian line. The CinC admitted that my aggression kept the Poles off-balance, especially when I took the Cossacks and – against the advice of the Russian CinC, the game host, and the rules author – ran them into the Polish rear, creating havoc and breaking the forward momentum of the attackers. I even had one Cossack brigade capture a Polish Division commander, inflicting a morale effect on each brigade in his division, before it overran two batteries of Polish artillery from the rear.

I was shocked that they were shocked at the results. They kept telling me "but you will only get one die of attack" and "you aren't going to win any combats unless you mass all of them together" (I was running each brigade independently, deeply separated from the others). It was like they had never seen anyone play Cossacks before!

I had held the hill (it did not give us any VP, just deny the Poles the VPs), but I had also inflicted two of the three Divisional morale failures on the Poles (which was worth 1 VP each), so the Russians won, 3 to 1. The Russian CinC did congratulate me on my game, saying that he had never played with someone who was so aggressive, yet did not simply throw his troops away. [shrug]

Summary

Overall I definitely had a good time. I really only played three four-hour games, which you might think is not much given that I drove 1800+ miles for a total of 28 hours. Honestly, I think I only could have gotten one more game in (which was originally scheduled, but cancelled at the start of the convention). I spent the time during that slot playing a board game I had and writing up event 1 and 2 for this blog, so it was not a waste.

One of the things I am tending towards at the moment is to use conventions to play mass battles, like in events 1 and 3, and mostly do skirmish and board gaming when I am home. I will probably change my mind again, but my thinking is that I don't have to collect mass troops and worry about basing, nor terrain for that scale of battle, and simply focus on the smaller stuff.

Like I say, I will probably change my mind again. 

Saturday, July 30, 2022

More Painting, More Thoughts on Downsizing, Goodbye My Friend

I have been doing a lot of painting of late, as part of my trying to figure out which scales to keep and which to shed.

Wooden Warriors – French (Napoleonic) Marine of the Imperial Guard

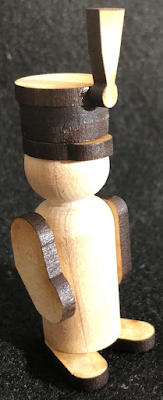
One only my Wooden Warriors blog I finally made two posts. The first was about how to use my laser cutter for something other than making paint racks and wooden bases; I decided to take a different approach to making Napoleonics shakos. I did a test and then painted up this French Marine of the Imperial Old Guard.


6mm Napoleonics Painted with Citadel Contrast Paint

Someone on one of the Facebook groups had asked about whether anyone had tried painting 6mm miniatures with Citadel Contrast Paint. As I had done some 15mm in the past, I decided to give it a go and report on the results. I decided to try a harder subject that the standard Space Marines or Space Elves; I went with Napoleonic-era Bavarian troops.

First a couple of notes. Firstly, 6mm closeups always look horrible; they just do. You really find out how shaky your hands are when you photograph 6mm troops. You can actually see details, flaws really, that you just don't see when you are looking at them about 1' away (or farther).

I started by priming the miniatures white with Pro-Acryl white primer. It is a nice, thin white that does not clog the detail, which is important with 6mm, especially if you are going to use Contrast Paints or Speedpaint. As there are older Baccus sculpts, they are very rough and thus will take these types of paints well.

Here is what they look like, fully painted. (I later took a little more white to the trousers and cross belts to make them more solid.)


Overall I was good with the results, but I really need to look at the results of figures that are more crisp. The older Baccus sculpts are very 'rough' and I was not keen on them. But I love the newer sculpts. Also, using the gray Contrast Paint as a replacement for metallic paint is not really a good idea, so I would change that and go back to a gunmetal color.

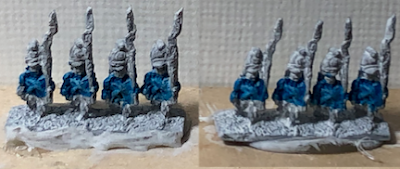
Next up are Xyston 15mm Later Achmaemenid Persians. I bought a ton of Xyston 15mm ancients when Brookhurst Hobbies had a clearance sale and I have had them heaped in a pile of shame every since. (Greek Hoplite and Thracians are two of the armies that I vowed I would have a large collection on, one day. They would practically all be Xyston miniatures too.)

I started off airbrushing on a Zenithal primer. I started with Pro-Acryl black and fully covered the miniature. Then I swapped in Pro-Acryl white primer without cleaning the pot, knowing that it would come out gray. I liberally covered the figures, leaving only the undersides untouched. Finally I drybrushed white on top to pick up the highlights. 


Next I started carefully laying down the contrast colors, doing white touchups for areas where a darker color was laid down over an area where a lighter color was intended.


Here are the final results. For the most part I had to use light, opaque highlights over the areas with Contrast Paints to remove the 'tide pools' and 'coffee stains'. The newer Contrast Paints that have less contrast, such as the bright yellow on the purple and yellow figures, as opposed to the yellow-brown on the other figures. The former did not require yellow highlights (I actually shaded with Shade Paints), while the latter definitely did.


Overall I think the older Contrast Paints are too 'brutal' for 15mm. It is better to go with a base color and use Shade Paint or a wash to collect in the recesses. If you want three colors go with a base color as a mid-tone, highlight with a lighter color (use more contrast between the base and the highlight than you would with 28mm figures), and then wash with a darker color. The tint from the wash will tone down the mid-tone and highlight, bringing down the contrast, and match well with the shadow color it gives the recesses. For me, Contrast Paints do not seem to be the solution for 15mm. It flows too well for the scale.


The last experiment came from watching a video by Bunker6. He paints a lot of Games Workshop Epic Warhammer 40,000 figures – roughly 6mm – and he puts a lot of detail into them. I decided to see if I still had my eye and hand (because if not, the unpainted 6mm were going to be on the chopping block).

I started with the new Imperial Fist Yellow Contrast Paint because: 1) these are meant to be Imperial Fists; 2) I don't have any other yellow that is that exact hue; and 3) these are supposed to be one of the new single pigment colors that cover well and are low contrast (which is ironic for a 'contrast paint'). First off, it does cover well and the flow characteristics are generally nice, but the smaller the scale the less you want your paints to flow. As this was my base coat for the model, and nothing was going to be a lighter color, I did not care that it flowed off of the areas where I put the brush. If anything, it ensured that I did not miss a spot.

Personally I think I put in a little too much detail, but nonetheless I went forward with the exercise because I wanted to see whether the effort was wasted or not. I already consider this picture too zoomed in for tabletop view, but not so close that it looks closer than bent arm's length (the range most people generally use when they pick up a stand to look at it). I can still see the attempt at details, like the grey behind the knees (rubber parts in the armor), the black stripe on the helmet, the red glowing eyes, and the black and silver bolt gun. I can also see one other detail that you probably don't see and that is only because I intentionally painted it: I painted a yellow highlight color and a yellow shade color. Is it worth it? Not sure. But I answered my question: I can still paint 6mm troops to an acceptable table standard with my eyes and hand.

A Note About Army Painter Speedpaint

My experiments with Army Painter Speedpaint has been disappointing. Largely because they are not really acrylic paints, but some form of 'resin' paint. Water causes them to reactivate, so adding acrylic highlights over them causes them to partially blend with the color being painted on while also popping the color off of the primer, exposing the white (or whatever the primer color was) below. Not a good effect because you cannot really control it. Dana Howl (YouTuber miniature painter) was the first that I saw that suggested the way to deal with this was to mix your acrylic paint with either Speedpaint Medium or another Speedpaint color, effectively turning it into a custom Speedpaint color. A lot of people must be doing this because Speedpaint Medium is very hard to find right now and where you can find it, it is double its normal price.

One thing I have found out for sure is to not mix Speedpaint with acrylic mediums like matte medium, glaze medium, metallic medium, etc. It makes it into a gloppy mess that spreads even worse than Speedpaint, that Flow Aid or water does not seem to fix.

At this point I see Speedpaint as an 'all or nothing' solution.

Sad News

More than 15 years ago, while still trying to build a gaming club in Sierra Vista, Arizona, I was searching The Miniatures Page for players who might be within driving range, but were to the east (i.e. we were closer than Tucson, Arizona) and thus underserved, gaming-wise. I found Marv and Betsy Schmid and despite them being five hours away (in Deming, New Mexico) they said that they would be happy to hop in their camper and come to Sierra Vista and teach us this game called De Bellis Antiquitatus (a.k.a. DBA). They had numerous armies and all the terrain we would need. It was a smashing success, such that many of us started collecting DBA armies. It also led to the discovery of HOTT, me creating American War of Independence version of DBA (DB-AWI 2008) and HOTT (HOTR 2009), and even a blog (now inactive) about my DBA games.

Over the years my wife Rita and I have alternated visiting with Marv and Betsy, us going to their house or they coming to ours. Gaming buddy Don and I once dropped by on the way to a DBA tournament in Albuquerque, New Mexico for inspiration and last minute tips. We even went to a state park with a lake together to swim, camp, and game.

Part of what I have been doing of late is re-connecting with people that I haven't spoken to during the lockdowns, especially those that are not in my immediate area. That has led to some great conversations with people across the country and around the world, but sometimes it leads to sad news. It took finding an old mobile phone, recharging it, and retrieving the phone number I failed to transfer over to my new phone to finally reconnect to Marv and Betsy, only to find out that Marv had died last May of brain cancer.

Needless to say, Betsy is still trying to cope with the loss, but Marv had a large wargaming collection and she was trying to get a hold of me in hopes that I would take it off her hands. Right when I am trying to downsize my own collection… So, right after I retire next month I am going to head to Deming to inventory his collection, see what I think I can "move to a good home", i.e. what is sellable, and work with her on managing the sale of his collection. Hopefully I can sell things off on Facebook, The Miniatures Page, Fanaticus, and eBay and send her checks periodically. I know it will be a lot of work, but it is a bit of repayment to a couple that showed us a part of this great, fragmented hobby that ended up being a big part of my wargaming experience (and this blog), plus it will show me how to reduce my own collection.

In a way this is something I have been considering, and although it is a bit morbid, it is something we need to consider. What will happen to your collection when you pass? Are you sure the kids will take it? Are you sure your friends will? Do they know they are going to be tagged to disposed of your collection? Is your wife expecting to recover some of the costs of your hobby? Does she know that you "invested" in a depreciating asset? Does she know who to contact about your collection? Does she know how to sell it? Does she know a reasonable price? (Do you? When was the last time you sold?)

I posted a message on a DBA forum on Facebook to try and get a sense of what the market for painted 15mm DBA armies is. Ten years ago I used to scour eBay, Fanaticus, and TMP for painted DBA armies and paid what I felt was a premium buying them. But I stopped playing DBA after 3.0 fragmented the player base. Like Flames of War 3rd and 4th Editions, I just couldn't get into the next edition, despite buying the new rules. I was done. And with that exit went my knowledge of how viable the market was.

Fortunately, it appears that the market is still good. Not only are people still playing DBA 2.2, 2.2+, and 3.0, there is a new derivative called Triumph, but it appears that Art de la Guerra (ADLG) using the standard DBA basing. So I feel better about taking on his DBA collection to sell for her. His WW II and Arab-Israeli micro armor, however, jet age Check Your 6 aircraft collection, however, are a different story. But just like the old joke about how to eat an elephant (one bite at a time), so to with how to move someone's lifelong collection. Enough whining!

Here's to you Marv. You will be missed.


Tuesday, December 11, 2018

One-Hour Skirmish Wargames Review – Part 2

This is a continuation of my test game of One-Hour Skirmish Wargames by John Lambshead and published by Pen and Sword Publishing. If you did not read Part 1, you might want to start there.

Turn 2

When we left off the British had inflicted three casualties on the French, who had inflicted two in return.
One note I should make is that I read the scenario wrong. It is the British that must get within 6" of the cannon at the end of the game, not the French. I wrote it correctly in the last post, but my brain did not register it correctly. Change of plans! Thank goodness I am playing this solo!
The French gain the initiative and get 8 Action Points (AP). The French infantry behind the rise continue to fire at the British line in the woods, while the main body of infantry head towards the British right flank in order to clear out the woods of enemy. The French cavalry retreats back to the woods, not wanting to be picked off by the rifles, and an infantryman moves to cover the mounted French Lieutenant.
If a target is behind an obstruction that is ½ its height (or more) line of sight is considered blocked. I have been playing that a model on foot qualifies as such a blocking obstruction. If not, Mounted Leaders would be bullet magnets. Further, in this mission a British Rifleman has infinite range and a bonus to shooting Mounted Leaders, so it seemed rather strange to make such a critical model so vulnerable. I wanted to allow an opportunity shot or two for this scenario, not make the Officer's demise a foregone conclusion.


The British also receive 8 AP. They use those points to fire with four line and two rifles, downing four of the French infantry that were foolish enough to run into the open.
What I am finding out is that you have a basic choice when receiving an 'average' number of AP: move a few figures multiple times; or move a lot of figures once each. So far, moving a lot of figures at once has not worked as they have been shot down. I suspect had the French been the second player, there would have been a possibility of being the first player in the next Action Phase, giving them a 'double move'.


The French again get initiative, but only gain 5 AP. The cavalry makes a double move and charges the closest British infantryman in order to make it harder for the British to bayonet the downed French. The Chasseur succeeds in cutting the infantryman down. Given that the British has the next action, will it be a sacrifice?


The British get 7 AP and they make the cavalryman pay. One soldier shoots the cavalryman (making then 'downed') while another advances and bayonets them.
By the way, I do not consider a 'downed' model to be literally on the ground (although they may be). For example downed cavalry might be the rider trying to bring a rearing or wounded horse under control, making them easier to defeat in close combat. Basically I see this as a decisive combat mechanism that requires you provide at least two models cooperating against a single model. The first model shoots them successfully, getting a downed result, with the second coming in and finishing the task.
As the threat in front of the British has largely been neutralized – at least for the remainder of the turn – the Line Sergeant makes a move towards the cannon, but does not have enough AP to get there.


With the Joker drawn the turn ends.

The British have three casualties, a 3 motivation, so they pass morale automatically. (The British will draw a minimum of an Ace (1), add your Motivation score (3), and have to exceed the number of casualties (3) that you have. So the British automatically pass. You should still draw the cards, however, as it might affect Casualty Resolution later.)

The French have four casualties, a 2 motivation, so they need to draw a 3 or higher. Because they have a Leader with a Leadership (2) skill, they get three cards, discarding the lowest two. They easily pass.

After casualty resolution, two of the French infantry were determined to be dead, while two have recovered.


Turn 3

The British win initiative this time, effectively giving them a double move. I must say that so far, the British have generally had more AP to spend and more double moves.

The British receive 9 AP. The Line Sergeant finishes his move to the cannon and fires at one of the French in the open, as do other line soldiers. Finally one of the line moves twice, bayonetting the downed French soldiers, ending the threat to the woods.


With 8 casualties and the British in possession of the cannon, things are starting to look desperate for the French. Worse, the French draw 1 AP. The soldier behind the rise downs the British infantryman that bayonetted the French soldiers.


The French get the initiative, giving them a double move, but draw a miserable 2 AP! The soldier behind the rise fires at the Sergeant taking cover at the cannon and downs him. Meanwhile the soldier by the road advances on the cannon in an attempt to bayonet the Sergeant before the end of the turn.


There appears to be a lull in the action as the British also draw 2 AP for the Action Phase. The soldier at the edge of the woods succeeds in downing the advancing Frenchman, stopping the threat to the downed British Sergeant.


The French again get the initiative, getting 10 AP. This allows for a bold move by the French cavalryman by the road. He charges the downed British Sergeant and cuts him down. Noting that he is within 12" range of the Rifles Sergeant, he decides to take a potshot at him, despite him being in cover. He must have caught the Rifles Sergeant unawares as he downed him with a single shot!

The French soldier guarding the mounted French Lieutenant decides to take the opportunity to charge the downed British, bayonetting him, and then firing his musket at the British soldier hiding behind the tree. (A Joker comes out and the turn ends making him automatically miss.)
Although I knew that I could move and fire with a figure, if I spent the two points, initially I did not take advantage of that combination, to my detriment. You see a lot more figures on both sides starting to move an fire. I don't really have a problem with that in a Napoleonic skirmish game, but it feels a little too much like modern maneuver warfare.


The French have 8 casualties, a motivation of 2, so they need a 7 or better. They still have their Lieutenant so they draw three cards and pass the morale check.

The British have 5 casualties, a motivation of 3, so they need a 3 or better. They have lost one leader and the other is downed, so they will only draw one card. They still pass their morale check, however.

Casualties are resolved and it appears that the Rifle Sergeant was indeed dead from that lucky Chasseur's shot. So the British have now lost both of their leaders. One of the French soldiers also proved to be out of the fight.
Although I use terms like 'dead', 'killed', 'bayonetted', etc. I am just using those terms for color. The figures are really all just out of the fight for the rest of the scenario. If you are playing a campaign game all figures that were casualties at the end of the game would have a card drawn for them, just like for Casualty Resolution. Red is Dead and Black is Back, so it really takes two red cards to kill a figure or take it out of the campaign.


Turn 4

The French have been maintaining their casualty spread – about 50% more than the British – but they have a Leadership advantage. Although the card they must draw is higher in value than the British, they draw three cards to the British one due to their leaders still being in action.
So far I have kept the French leaders out of the fray in order to protect them. Leaders, however, not only draw additional cards during the end of turn morale check, they also draw extra cards when they are attacking or defending. So leaders are better fighters, but if you lose them, your whole force may rout from the loss.
The French get the initiative and receive 5 AP. The French Lieutenant advances forward, so I can use his combat on the following Action Phase. As he is mounted he is better in close combat, in addition to being better because he is a leader. For example, he would draw five cards in close combat when attacking (four when defending) compared to the one for an infantryman. When being shot at in the open, he draws three cards rather than one, making him harder to down.

Meanwhile the French infantry shoot at the British in the woods, downing one (who is subsequently bayonetted by an advancing French soldier), but missing the last one.

The French Chasseur, fresh from his victory over the Rifle Sergeant, charges the British line at the rear and cuts him down.


The British need to hold on as they are losing figures at a rapid rate. They draw 10 AP.

With the French Lieutenant exposed, the sniper moves twice to a new position where line of sight is not obscured by the rise. He raised his rifle, aims, shoots, and downs the Lieutenant. (Three cards firing versus three cards defending, so a 50-50 shot.)

The other remaining rifleman takes a shot at the Chasseur but misses. The last remaining Line soldier, seeing his position flanked by the charging Frenchman, moves back into cover before taking a potshot at him. (He also misses.)


The British gain initiative, giving them a double move. They draw 9 AP.

The sniper, seeing an opportunity, moves twice to the cannon, draws a bead on the French Sergeant, and drops him with a single shot. (Note that the sniper does not get a bonus for shooting leaders, just the French Officer. So this was another 50-50 shot.)

The second rifleman draws a careful aim against the Chasseur and also drops him with the shot. Finally, the Line soldier shoots and downs the French soldier, but runs out of AP so he cannot bayonet the downed foe. Three shots and three hits. That really hurt the French. They only have three models remaining that can act.


The French draw 6 AP. Both soldiers fire at the sniper and miss. The Joker is drawn, so the turn ends.


The French have 9 casualties, so they need an 8 or better. As both French leaders are downed, they have only one card. They draw a Queen and pass the morale check.

The British have 8 casualties, so they need a 6 or better. They draw the Ace of Clubs, the lowest valued card in the deck, and fail their morale! The British decide that this cannon is not worth the blood that has been shed and retreat, ending the game in a French victory.


The British that were taken out of action.


The French that were taken out of action.

Initial Thoughts

I obviously changed the way I played as I got a better feel for the rules. All of the play after Turn 1 was done in about an 90 minutes, but that includes taking notes, picture taking, and the actual gameplay itself. It really felt like the action was moving very fast. Also, I did not have the rules at my side with this session, so once you get the hang of it, you really do not need the rules any more. The odds of success are basically I have X number of cards, you have Y number of cards, whoever draws the highest card wins. Determining how many cards you draw is easily memorized.
Ironically there is one strange rule (to me): determining who has the highest card when you draw the same card value, but with different suits. The author uses the card suit ranking system from bridge, which I have never played, and indicated the best way to remember the order is some little mnemonic that I could not remember. Rather than fetching the rules I went to Wikipedia to determine the suit ranking and they had a much more memorable method for remembering: the suits are ranked in alphabetical order, ascending. So Clubs is lower than Diamonds (C comes before D), then it is Hearts, and finally Spades. His little was something about Super Heroes Do C...? Hell if I remember.
The rules are dead simple. The play is very fast once you get the hang of the mechanics. It makes for a good game where you want to throw figures on the table along with some terrain and get to playing quickly. One hour? Not sure about that, but that is okay. It matches the concept even if it runs over the time.

Rules Ratings

Using the review system from before, here are the game ratings for One-Hour Skirmish Wargames (OHSW).

Drama – do the rules create tension during play?

For the most part, combat actions have a 50-50 success rate. Many times both sides were drawing one card in the attack and two cards in defense, but because both sides had the same odds, it largely felt even. In either case, fortunes could swing wildly from phase to phase.

One element that supported that drama was close combat being so decisive. Losing meant you were out of action, rather than merely downed, and if you were downed when attacked, you automatically lost. This led to lots of action around downed figures. Maybe as I play it more and understand the risks better, the drama will reduce, but there were several time where I had 50-50 shots and got four hits in a row. That can decimate a force's ability to act in a heartbeat.

These rules rate 3 out of 5 in Drama.

Uncertainty – are there enough elements that introduce uncertainty into the game?

The three primary mechanics that create uncertainty are: will I act first or second; how many AP will I receive; and when will the turn end. This last element, when will the turn end, could cause the turn to end rather quickly, generally not impacting you in terms of accomplishing something that turn, but very probably ruining your chances at winning the scenario. If you are not playing a time-restricted scenario, this element will probably not produce much tension.

The order of acting being randomized allows you to gamble with your actions when you are second player. If you get first player next action phase and get a sufficient number of action points, you will likely look like a tactical genius. As for the opposite occurring, well it was a great plan but the cards were against you.

These rules rate 4 out of 5 in Uncertainty.

Engaging – do the rules allow the player to make meaningful decisions that lead to consequences?

Moving out of cover into the open definitely changes your odds. The basic combat is the attacker shooting with one card. A defender would have two cards in light cover and three cards in hard cover, Not impossible to overcome, but still not in the attacker's favor. Move out into the open and suddenly you defend with one card, a 50-50 shot.

I see spending AP like managing a hand of cards in a Command & Colors game. You need to be patient and take no rash actions until you build your hand. With OHSW you need to turtle when you draw low AP and make the bold moves when you have high AP, especially when you are second player.

These rules rate 4 out of 5 in Engaging.

Unobtrusiveness – do the rules get in the way?

No. Obtrusive have lots of exceptions for special cases. These rules have few such special cases to worry about.

These rules rate 5 out of 5 in Unobtrusiveness.

Heads Up – are the rules playable without frequent reference to a quick reference sheet?

Basically you need to memorize the stats for your troops at the beginning of the game, but given that most figures are the same, this is not really an issue. Stats may change as you switch from period to period, but within the period being played, pretty much everyone is the same, save for a few key figures.

The majority of my test game was played without the rules being nearby. Once you get the hang of the rules, you will only access them to refresh on stats before you start a new game.

These rules rate 5 out of 5 in Heads Up.

Appropriately Flavored – do the rules 'feel' like they represent the period or genre being played?

If anything, this is where the rules 'fail'. Yes, there are differences between weapon systems, even within a period. For example, in the Napoleonics test game the Rifles were infinite range, the Muskets an 18" range, the Carbines a 12" range (if the cavalry was firing while mounted, otherwise it was the same range as a Musket), and the Pistols 6". Everything was one shot per Fire action. Compare that to a single-shot breechloader in the Colonial period, where it has an infinite range and a single shot. The issue is not the range, but: a) the weapons are equally accurate; and b) the firing rate – every action phase – is the same.

Only time, and playing other periods, will tell if these have the right flavor. Right now, it feels really good for Age of Machine and onwards. It felt funny for Napoleonics.

These rules rate 2 out of 5 in Appropriately Flavored.

Scalable – can the rules be scaled up or down – in terms of figures or number of units played – from a 'normal' game?

Although the number of figures may vary from scenario to scenario, that really does not address scaling. The two primary mechanisms for 'how much can I do' are determining action points and determining when the turn ends. There is no scaling mechanism based on any factor, much less the number of models you are using. If you use a small number of models per side you will find that a higher percentage of models will get used in a game compared to when you use more models. Activity tends to cluster around a few models making aggressive moves. This system is designed to limit the number of points a single model can spend, so high AP draws will tend to allow figures on the periphery of combat to act, When you have the same number of points but more models, the periphery of combat will expand, so I suspect larger games will feel like more figures standing around doing nothing. But hey, you got the figures on the table!

These rules rate 2 out of 5 in Scalable.

Lacks Fiddly Geometry – do the rules require fiddly measurements or angles?

Anything with freeform movement will result in games in which you are 'just out'. Infantry moves 6" per move action and cavalry moves 9". Being forced to pay for a second move because you are 'just out' is actually very costly as second moves take more action points than first moves. This game would benefit from a grid. (Note that I say that with all games.)

The other aspect of the game that is fiddly is determining cover. Part of this may be that I do not like area terrain for a low scale skirmish game. Trees should not move around on a piece of felt and be 'just wherever' at this scale; they are immovable trees. So because I played that way I was basically eyeballing line of sight, which I find fiddly. Playing solo. this does not bother me, but I would never play it this way competitively.

These rules rate 3 out of 5 in Fiddly Geometry.

Tournament Tight™ Rules – are the rules clear and comprehensive, or do the players need to 'fill in the blanks'?

Let me start by saying that my preference is towards tighter rules, where everything is spelled out clearly by the author, not looser rules where the author leaves certain mechanics up to the individual players, gentlemen's agreements, and a roll of the die where agreements cannot be found. So a high value means 'tight' and a low value means 'loose'. If you like looser rules, subtract my rating from '6' and that would probably be your rating!

Although the author defines the different periods and weapon systems pretty sharply, he clearly intends that players develop their own modifications to suit their taste. Clearly a set of rules that covers from Muskets to Laser Rifles is not going to lock everything conceivable down.

That said, there is one area that they left wide open and clearly state they intend the players to work out before starting a game: terrain effects. They give you some basic game effect that you can apply to terrain, but leave it to you to determine which ones are in effect by talking it over with your opponent when going over the scenario. This is very much like Flames of War version 2 was. Effects described, suggestions made, few hard and fast rules.

Only one situation came up where they do not resolve it in the rules. Because there are two Jokers in each deck, and the turn ends after the first Joker is drawn, it is very possible that a Joker will be drawn while checking morale or resolving casualties. The rules state that a card's value is from 1 (Ace) to 13 (King), but if a Joker is drawn it is undetermined. (I ruled that it counts as a 0.)

Many decks have a Red Joker and a Black Joker, so if you draw one during casualty resolution, just use the color of the Joker to determine Dead or Back.

I think the lack of hard terrain definitions is significant, hence scoring this factor as average. Otherwise I cannot think of any ambiguity during play. Then again, that is pretty typical of solo play.

These rules rate 3 out of 5 in Tournament Tight™ Rules.

Solo Suitability – do the rules have elements conducive to solo play?

There are no hidden elements to the game so that alone usually grants the rules high solitaire suitability. Having a mechanism to randomize which units act next is usually an element that solo gamers inject into other rules, sometimes with disastrous results. So having that mechanism built in and accounted for is just icing on the cake. Because it does not have a mechanism for which figure acts, it is not given a perfect rating.

These rules rate 4 out of 5 in Solo Suitability.

Component Quality – are the components provided made with quality?

This is a new rating, meant primarily for board games and books, which addresses the quality of the physical components.

These rules only come printed. This is a paperback book with quality binding. However, it is not a lay-flat binding. Given the thinness of the book (just over 100 pages) it is capable of having a lay-flat binding. The quality of the paper and the legibility of the type screams quality. At $23, I think this book is a good value. I wish it had more scenario material, but I am happy with my purchase.

These rules rate 4 out of 5 in Component Quality.

Summary

There is much of this book that I did not cover – such as the scenarios for the other periods, the differences between periods, the points system (it is a little lightweight), and the notes on running campaigns (again, pretty lightweight) – for the most part I review rules, not books. These rules are very accessible, in my opinion clear and understandable (moreso when you break out the figures and try them), will possibly lead to disputes about terrain and 'just out' cases, and can provide a decisive game in a reasonable amount of time.

Will everyone like these rules? No! Every rules author must decide where to add detail and where to abstract them away and players will not always agree on where that line should be drawn. If you think that there is "no way" you could play a set of rules that don't have modifiers to your probability to hit based on range or a myriad of other circumstances, you probably won't like OHSW. If you think there is "no way" you could play a set of rules that don't care about facing, then you probably hate board games and probably won't like OHSW also.

If you like Neil Thomas and wish he had come up with skirmish rules closer to his later design principles – after Wargaming, An Introduction but before One-Hour Wargames you will probably not like these rules. Neil Thomas liked tables and modifiers in that design period and these have none. If you like the raw simplicity of One-Hour Wargames and were always tempted to tweak them (or did), it is very possible that you will like these rules. This is probably why Pen and Sword decided to brand these under the One-Hour label.

Recommended.

Postscript

Even though I think this feels better for Age of Machine and later skirmishes, I cannot understand why the author felt this system should focus on the Age of Firearms. I think they would do well for ancient and medieval skirmishing too.

Blog Archive

Blog and Forum Pages

Popular Posts

Followers

About Me

My photo
Huachuca City, Arizona, United States
I am 58 yrs old now. I bought a house in Huachuca City, AZ working for a software company for the last three years. To while away the hours I like to wargame -- with wooden, lead, and sometimes paper miniatures -- usually solo. Although I am a 'rules junkie', I almost always use rules of my own (I like to build upon others' ideas, but it seems like there is always something "missing" or "wrong").