Map Campaign
This is the continuing saga of my solo map campaign, using The Solo Wargaming Guide (TSWG) for the campaign rules and Neil Thomas' One-Hour Wargames (OHW) for the tactical rules. If you missed it, here are part one, part two, and part three. So far I have fought the First Battle of Firnskuppe and the Second Battle of Firnskuppe. Much of this was inspired by the campaigns of Mr. Wargaming on The Joy of Wargaming Youtube channel. The goal of this campaign was to create a series of linked battles where each battle has some context and is not just a random, disconnected scenario. I wanted to produce some interesting scenarios, especially unbalanced affairs that you might never normally play in a face-to-face game. (So far, it has done that, but I am just getting started.)
The Action So Far
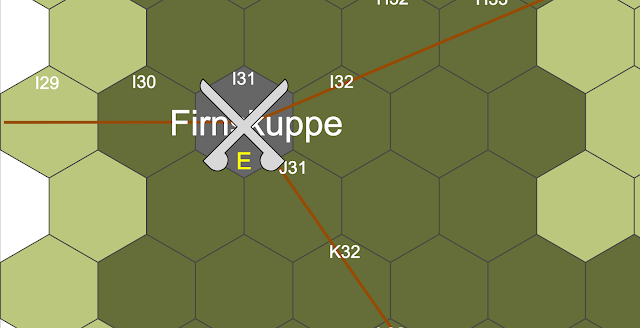
The Westonians launched a surprise attack, declaring war on the Eastonians five days after they had already started mustering their troops for a war. Because of this the initial action has been between the vanguard of the Westonian Northern Army and the frontier defense forces of a few towns in the line of attack, centered around the Eastonian village of Firnskuppe. Firnskuppe has been temporarily lost to the Westonians, but the Eastonians are mustering their Northern Army to take it back before the bulk of the enemy army arrives.
Meanwhile on the Southern flank, the Westonian Southern Army has started marching on the Eastonian town of Tierwelt. Unknown to them, Eastonian frontier forces are waiting for them in the extensive forest lying between the two countries. That engagement is the subject of today's post.
The Forest Battle
One of the other goals of this campaign is to use some of the various game accessories that I have collected over time and gauge how useful they really are. In the First Battle of Firnskuppe I used a (now out-of-print) deck of cards called Kings of War Battlefield Cards. This provided me with objectives and stratagems for each side and conditions for the battlefield. The Second Battle of Firnskuppe allowed me to experiment with Warcry Battleplan Cards. This provided me with a deployment plan for each side, victory conditions, and a twist to the battle. One might say that there is some overlap between the two, but I think it would be very possible to combine both in a game. Something to ponder.
Today, however, I want to explore another resource and that is something that more people praise OHW for than the rules: the scenarios. A lot more people play the OHW scenarios than do those that play the rules. The OHW scenarios cover a variety of issues, so why not list out the one sentence summary of each – ambush, flank attack, meeting engagement, etc. – and use that for picking a scenario. But how do you figure out which scenario to pick?
In 2006 I 'discovered' a set of rules called Mythic Role Playing (and the stripped down version Mythic Game Master Emulator). Here is a quick explanation of Mythic:
Mythic Game Master Emulator
Create dynamic role-playing adventures without preparation. For use as a supplement with other systems.
Mythic Role-Playing brought true, solo play to the world of tabletop role-playing in 2003, kicking off a solo revolution that continues today. The blue book Mythic Game Master Emulator contains the ground-breaking solo emulation rules from the Mythic red book, giving you everything you need to play any RPG system without a Gamemaster.
Mythic adventures are meant to be played off the cuff, with perhaps a few minutes of brainstorming to come up with the initial setup. Through a Yes/No oracle system, Mythic guides you through your adventure as you test your expectations. A Random Event mechanic throws narrative curve balls at you, and the Chaos Factor keeps tilting the story throughout your adventure to change up the pace.
So the basic idea is to ask a series of Yes/No questions – generally the ones you consider having the highest probability of occurrence first – and use die rolls to determine what the answer is. Using these answers you have critical decisions made about the 'story', in this case the scenario. I used Mythic for gaming solo with miniatures some time ago and it worked well.
Scenario Generation
For this battle I had it in my mind that the Eastonians, as they are much faster (Light Cavalry), and a smaller force, that they have some chance of scouting out the Westonians. Using Mythic I asked a series of questions to drive me towards a scenario.
- Have the Eastonians out-scouted the Westonians, i.e. spotted them first? Yes.
- Have the Eastonians detected the enemy without being detected? Exceptional Yes.
- Have the Eastonians been able to get into an ambush position? Yes.
- Have the Eastonians been able to get into a position where they can disrupt the Westonian supply line? Yes.
This gives me an idea of what the scenario should be like. Because the Eastonians can ambush the Westonians they will be allowed to start any place on the board, save a few locations. Further, they will be given the opportunity to achieve an objective that will allow them to disrupt the supply lines of the advancing Westonian army. Let's take a look at the board first.
Terrain Generation
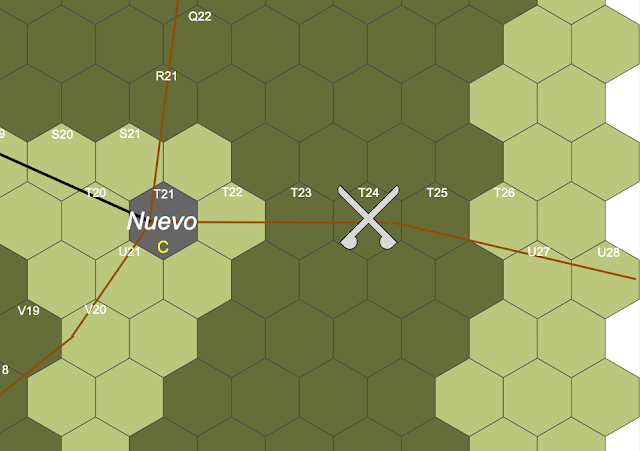
The battle is taking place in the middle of an extensive forest with a poor road cutting through it. This road runs from a C class town in Westonia (Nuevo) to a C class town in Eastonia (Tierwelt). Imagine a road cutting through the North American wilderness in the 1750s from a British frontier town to a French frontier town and you have a pretty good idea of what I was envisioning.
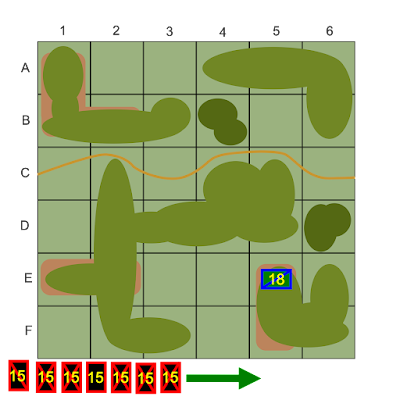
Because the hex was forest with road, and all surrounding hexes were the same, or just forest without a road, I decided to use the same card system for terrain generation, but with some changes. Draw one playing card for each square of the grid (there are six rows of six columns, so 36 cells) and there would be a 50% chance (any Red card) of the square containing light woods, a 25% chance (Spades) of being clear of terrain, and a 25% chance (Clubs) of having special terrain. If special terrain was indicated draw another card and that indicated if it were light wooded hills (the second card being Red) or a heavy woods (the second card being Black). Once you have determined the terrain for each square, draw a road in a logical place from West (left) to East. Here was the board generated.
Battle Plans
The Westonians have two basic battle plans that I can see.
- Push through as quickly as possible, trying to exit off of the East side of the board. (50%)
- Exploit the gaps in the woods (C1, C3, C6, and D1) to deploy troops and destroy the Westonians. (50%)
The Westonians will use battle plan #2.
The Eastonians have two basic battle plans.
- Ignore the minor victory objective (moving troops off of the board) and fight as hard as possible in inflicting damage on the ambushed troops. (50%)
- Attempt to obtain a minor victory. (50%)
- Attempt to get just the small Mounted Skirmisher unit off of the West road. (50%)
- Attempt to get both units off of the West road. (50%)
The Eastonians will use battle plan #1.
Deployment
The Westonians will enter the board at C1 and are trying to get off the board at C6. That said, there is no requirement for the Westonians to exit the board during the battle. As the Eastonians can ambush the enemy they are not allowed to setup in rows B, C, or D, but can set up in any column in rows A, E, and F.
The Westonians will be marching on the board (BG Don NoSeLasTraga prefers to put his Cavalry in the rearguard, not the vanguard). Their forces are unaware of the Eastonian presence, so they must advance down the road at one square per turn until at least one Eastonian unit reveals itself.
Artillery, Infantry and Cavalry on roads may move through woods squares, but because they cannot deploy into that terrain, they are limited in what they can while in those squares. Infantry may only fire from squares that are clear of woods terrain (light or heavy). Cavalry may only charge from squares clear of terrain if the target of the charge is also in clear terrain, and all squares moved through are clear terrain. Artillery may fire from clear terrain to any other square as long as they have line of sight from the center of their square to the center of the target square. Artillery may always fire on an adjacent square that they are facing, even if they are on a road going through the woods.
Deployment for the Westonians is a march column, with three Infantry units in the lead, followed by the Artillery, followed by two Infantry, and the Cavalry unit bringing up the rear. The first Westonian unit will enter C1 on turn 1.
The only stipulation to Eastonian deployment is that they not be deployed in rows B, C, or D (red striped area) and that it not be a square visible from C1. Once the Westonians take their first turn, however, the Eastonians may move to any square.
Because of the Eastonian battle plan, all three light cavalry companies have decided to form into a single, over strength unit.
Conditions, Stratagems, Minor Objectives, and a Twist
For this game I am mainly relying upon the scenario to determine victory. The Westonians win by being able to exit the East (right) side of the board (via the road). The Eastonians win by preventing that.
However, the Eastonians can obtain a minor victory by exiting a unit off of the West side of the board (via the road) before all of the Westonian units exit off of the East side (or are destroyed). If the Eastonians obtain this minor victory not only will the Westonians be forced to spend one day regrouping after the ambush (if there are any casualties), but they will require one additional day chasing down the Eastonians, driving them back down the road Eastward as the Eastonians will be disrupting their communication and supply lines.
Previously I experimented with the Kings of War Battlefield Cards, but also the Warcry Battleplan Cards. This game I will use both.
Because the Condition cards are so powerful, I decide that there is only 25% chance of there being a Condition (drawing a Heart from a card deck). There wasn't.
The Stratagem cards drawn were Sudden Faith for Westonia, and Advanced Scouting for Eastonia. Sudden Faith allows one unit to get a die roll modifier to a Nerve test. See the Thoughts on Changes to One-Hour Wargames (below) on how this might be incorporated. Advanced Scouting only applies to normal games in which troops deploy forces. As this game has specialized deployment rules as it is, this simply means that the Eastonian troops are hidden and their location is indicated on a map until they are revealed. (Not much of an advantage in a solo game!)
The Objective cards for both sides were appropriate only for games in which both sides are attempting to command the field of battle. As this scenario does not fit that model, they are ignored.
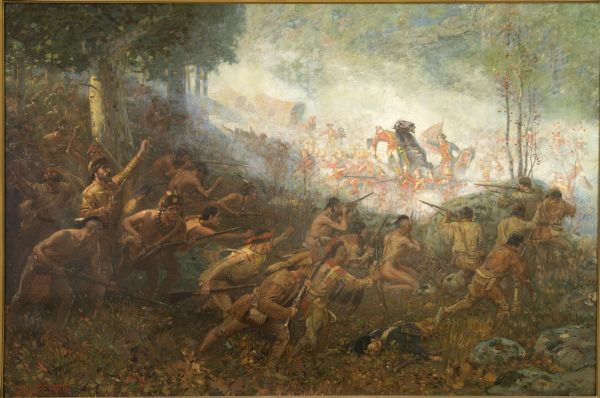
The Twist card is Battle Frenzy. The description is as follows: "A killing madness has enveloped the combatants, and they hack and hew at one another in a frenzy of blades and blood." This is an interesting card for two reasons: 1) I was considering whether the Westonians should be allowed to become desperate given that they cannot fire when jammed in march column in the woods; and 2) when I started developing this scenario – an ambush in the wilderness on a poor road – I immediately envisioned the painting of Braddock's Defeat.
Also, Bushy Run comes to mind but in that story the Highlander's desperate charge lead the British to victory.
Because I drew this card, I need to allow the Infantry a chance to fight their way out, despite the Horse & Musket rules for OHW forbidding it. Because of the Battle Frenzy card, I will allow all units (except Artillery) to charge into close combat with the following modifications:
- Cavalry charging units in the open do so using the procedure indicated in the main rules.
- Infantry may charge the enemy in the open or light woods, but do so inflicting D6 - 2 hits. If the enemy unit are Skirmishers or Mounted Skirmishers, they will retreat one square to their rear, otherwise the attacking Infantry must retreat if they did not destroy the enemy unit. If the enemy retreats or is destroyed, the Infantry take the square.
- Cavalry may not charge the enemy in light or heavy woods.
- Skirmishers may charge the enemy in any terrain other than impassable terrain. Mounted Skirmishers may charge the enemy in any terrain other than impassable or heavy woods terrain. Both unit types inflict D6 hits, but must retreat if they did not destroy the enemy unit.
- Skirmishers and Mounted Skirmishers do not get half casualties in close combat, although Cavalry continues to get that benefit.
All the scenario modifiers are done, so now it is time to play the battle. But first…
Thoughts on Changes to One-Hour Wargames
I have been trawling through the various blogs and forums of late, looking at how others have been tweaking OHW. Although I have previously stated my desire not to do that, I have committed probably one of the larger tweaks out there: converting this freeform movement game to a 6", one unit per square, grid-based game.
So what are some of the things I have seen out there?
Skirmishers
I noticed that MarkusB of the Wargamer's Block blog has been putting out a number of OHW-related posts. His post on changes he would make to OHW combat has a lengthy bit on Skirmishers. The three major changes he suggests are: 1) enemy units fired upon by Skirmishers cannot reduce their hits due to cover; 2) fire from Infantry and Artillery are halved; and close combat hits from Cavalry are doubled.
The shift in the power dynamic between Infantry and Skirmishers would definitely shift. Currently, Skirmishers in the open firing at Infantry in a town inflict D6-2 hits, halved (rounding up). The return fire from the Infantry is D6. So this is an average of 1 hit per turn versus 3.5 hits per turn. Under MarkusB's proposal it would be 1.67 hits per turn versus 2 hits per turn.
Note that Skirmishers shooting at one another are D6-2, not D6-2 halved.
Hussars, Cossacks, Chasseurs a Cheval, etc.
I all honesty, no one else is talking about this; it is me. These are basically alternate names for Mounted Skirmishers. Mounted Skirmishers move 12" (maybe it should be 15"), can move through most of the terrain that Skirmishers can move through, and can fire (d6-2).
In light of the Skirmisher changes proposed by MarkusB, which of those should be carried over to Mounted Skirmishers?
First, I do not see Mounted Skirmishers as Sharpshooters, which is the justification behind Skirmisher fire negating cover benefits.
I do see their dispersed formation and lower unit size as justification to grant them half casualties from Infantry and Artillery fire.
The biggest question I have always had is whether Mounted Skirmishers should have any capability to enter close combat. I cannot see them being allowed to charge Infantry or Cavalry, but what about Artillery, Skirmishers, and other Mounted Skirmishers? My inclination to the latter question is "yes". I could see giving them D6 in close combat, but not halved casualties against hits caused by Cavalry (or Mounted Skirmishers).
Activation Tests
This is one I have seen mentioned in Facebook groups and is often also called a morale test. The most common version I have read is to force a unit to roll dice each turn to determine whether it acts or not, whether than be moving or firing. I have read about both rolling against hits and against remaining hits. Given that I use understrength units in my games, I like the idea of rolling against remaining hits.
An example system might be to roll 3D6 each turn and if the roll is equal to or lower than the remaining number of hits in the unit, the unit can act this turn, otherwise it cannot. Note that in this system a roll of 16, 17, or 18 would mean that a fully strength unit could not act, satisfying those players that want that 'combat friction/fog of war/chaos factor' in their game. Also note that a unit with only 1 or 2 remaining hits would never be able to act. For those that believe a unit is perfectly functional, even with a few casualties, you could use 2D6, meaning your unit is immune from effects if it has 13 or more hits remaining. You could also go to a 1D12 or 1D20, so a unit would never not be able to act (if it rolled lucky enough).
Rolling against hits, rather than remaining hits, can get a bit tricker if you use units with hit values other than 15 as then you would need to track the number of hits lost and the number of hits remaining. Logically, you would also be saying that a unit that started at, say, 12 hits has the same morale as a unit starting at 15 hits. I personally think that as units get smaller in relation to other units, their morale tends to go down too.
Resolving Combat
There have been several proposals to changing the combat system while not messing with the odds that Neil Thomas uses. The first one I saw was Kaptain Kobold's Five Hits System.
Units roll one, two or three dice when firing, corresponding to 1D6-2, 1D6 and 1D6+2. Each score of 4 or more is a hit. Units can take 5 hits.
Then came John Acar's Three Hits and Six Hits Systems.
Six Hits System: We can have each die hit on a 3+ instead of a 4+. Each unit will take 6 hits. With this you can match more closely the hit rates of the original rules. Thus 1D6 (.67) will take 9 hits to kill a unit. 2D6 (1.33) will take 5 turns to kill a unit. 3D6 (2) will take 3 turns to kill a unit. You can simply double or halve damage as necessary. Round fractions up as per the rules. It occurred to me that instead of halving the damage you could simply change the hit number to 5+ for half damage. Double damage becomes more problematic though. You are still doubling numbers…which is fine but perhaps slightly cumbersome. If you like this system, you can simply use a single D6 per unit to track damage and still apply the rest of the rules as is.
Three Hits System: So, a normal chance to hit is now 5+. Each unit can take 3 hits. So, 1D6 (.33) still kills a unit in 9 turns. 2D6 (.67) still kills a unit in 5 turns. 3D6 (1) kills a unit in 3 turns. Now for the cleanup. If the rules call for half damage, simply halve the probability to hit. So half damage is the same amount of dice but hits are on a 6 only. If the rules call for double damage, hits will occur on a 3+. With this system, you only need two kinds of colored markers. Yellow, for example, represents 1 hit and red represents 2 hits. The third hit removes the unit of course. This system will provide the greatest degree of uncertainty.
I am fairly certain I tried the Three Hits System, but I cannot find the battle report. As John points out, what these systems do is create more chaos and less certainty, which is another way of saying that the combat will be more luck-driven. By reducing the number of die rolls, each die roll becomes that much more critical. As it is there are not that many die rolls in OHW, so reducing them to even fewer seems like you are swapping … what? … for using fewer dice to mark your hits? (By the way, I now use dice to mark remaining hits, given units can start with more or less than the standard 15 hits.)
MarkusB suggested another method (Same Chaos Variant), which I have seen with other rules, but not seen suggested for OHW.
You’ll need four types of tokens, labelled “4”, “6”, “8” and “x2”. Every time you attack an unit, put a token corresponding to the maximum damage that attack could do. So an 1d6-2 attack on the flank would put a “4” token stacked with a “x2” token on the damaged unit. Every time you acquire a new token, tally the total of potential hits so far. Only if and when the total potential hits reach or surpass 15 (or the number of hits the unit has, for understrength and overstrength units), roll all of the dice corresponding to tokens. If those ‘actual’ rolled hits a total 15 or more, the unit is destroyed. If you roll a lower number, the unit is still fine – but it still keeps all the tokens it acquired so far.
I like this method as definitely increases the 'fog of war' by not defining precisely when a unit will break while at the same time not reducing the number of die rolls.
Changing the Turn Sequence
In the same post cited above MarkusB proposes changing the turn sequence from Movement → Firing → Close Combat → Unit Elimination to Firing → Movement → Close Combat → Unit Elimination. Essentially Movement and Firing switch positions in the sequence.
The complaint, and thus the justification for the change, is that you cannot coordinate actions between units with the current sequence. For example, you cannot fire with your Artillery or supporting Infantry while your Cavalry charges as the charge move will generally block line of fire to the enemy unit, or you may have ruled that a unit cannot fire on an enemy unit in close combat.
By conducting fire first, units will have clear line of fire as charging units will not have moved yet, so it allows for units to double up on the enemy, which is pretty powerful. The following images show the difference. The left image shows that, because the Cavalry moves first, the Artillery's fire will be blocked. The right image reverses the order in the turn sequence, so the Artillery will be able to fire before Cavalry can move.
The net effect of this, of course, is that it allows units to double up on the enemy. So is this a good thing or a bad thing? Also, is it a realistic thing?
One of the complaints agains OHW is whether or not each period feels different from the next. I think it does, but do wonder whether sub-periods within the larger period have enough feel. For example, the Seven Year's War and the Napoleonic Wars both fall within the Horse & Musket period, but should their battles feel the same? Obviously I don't think so as I wrote my own AWI Variant for OHW.
If you look at other game designs, such as Richard Borg's Command & Colors (CC) series, the big difference you will see between Command & Colors: Napoleonics (CCN) and Command & Colors: Tricorne (CCT) is the use of a Combined Arms mechanic that the former has, but the latter does not.
The rules for CCN state that, for combined arms combat "When an ordered infantry or cavalry unit is about to attack an enemy unit in melee, one or more ordered artillery units may combine their battle dice with the attacking unit. A combined arms combat must be declared before any battle dice are rolled." Changing the turn sequence in OHW would allow that sort of tactic to be replicated.
Another tactic in CCN is to threaten an Infantry unit with a Cavalry unit, forcing it to make a decision on whether it should form square, and if it does, to hit the Infantry unit with Artillery or Infantry fire. Although this is harder to replicate in OHW – especially if you are not using the optional Square rules – it would be very hard in the current turn sequence unless you are approaching the enemy from two directions, i.e. going after different faces of the enemy unit.
For me, the question of whether this change should be made is centered around time. I used to think that if a unit moved and the other unit did not, then the moving unit should be penalized because it was not spending its full time shooting whereas the other unit was. Sort of a "volume of fire over time" concept. When you realized that many of these rules have turns representing anywhere from 30 minutes to one hour you can't rightly assume that the non-moving unit is actually firing the entire time. If you have ever played the fascinating, but exceedingly tedious Chef de Bataillon (CdB) by Scotty Bowden and Jim Getz you know that the idea of battles lasting hours could not have meant that troops were firing two-three rounds per minute for very long. You would run out of your 60 rounds in 20-30 minutes, not even one game turn. (In CbD, turns were much shorter, however, as they were trying to use realistic time and ground scales, hence the tedious nature of the game.)
So, is allowing a unit to fire effectively – represented by the full D6 of hits they inflict in a turn – and allow another unit to make a full move distance charge all in the same turn realistic? Probably, because much of combat is "hurry up and wait". Most games use non-charging rates of movement as units did not quick march all over the field constantly. There was a lot of wasted time reordering the troops, dressing the line, waiting for orders to be delivered by signal or messenger, etc.
A better way to think of combat is a lot of waiting with short bursts of furious action. By changing this turn sequence you would be implicitly saying that units can coordinate their actions in a single turn.
The question to my mind remains: at what point in time should this effect start to occur? Certainly by the time of the Napoleonic Wars, but not at the time of the American War of Independence, according to Richard Borg. That would split the Horse & Musket period and maybe that is what it needs. Maybe that is one more thing that the rules need to get a better period feel. (Squares are another. I do not allow troops before the Napoleonic Wars to form square. Certainly by the Rifle & Saber period, in Europe, they had stopped. In the Colonial wars it was less a "wall of steel" defensive formation against cavalry and more of a "stop from being surrounded" defensive formation against superior numbers.)
Changing the Range of Horse & Musket Firepower
Another suggestion by MarkusB is to change Infantry shooting range and firepower from 1D6 for 12" to 1D6+2 for 3" and 1D6-2 for 12", the idea being that their deadly firepower is really only at very short range, otherwise it is terrible.
I think if I wanted to simulate that I would grant Infantry the ability to go into close combat with Infantry, and consider that the short range firefight. You could also use the old Ancients and Medieval rules of units in close combat cannot move, accurately simulating the pinning effect of the inability to get unstuck when you are in a hot firefight. That would also grant you the 1D6+2 for that close combat roll. The one change would be that a unit turning to flank while 'contacted' by the enemy would not get to fire on the turn it moves. (If you get flanked and contacted by Infantry, you deserve what you get.)
Secondly, I don't think I would adopt 1D6-2 for normal shooting. If anything, I would probably drop the range to 6". But at this time I think that is too much of a change. I look forward to reading MarkusB's battle reports on how it went. (Hint, hint.)
Enfilade Fire
I've seen mention of enfilade fire before, essentially a unit firing down the length of a unit in march column or down the line (flank) of a deployed unit. Basically the effect is to increase the damage inflicted on the unit being enfiladed.
To me, the farther a unit is away, the less likely the enfilade fire will have must effect. Also, I only consider massed fire as gaining an advantage. If I were using the 'Infantry Firefight' rule above I would only allow it to count if attacking from a flank, i.e. the double effect of a flank attack in close combat would be called 'enfilading fire'.
For Artillery I would allow it better firepower if it could claim enfilade. I would allow enfilade if firing at: an Infantry unit is in square; an Infantry or Cavalry unit is on a road moving through terrain that it cannot normally move through, e.g. woods, marsh, etc.; and the flank face of an Infantry or Cavalry unit in terrain that it can normally move through, e.g. it is deployed into line. I will leave it to you – like Neil Thomas does – to determine exactly what angle it is a flank face or not. Oh, and what should the bonus be? I would grant Artillery 1D6, not 1D6-2 x2.
March Column
A march column essentially grants a unit the ability to move faster on the battlefield in exchange for being exceedingly more susceptible to damage by enemy fire and close combat. A unit commander generally will not risk entering into this formation unless they believe they are out of the dangers of combat, i.e. out of the line of sight or range of enemy attacks. That said, a unit commander will use that formation if they need to move faster on the battlefield, such as shifting a position behind their own lines.
As mentioned previously, a march column can be inferred is a unit is currently on a road moving through terrain that it normally cannot move through, such as Infantry or Cavalry moving through woods. You can either always consider moving Artillery to be in march column or not. (I tend towards not.)
One way to model the unit commander choosing to use march column is if the unit starts and ends their movement outside of 12" from all Infantry, Cavalry, Skirmisher, and Mounted Skirmisher units and outside of all line of sight or 48" (if in line of sight) of Artillery.
The benefit of a march column move is that it provides +6" (one square) of additional movement.
I'll Pause Here
I intended to include the battle report for The Ambush on the Forest Road here in this post, but decided that it is getting too lengthy. Look for the battle report (and the rule changes to OHW that I am going to experiment with) on my Solo Battles blog.
Painting Update: Marvel United
Our group continues to play Marvel United once a week. (Actually, I was able to sneak in an extra game as my wife and I went to a friend's house, and his wife seeing that my wife was playing, decided to learn the game too.) This continues to motivate me to paint more villains (red band on the base) for us to fight and more heroes (blue band on the base) for us to use, keeping the game fresh.
We start with Doctor Octopus for the Spiderverse and part of the Sinister Six expansion. He is destructive to the game's locations, which is an interesting twist for a villain. We have fought him several times on Easy Mode and always won. I had fun painting him, but this was the second attempt on painting the tentacles. I wanted to get a 'shiny metal' look without using metallic paints. (In fact, the only time I use metallic paints is on the base.)
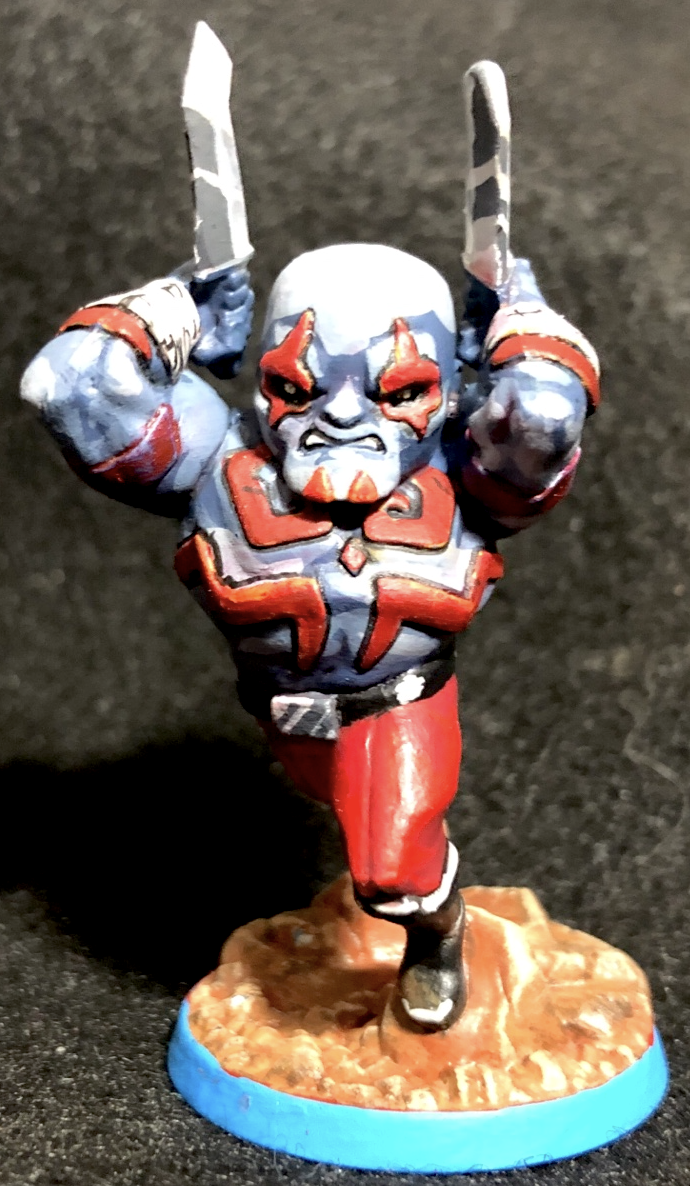
Next up is Drax the Destroyer from Guardians of the Galaxy. Interestingly, the skin color scheme for him was what you see, which is different from the green tint they used in the movie. I wasn't too happy with my painting efforts here, but he looks good on the table.
Next is Kraven the Hunter, also from the Spiderverse and one of the Sinister Six expansion. I just finished painting him, so we have not fought against him yet. Again, this color comes from the game; his hair was black in the comics.
Next up is Moon Knight. He was a request from one of the players. I need to clean up his cape a bit as the shadows look too ragged to my eye. I like how the moss turned out on the stone pillar he is standing on though.
Next is Sandman, from the Spiderverse and the Sinister Six expansion. The sand was contrast paint with dry brushing on top. I really like how he turned out. He is tough as an opponent as he gains health as the game goes on, but we still managed to beat him.
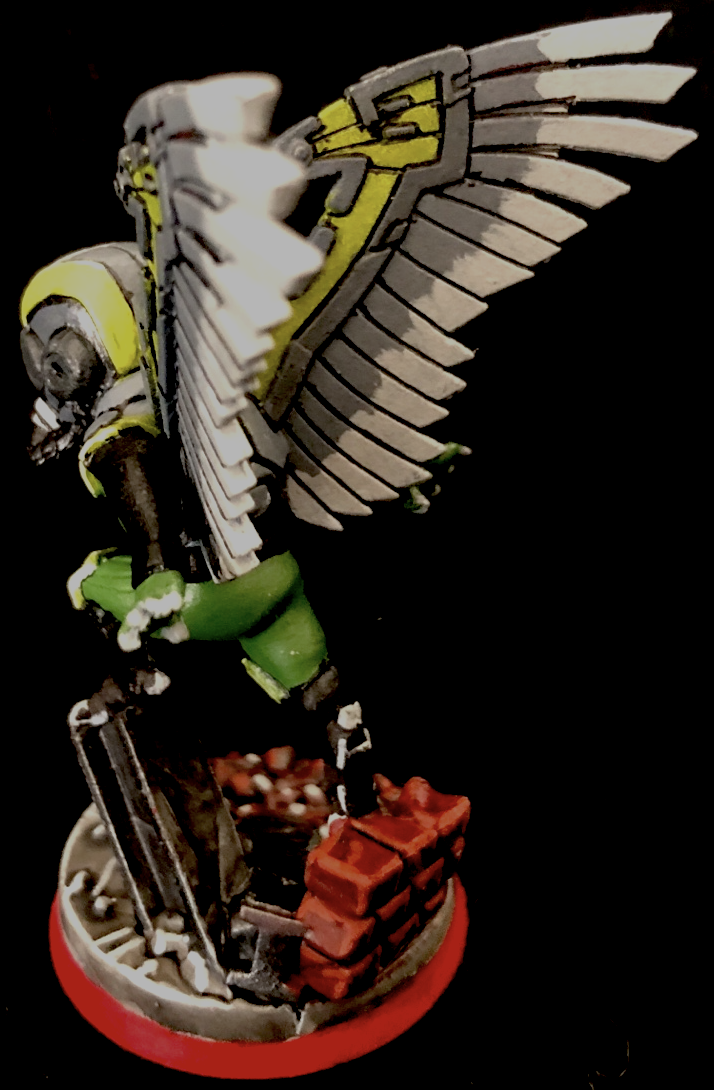
Next is the Vulture, from the Spiderverse and the Sinister Six expansion. He is obviously the new 'model' as the one when I was a kid (in the 1960s) was an old, bald-headed guy in a green suit that eventually got cancer. In Marvel United he is, for some reason, exceedingly tough. You cannot go after him with just any team of heroes as you will lose horribly, as we did four times in a row. He has yet to be beaten. (I need to paint some more heroes in order to have the right combination of movement and healing to defeat him.)
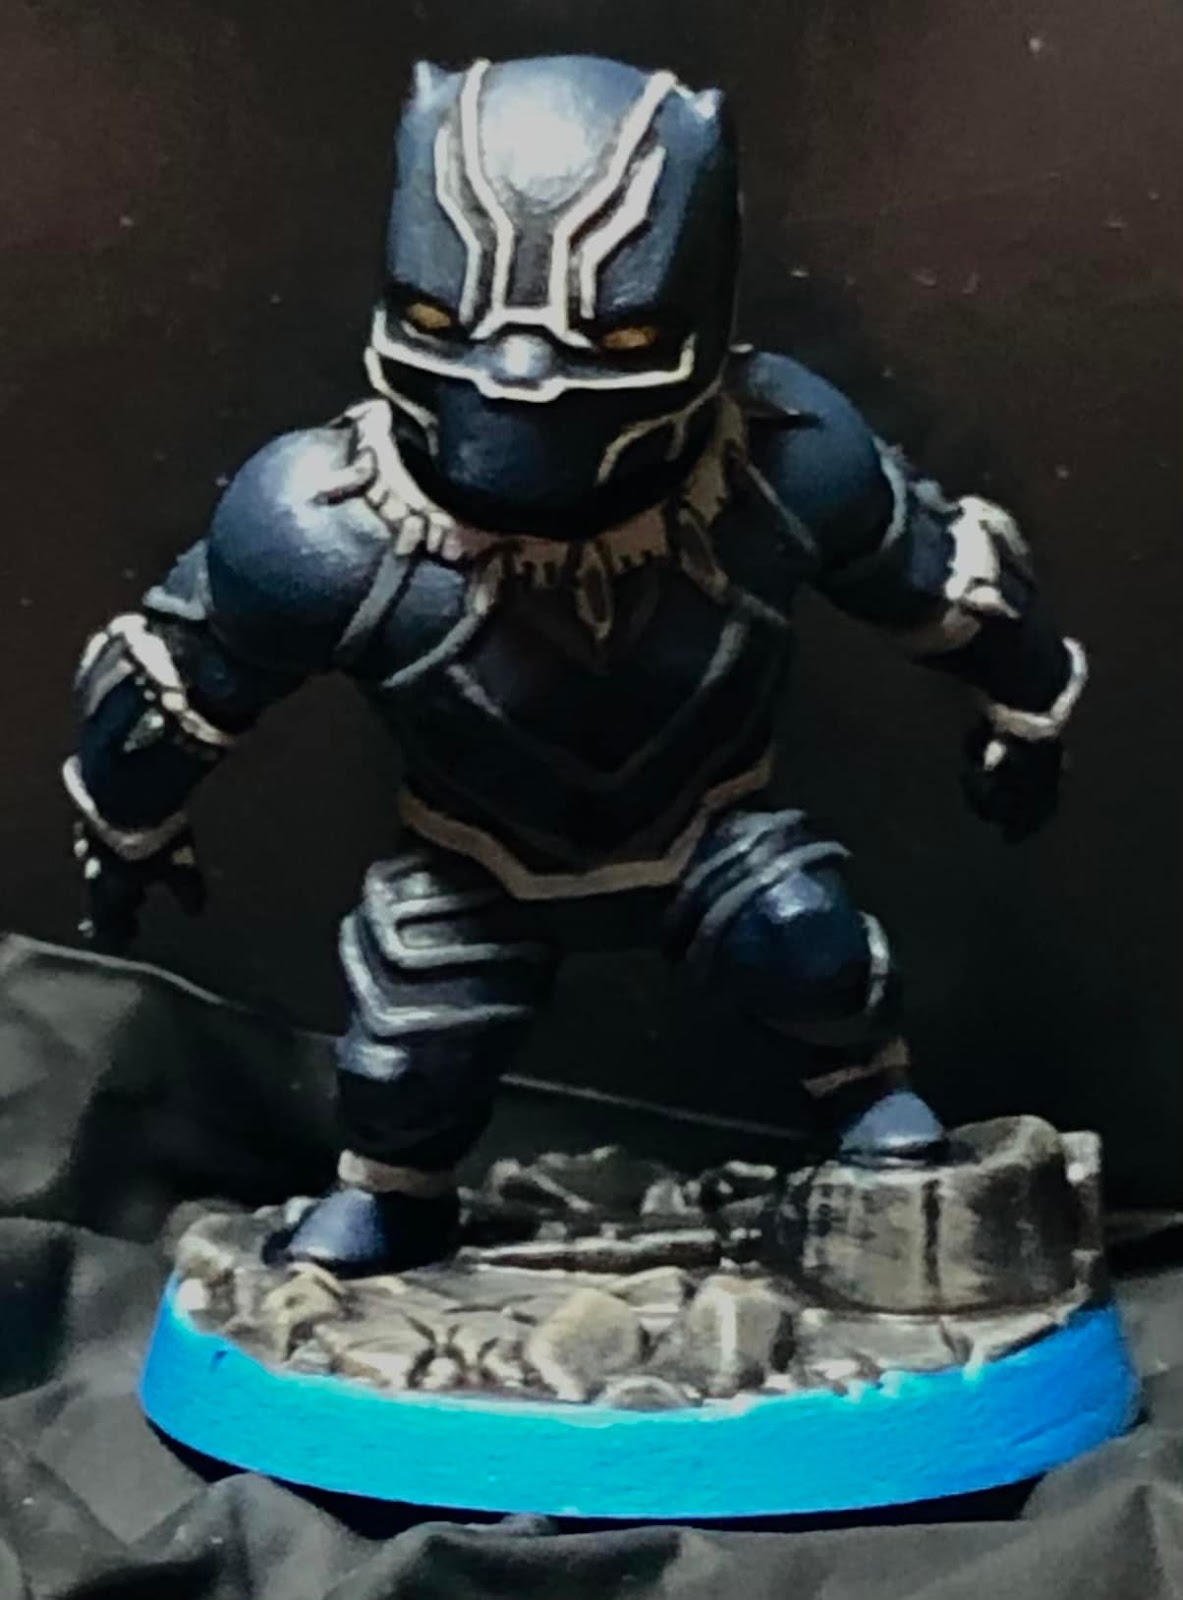
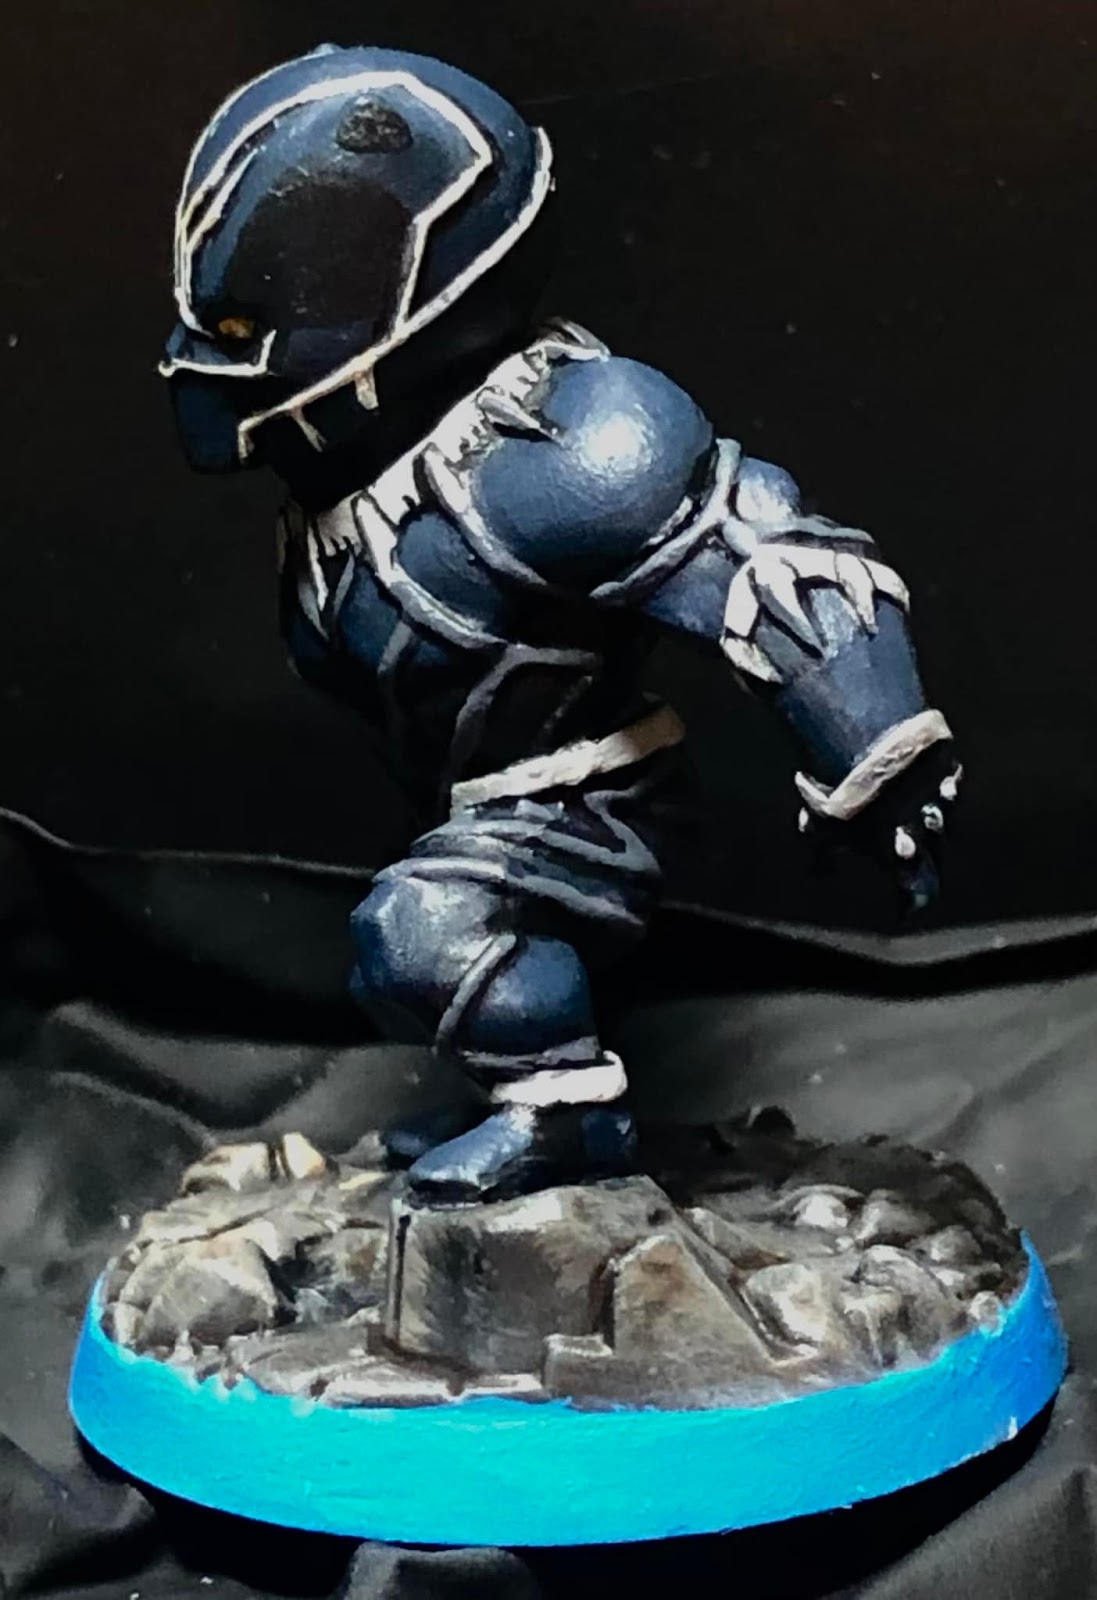
Next is Black Panther, also a request from a player. I wanted to trying a blue-black style for his black suit, but I think it ended up way too blue. I like it though. All those little white and gray lines were a pain though.
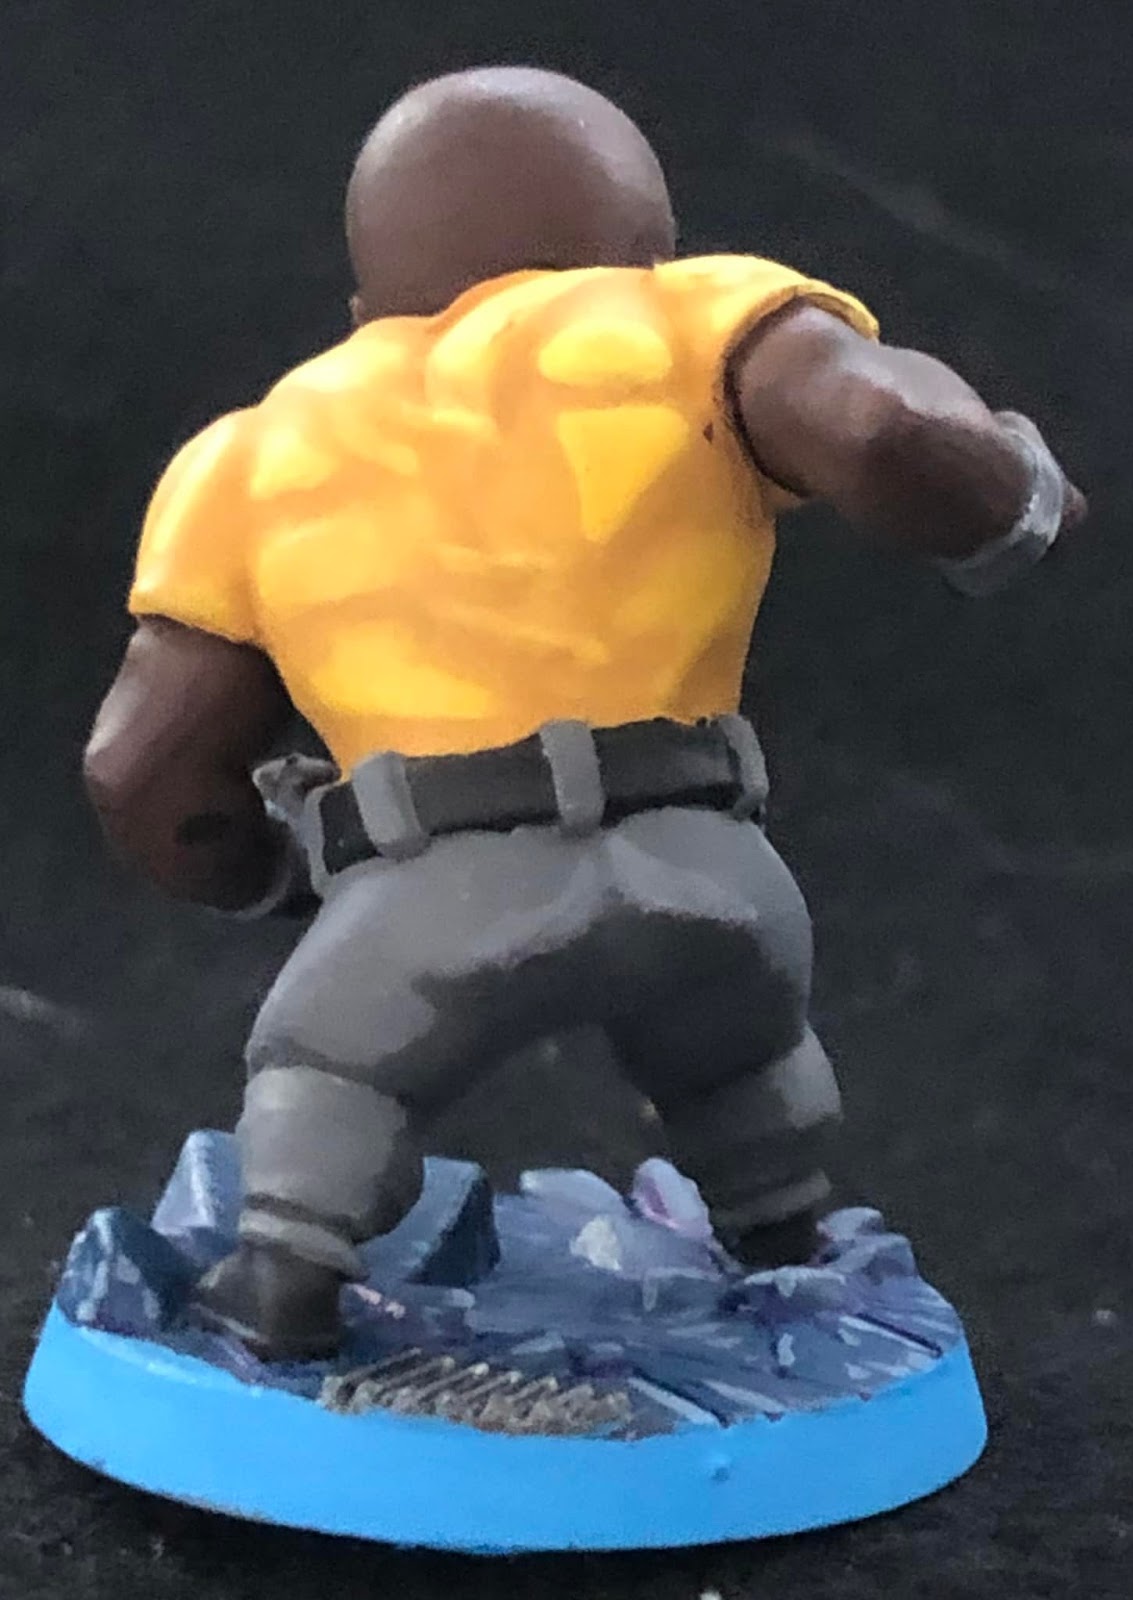
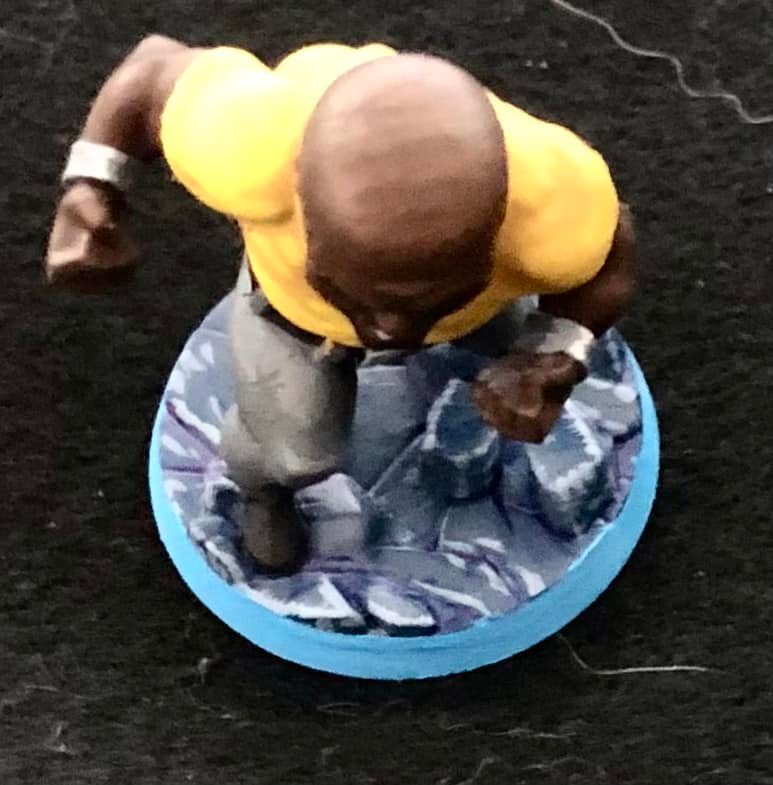
Last is Luke Cage. I painted him for two reasons: 1) I saw a painting video on how to get good yellows by first underpainting with pink, and I wanted to try it (it worked); and 2) I wanted to try and paint the wrinkly effect on a bald head, and he had one (it worked). I think I also did well with the Borderlands cel style using high contrast colors (three shades of yellow and three of gray) with no blending, just hard lines. You can see that in the other figures, like the wings of the Vulture, the suit of Black Panther, and the tentacles of Doctor Octopus.