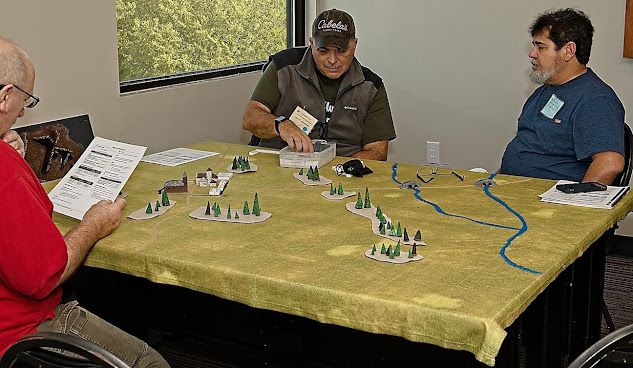
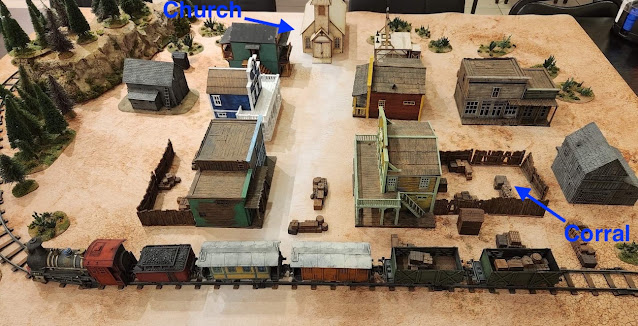
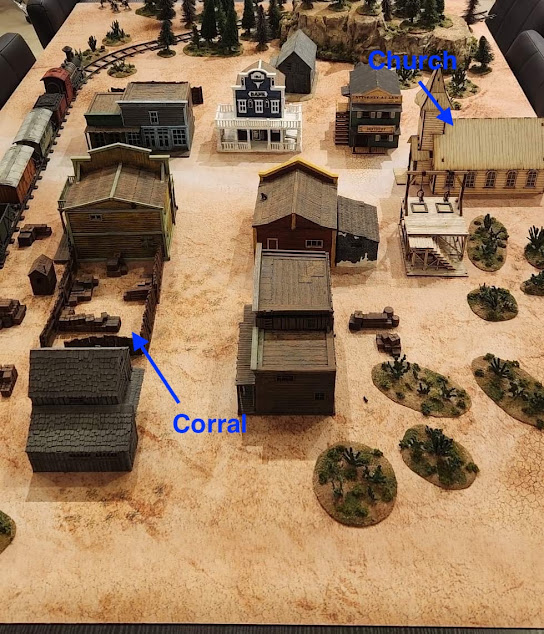
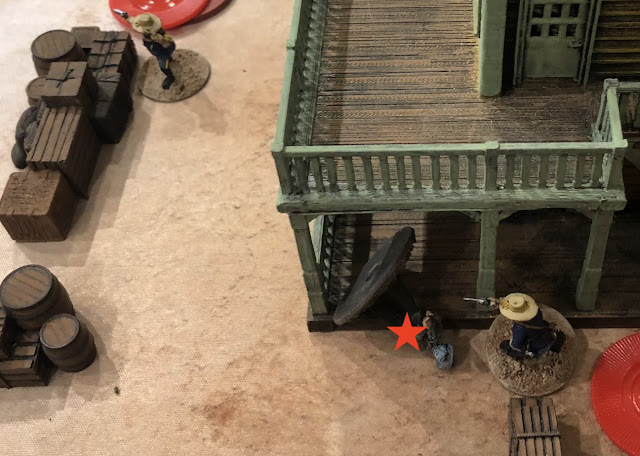
As I reported a few posts back, I played the rules Fistful of Lead Reloaded (FFoLR) with gaming buddy Bill using his beautiful Western terrain and figures. For the most part we played them correctly, but some of the rules from Fistful of Lead Core Rules (FFoL) leached in as Bill was familiar with both. While I was at MillenniumCon 2022, and from the FFoL forum on FaceBook I learned that FFoLR was the older, simpler version of the rules and that FFoL represents the current incarnation of the rules. In addition I got to see an experienced game master run FFoL for six players (I being one of them).
FFoL has quite a number of supplements and variants – variants being standalone versions of the core rules and supplements being sets that require the core rules or a variant – to cover period- or genre-specific rules that give the rules their 'flavor'. I have most of the supplements and variants, but not all:
- Fistful of Lead Core Rules
- Fantasy
- Horse & Musket
- Fistful of Lead Reloaded
- Galactic Heroes
- Codex Galactica Grim Dark Edition
- Fistful of Lead Bigger Battles
Fistful of Lead Core Rules
FFoL are the 'universal' skirmish rules that cover all periods, but none in any specificity. There are generic rules for pre-gunpowder, early gunpowder, modern, and futuristic weapons and armor. If you want to go more in depth in these other areas, you can buy the variants.
Activation Order
FFoL uses cards to determine activation order, rather than a more traditional IGO-UGO. Each player is dealt one card for each figure in his force and played as a hand. The cards are counted down from King on down and as players have the card in their hand they assign it to a figure that has not activated yet. This allows each player to assign order to his forces, but turns are intermixed between which player acts next. It is a good compromise between IGO-UGO and card assignment systems like Tin Soldiers in Action where each card is assigned to a specific unit.
Note that some cards have special properties, such as healing wounds, granting bonuses to combat and such. Also, the Ace is treated as a Wild card, allowing the player to assign any card's value as its' value, so if you want to go first you could make it a King, or if you wanted too heal a wound you could make it the Queen of Hearts. These special properties add simple twists to the game that allow the player to play the cards more strategically, such as assigning a card that automatically reloads a weapon to a figure with an unloaded weapon (therefore not requiring them to spend action to reload), but at the cost of forcing that figure to wait later in the turn.
Actions
When a figure is activated the figure receives two actions, such as Move, Shoot, Pick Up/Drop Item, Mount/Dismount, Switch Weapons, Recover from Combat Effects, Aim, Reload, or Complete a Task. Because you can perform these actions in any order a figure can move twice, move and fire, fire and move, aim and fire, or fire twice. This is a good way to simulate time and that a figure is splitting its time between these actions.
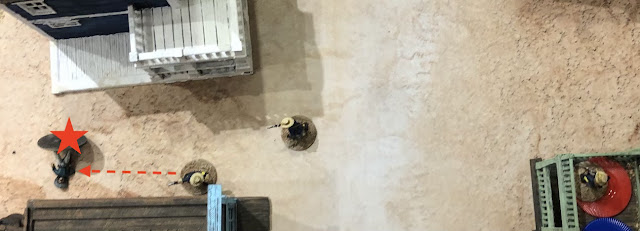
Movement
Movement is a simple 5" per Move action. There are provisions for moving slowly (Creep), jumping, falling, moving through terrain, and moving while mounted. Movement is completely free, i.e. it is not constrained to moving only in straight lines, as is facing. However, if the figure comes within 1" of an enemy figure it must stop and engage in close combat. Note that close combat is not an action.
Note that movement is also reduced by Wounds and Shock (see below).
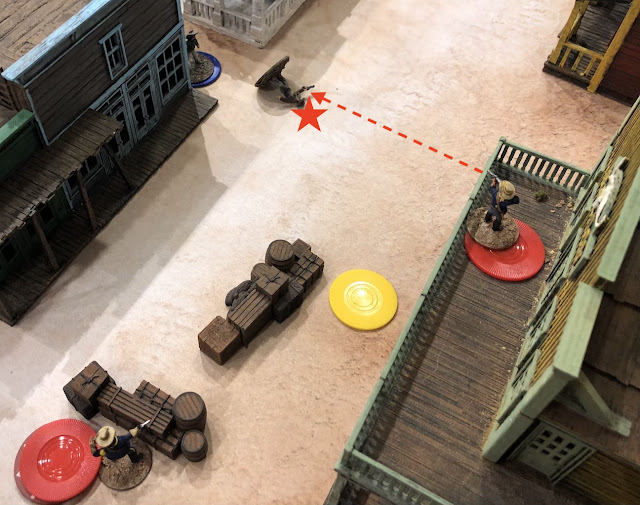
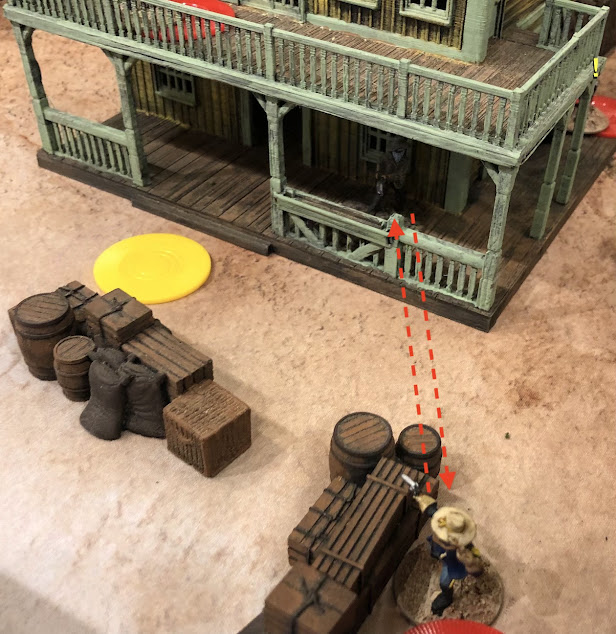
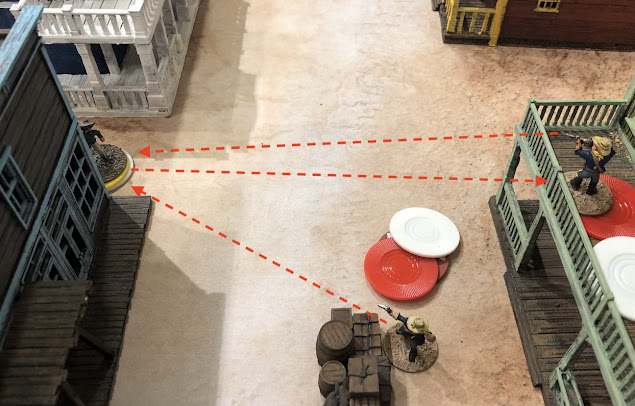
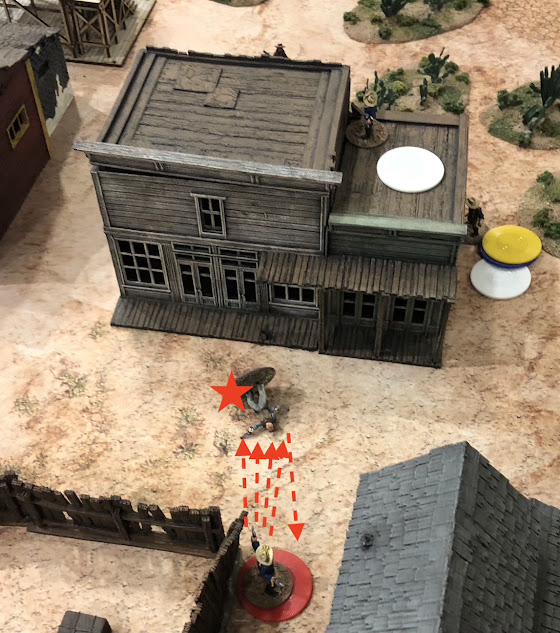
Shooting
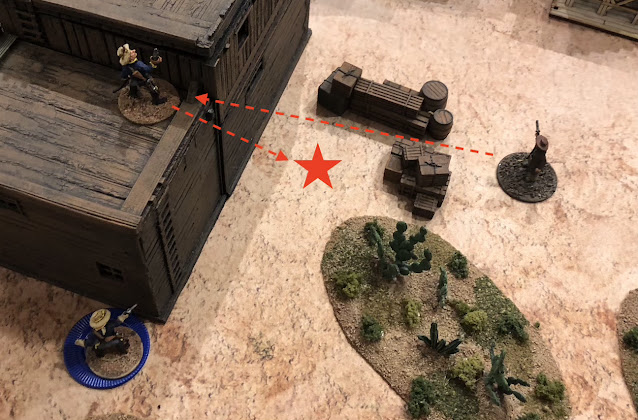
Ranged combat is handled easily. All weapons have a short range and a long range. Targets within short range hit on a 5+ on 1D10, while targets at long range hit on a 8+. Rolls of a natural '1' indicate the weapon has run out of ammo. There are few modifiers to shooting, largely from cover and from the shooter being wounded or shocked. Note that spending one action to Aim before shooting only adds +1 to the die roll. You generally only do this when you have very low odds of hitting. Note that a natural '10' is not a guaranteed hit.
By the way, there is no pre-measuring in FFoL.
If a shot hits the target the shooter then rolls 1D10 to determine the effect of the hit.
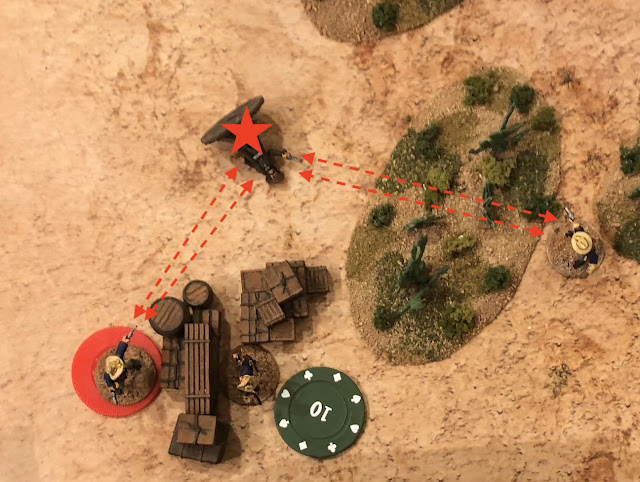
Close Combat
Close combat occurs when a figure moves to within 1" of an enemy figure. It is resolved by both players rolling 1D10 and comparing results (after modification). The highest modified die roll is the winner and the loser's modified die roll is subtracted from the winner's. That difference grants a modifier to the 1D10 roll to determine the effect of the hit.
As with shooting, rolling a '1' means you have fumbled and lost your weapon. The rules also account for fighting against multiple opponents, being wounded, shocked, or prone, the close combat weapon, and defensive terrain.
Note that there is an element of movement in close combat as the winner can decide to stay locked in combat, switch positions with their opponent (and stay locked in combat), or push their opponent back out of close combat.
Wounding
When a figure is hit by shooting or in close combat a 1D10 is rolled to see the effects, which can be nothing, getting a Shock counter, getting knocked down and wounded, or being taken out of action. There is a modifier for close combat, but also a modifier for the target being previously wounded.
When a figure takes three wounds, it is taken out of action.
Recovery
The effects of Shock, Wounds, and being knocked down require the figure to recover in order to remove the effects. For each Shock and Wound counter a figure has they are -1" in movement, -1 to shooting, close combat, task rolls, and to recovery rolls. When rolling for recovery there is a chance, if the player rolls too low, that the figure will be removed from action.
Miscellaneous
There are a number of other rules, as you might expect, for Leaders, Overwatch, Tasks (like picking a lock, etc.), Fires, Hiding, and so on.
In addition they have a team building system largely centered around a list of special abilities (rules) called Traits. Examples are: Brute, use D12 for close combat instead of D10; Deft, where reloading only takes one action; Lunge, where the figure can conduct close combat from 2" away; etc. Figures can also be assigned negative traits like Lousy Shot or Slow.
All of these traits are built around your team customization. Your leader gets three individual traits, Specialists two, and Regulars only one. Additionally your whole team gets a team trait, which is the same as a subset of the individual traits only applied to all members of the team.
Weapons also have traits, such as Burst, Blast or Armor Piercing. In addition team members can have shields and armor. Armor is essentially an extra roll after being hit, but before rolling for the effect of the hit. If the target makes their armor save, it lowers the effect of the hit by one level.
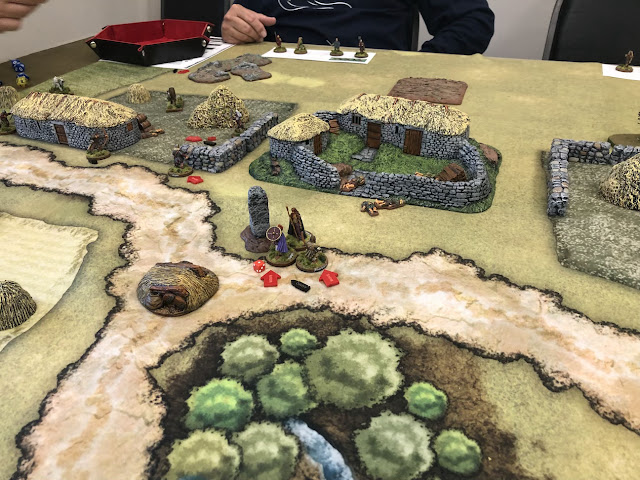
Fantasy
There are three separate books covering the Fantasy genre: Might & Melee; Magic & Mages; and Monsters & Mazes. Might & Melee is a FFoL variant, meaning you do not need to buy FFoL Core Rules; it is a standalone set of rules. Everything that you see in FFoL above is a part of Might & Melee, save for things like modern weapons, armor, and equipment. All of the core mechanics are the same, however. Note that there is a lot of overlap between this variant and others as the Core Rules gave you Armor, Wasteland Warriors gave fantastical powers, and Tales of Horror gave the beginnings of magic use.
The primary difference between Might & Melee and FFoL is that the former goes into more detail with ancient, medieval, and fantasy weapons, armor, and equipment. Also, there are new traits that apply to the fantasy genre, like Bard, Born in Harness, Bowyer, etc.
Mounts are fleshed out a little more, having equipment slots and traits. Also, there are a few mythical creatures defined though more will come in Monsters & Mazes.
Magic & Mages adds depth to the magic system, defining spell caster levels, spell casting mechanics, and providing spells and their effects. In addition there is a system for dispelling opponent's spells and summoning creatures. Clerics and divine magic are not left out either, but they largely use the same mechanics as spell casters. Finally, what magic system would be complete if it did not have pages and pages of potion, scroll, and magic item definitions?
Last of all is Monsters & Mazes which is centered around defining monsters and their combat characteristics and how to use FFoL for dungeon crawling. Included is a system for random dungeon generation for solo play, if you go in for that sort of thing.
Horse & Musket
The Horse & Musket rules are another variant, so the FFoL Core Rules are not required. By and large the core game mechanics are the same. There are some minor differences, however.
For example, in the core rules the roll of a natural '1' while shooting means the shot misses and the weapon is temporarily out of ammo. In the core rules a Reload action takes an entire turn and cannot be split across turns. In the Horse & Musket era weapon were typically one shot, so a Reload action is required after each shot anyway. In the Horse & Musket rules a natural '1' means there is an additional malfunction, requiring a Repair action before the Reload action can occur. The Reload action itself may take one or two actions, as defined by the weapon.
Horse & Musket does not seem to have period-specific traits, but some of the names appear to have changed.
French & Indian War
Red Hatchets & Black Powder (RHBP) is a supplement for the French & Indian War (F&IW) for the Horse & Musket variant of FFoL. Largely this contain definitions for various troop types in the F&IW, rules for fighting in the Winter, and a larger number of scenarios. (Note that all variants contained a handful of scenarios.) Most of the scenarios contain scenario-specific rules, which can be used for your own scenarios. Some of those rules include: Natives and how they fight; capturing enemies; setting structures on fire; ambushes and scouting; wagons; forts; deep woods; and events.
Fistful of Lead Reloaded
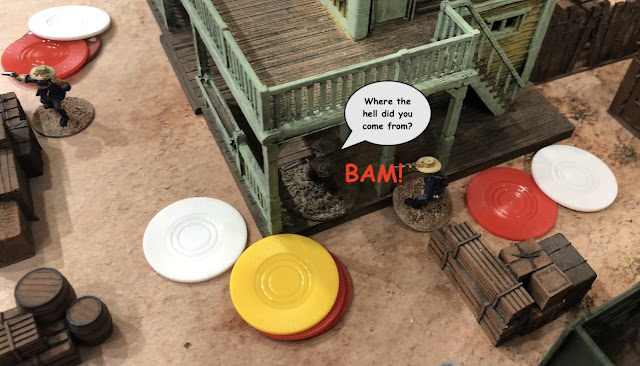
FFoLR is the older version of FFoL and not really recommended other than for teaching new players and simplified convention game play (which typically involves quickly teaching new players how to play). The theme is Wild West, so the scenarios and campaign information is geared towards that, but the core mechanics are stripped down just a bit.
Personally I would not recommend getting them.
Galactic Heroes
As you might have guessed GH is a standalone variant and contains all of the core game mechanics plus enough variation to reflect what I would call Space Fantasy, and not Hard Science Fiction. Primary additions from the Core Rules are psionics (i.e. Space Fantasy magic), futuristic equipment (drones, sentry turrets, etc.), and vehicles (although the emphasis is on lighter vehicles).
Vehicles are treated much like any other figure. They are assigned a card for activation. They have damage points akin to wounds. When a vehicle is hit it has its own version of the Wound chart. The vehicle's driver and any passengers can bail out if the vehicle is destroyed.
When attempting to shoot at a vehicle you have to declare if you are targeting the vehicle itself, the driver, or its passengers. Combat against the vehicle is generally easier (because the target is big), but mechanically plays out the same as fighting any other figure. You roll to hit and if you hit you roll for armor, then you roll to wound. Once enough wounds are inflicted the vehicle is out of action.
As you might expect, vehicles have their own equipment slots and traits.
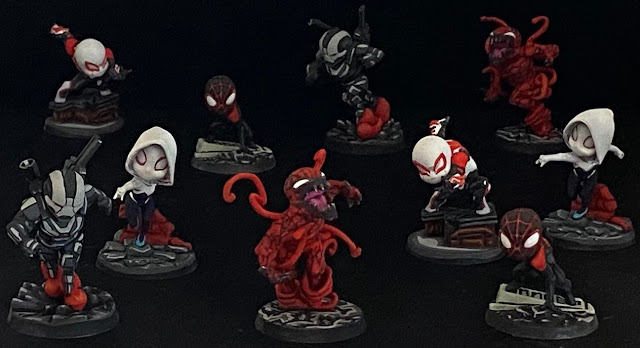
Codex Galactica Grim Dark Edition
CG is a supplement for the variant GH. It provides stats for a certain Space Fantasy IP backed by a company with a lot of lawyers. People tend to love that company's miniature – but not their prices – and initially love their rules – but drift away from them unless they are deeply into competitive play. (At least that is my assessment of it.)
Is every troop type of the Grim Dark Future defined? No? Every weapon and vehicles? No. Are you going to have to do some work on your own in order to define some of the more exotic troop types? Very likely. But enough weapons and traits have been defined to give each troop type in that universe a distinct flavor, especially when you start considering the team traits available to you. (I don't like how they defined the Tau, I mean Dynasty, Pulse Rifles though.)
There are new traits and mutations defined, but not as many as I would have thought. More importantly, psionics (i.e. Space Fantasy magic) are defined, including faction-specific 'spells'.
Note that there are two additional supplements to GH, one to represent starfighter combat and another for giant mecha combat.
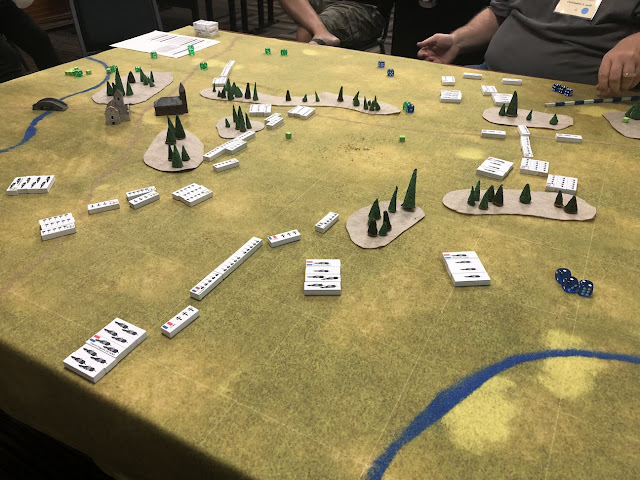
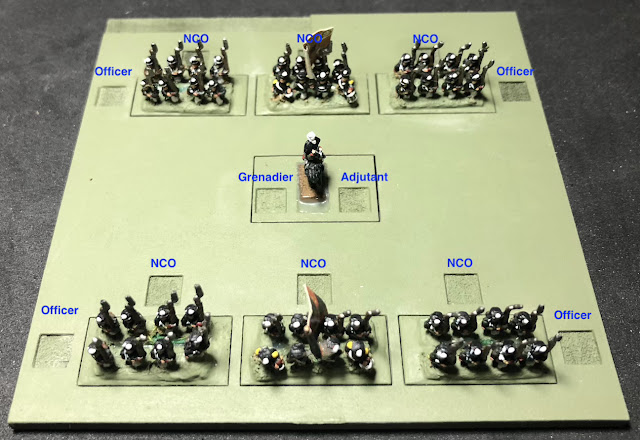
Fistful of Lead Bigger Battles
While FFoL are for skirmishes where each figure is an autonomous unit, Fistful of Lead Bigger Battles (BB) is a variant for conducting grand skirmishes. Each figure still represents a single man, but figures are grouped together and it is these groups that are autonomous.
Wargaming has a notion of 'bath-tubbing' or playing a set of rules at one level, but representing another, usually higher, level. BB does this by having figures continue to fight as if they were individual men even though the group of figures can represent a much larger unit. So it is easy to think of each unit in BB as a Platoon, Company, or Battalion even though the unit might only have 6 or 12 figures in it. This despite the rules still playing with each figure as if it were an individual man.
As the unit is no longer a single figure, but a group of figures, the actions are a little different: Move at the Double (move twice); Maneuver (shoot and move or move and shoot with shooting at -1); Shoot (only once); Form Up; Concentrated Fire (shoot at +1; only Formed units); Charge (move twice into contact); Rally (removes Shock); Reload; Ready (overwatch); Regroup; Mount or Dismount; Setup a Crewed Weapon; and Complete a Task. As you can see, the primary difference is that there are not two explicit actions per activation, but rather a single action per activation that mimics FFoL's two actions.
Another key difference is the Close Order formation. Only Regular troops can Form Up, and when they do so they gain both advantages and disadvantages.
Shooting now has rules whereby a a unit must target the closest unit within line of sight. There are some exceptions and a player can opt to take a Hard task roll first in order to shoot at another unit, rather than the one indicated. There are rules for who can fire, who can be removed as a casualty, if a unit counts as being in cover, and so on.
As with FFoL, BB has a number of weapons defined, including the number of dice rolled for crewed weapons. There are also rules for indirect fire. When a unit runs out of ammo (the roll of a natural '1') rather than getting no fire it is allowed to fire at ½ the number of dice until it spends a turn reloading.
Close Combat is radically different than in FFoL making it much less decisive. Rather than conducting an opposed die roll, as in FFoL, units roll to hit and wound in close combat as in shooting.
As with GH, BB has rules for vehicles. The rules are similar in that each vehicle is a unit, thus getting its own card, and they have Damage Points (similar to wounds), sizes, movement rates, and special traits.
Events have a larger section in BB than in other rules. Events are triggered when a Joker is dealt to a player.
Summary
FFoL and all of its variants have some good game mechanics that are largely consistent across all periods, especially if you play FFoL Core Rules instead of the variants. Learn the rules once and you should be good for any of the variants with a simple quick reference sheet. Games play very quickly and even with multiple players per side you do not find yourself waiting very long before you get to act.
If you don't like rules where you always get to activate every unit on your side every turn, you probably won't like this activation system. If you like systems that add a random element to determine if a unit can act, such as Black Powder, Warmaster, and Blitzkrieg Commander you probably will not like this activation system. Finally, if you are not keen on rules with lots of special abilities to keep track of, and prefer more generic troops, again you will find FFoL and its variants not to your liking. You can easily keep that in check by not using so many traits for your troops and using standardized definitions to simplify management of your figures.
All that said, the game is very enjoyable to play. Again, if you have a particular period that you want to play