I have part 1 of the review of Hostile Tactical A.I. over on my Solo Battles blog. I was torn over whether to post the article here, consolidating all of my wargaming articles (especially product reviews), but because Hostile Tactical A.I. (HTAI) is purely solo gaming, it seemed to make sense to put it there, unless I were going to delete that blog and move all the articles over here. Too much work at the moment.
HTAI is an interesting product in that it is not a complete rule set for gaming skirmish wargames, but rather a solo game mechanism that you should be able to strap on to any skirmish wargaming rules. HTAI essentially addresses two questions that solo gamers need to answer when playing wargames solo: which unit/model acts next; and what does the unit/model do when it is time to act.
Many solo gamers simply answers these questions by essentially spinning the board around and playing that side to the best of their ability. As I have discussed many a time on my Solo Battles blog and on solo wargaming forum threads, I think that many players can easily develop a bias for one side or the other, skewing those decisions. Further, I think solo wargaming allows me to leisure to take longer turns – although that may be a function of me having a wargaming space where I can keep things set up as long as I want – and thus to apply more mechanics for determining the answer to these two questions in some procedural way.
Because HTAI is not a complete rule set for skirmish wargaming, you have to integrate its mechanics into your skirmish wargaming rules of choice. In my case I am running them with One-Hour Skirmish Wargames and part 1 discusses how I integrate the two. Part 2 will be a test game using the two systems with HTAI driving the decision for one side. I hope to post part 2 on Solo Battles by the end of the weekend.
Thursday, December 20, 2018
Monday, December 17, 2018
One-Hour Skirmish Wargames – Follow-up with Author
I always enjoy it when an author contacts me about a review. (Well, usually. There was that one time...) It gives me a chance to dive deeper into their thought process, usually get insight into what I got wrong, and to ask for answers to questions that I still had or that I provided my own solution. Someone who read my blog post contacted the author, who in turn contacted me. Whoever you were, thanks for that.
In return, I would like to share my questions and the answers that John Lambshead gave me regarding One-Hour Skirmish Wargames. (Tip of the hat to Kaptain Kobold for the questions about Jokers and shuffling the deck.)
If a joker is played after the turn has ended do you skip it? I’ve played that if the joker was drawn during casualty resolution, because there was a red joker and a black joker it was a valid card. However if it was drawn during a morale check because the joker does not have a defined value it seems like it would not be valid. That said I decided to rule it as a value of zero, but it never came up.
I was discussing the idea of adding an extra action point in order to fire if you have a musket or a rifle. So a musket would be to action points and the rifle would be three action points and ordered a fire. The reason for this was it seems like age of musket troops fire too rapidly. I was going to give it a try and maybe blog the result, but I was wondering what your thoughts are on this.
Why did you choose to limit this book to just after the introduction of the firearm? It seems like, once you solve the armor question, it would work well for ancient and medievals too. I was thinking that armor would just simply be like mobile cover, i.e. light armor no additional defense, medium armor one additional card, heavy armor two additional cards. Thoughts?
I don't know about you, but I would love to see a book of scenarios aimed at skirmishes at the scale covered by One-Hour Skirmish Wargames. Games Workshop published one called Warhammer Skirmish that had some good fantasy-oriented ones, and I have one for sci-fi that is more narrative-oriented than map-and-forces-oriented. Given that I was more interested in the scenarios of One-Hour Wargames, I would be happy to see one for this scale. What about you?
In return, I would like to share my questions and the answers that John Lambshead gave me regarding One-Hour Skirmish Wargames. (Tip of the hat to Kaptain Kobold for the questions about Jokers and shuffling the deck.)
If a joker is played after the turn has ended do you skip it? I’ve played that if the joker was drawn during casualty resolution, because there was a red joker and a black joker it was a valid card. However if it was drawn during a morale check because the joker does not have a defined value it seems like it would not be valid. That said I decided to rule it as a value of zero, but it never came up.
This has not arisen in eight years of development. But it clearly will eventually to someone. Ignore the Joker after a turn has ended.The rules never define when you re-shuffle (or I missed it). Now it’s obvious that you would re-shuffle if you ran out of cards, but I actually re-shuffled after the end of all end of turn activities, i.e. between turns. The reason I think this is significant is that it resets the odds of getting a joker between the two decks if you re-shuffle between turns.
Yes, other people have had this query. I meant to say that one uses all the cards up, shuffles, and then carries on from the new deck.Wow! Let me just say that the combination of the last two answers brings forth the possibilities – however improbable – for extended turns. In the four turns I played twice I drew Jokers during the Casualty Resolution Phase (never during the single card drawn for the Morale Phase). Although it is not probable, it is possible that you could play all four Jokers ending the turn and resolving post-turn activities. That would leave the remainder of the deck and much of a re-shuffled deck for a single turn (assuming the Jokers ended up drawn late in the re-shuffled deck). I would think it even more probable for a short subsequent turn when you end a turn, no Joker is drawn in post-turn actions, and then start a new turn with half a deck. As it stood, Most of my turns lasted about 1/2 a deck, so they were lengthy. Not re-shuffling until the deck is depleted I think will make for turn lengths much more varied.
I was discussing the idea of adding an extra action point in order to fire if you have a musket or a rifle. So a musket would be to action points and the rifle would be three action points and ordered a fire. The reason for this was it seems like age of musket troops fire too rapidly. I was going to give it a try and maybe blog the result, but I was wondering what your thoughts are on this.
Yes, I know. I agonised over this but then left the somewhat unrealistic rate of fire for muzzle loaders on the grounds that they are unlikely to be used in the same scenario as more modern weapons and it left the game with a smooth basic ruleset. However, one can make a good case for doing just as you suggest.I understand the idea of design consistency, but for me this goes to period flavor. The idea that you can move farther under fire during the musket period than in more modern times is more important.
Why did you choose to limit this book to just after the introduction of the firearm? It seems like, once you solve the armor question, it would work well for ancient and medievals too. I was thinking that armor would just simply be like mobile cover, i.e. light armor no additional defense, medium armor one additional card, heavy armor two additional cards. Thoughts?
Yes, the basic system will work fine for pre-gunpowder, but I was running into consistency problems with the muskets so decided that it would be better to have a separate game for pre-gunpowder so I could stretch the range of probabilities to the max over just pre-gunpowder weapons. If the book sells I might get asked to do another.Well, here's to the book selling well!
I don't know about you, but I would love to see a book of scenarios aimed at skirmishes at the scale covered by One-Hour Skirmish Wargames. Games Workshop published one called Warhammer Skirmish that had some good fantasy-oriented ones, and I have one for sci-fi that is more narrative-oriented than map-and-forces-oriented. Given that I was more interested in the scenarios of One-Hour Wargames, I would be happy to see one for this scale. What about you?
Tuesday, December 11, 2018
One-Hour Skirmish Wargames Review – Part 2
This is a continuation of my test game of One-Hour Skirmish Wargames by John Lambshead and published by Pen and Sword Publishing. If you did not read Part 1, you might want to start there.

The British also receive 8 AP. They use those points to fire with four line and two rifles, downing four of the French infantry that were foolish enough to run into the open.

The French again get initiative, but only gain 5 AP. The cavalry makes a double move and charges the closest British infantryman in order to make it harder for the British to bayonet the downed French. The Chasseur succeeds in cutting the infantryman down. Given that the British has the next action, will it be a sacrifice?

The British get 7 AP and they make the cavalryman pay. One soldier shoots the cavalryman (making then 'downed') while another advances and bayonets them.

With the Joker drawn the turn ends.
The British have three casualties, a 3 motivation, so they pass morale automatically. (The British will draw a minimum of an Ace (1), add your Motivation score (3), and have to exceed the number of casualties (3) that you have. So the British automatically pass. You should still draw the cards, however, as it might affect Casualty Resolution later.)
The French have four casualties, a 2 motivation, so they need to draw a 3 or higher. Because they have a Leader with a Leadership (2) skill, they get three cards, discarding the lowest two. They easily pass.
After casualty resolution, two of the French infantry were determined to be dead, while two have recovered.

The British receive 9 AP. The Line Sergeant finishes his move to the cannon and fires at one of the French in the open, as do other line soldiers. Finally one of the line moves twice, bayonetting the downed French soldiers, ending the threat to the woods.

With 8 casualties and the British in possession of the cannon, things are starting to look desperate for the French. Worse, the French draw 1 AP. The soldier behind the rise downs the British infantryman that bayonetted the French soldiers.

The French get the initiative, giving them a double move, but draw a miserable 2 AP! The soldier behind the rise fires at the Sergeant taking cover at the cannon and downs him. Meanwhile the soldier by the road advances on the cannon in an attempt to bayonet the Sergeant before the end of the turn.

There appears to be a lull in the action as the British also draw 2 AP for the Action Phase. The soldier at the edge of the woods succeeds in downing the advancing Frenchman, stopping the threat to the downed British Sergeant.

The French again get the initiative, getting 10 AP. This allows for a bold move by the French cavalryman by the road. He charges the downed British Sergeant and cuts him down. Noting that he is within 12" range of the Rifles Sergeant, he decides to take a potshot at him, despite him being in cover. He must have caught the Rifles Sergeant unawares as he downed him with a single shot!
The French soldier guarding the mounted French Lieutenant decides to take the opportunity to charge the downed British, bayonetting him, and then firing his musket at the British soldier hiding behind the tree. (A Joker comes out and the turn ends making him automatically miss.)

The French have 8 casualties, a motivation of 2, so they need a 7 or better. They still have their Lieutenant so they draw three cards and pass the morale check.
The British have 5 casualties, a motivation of 3, so they need a 3 or better. They have lost one leader and the other is downed, so they will only draw one card. They still pass their morale check, however.
Casualties are resolved and it appears that the Rifle Sergeant was indeed dead from that lucky Chasseur's shot. So the British have now lost both of their leaders. One of the French soldiers also proved to be out of the fight.

Meanwhile the French infantry shoot at the British in the woods, downing one (who is subsequently bayonetted by an advancing French soldier), but missing the last one.
The French Chasseur, fresh from his victory over the Rifle Sergeant, charges the British line at the rear and cuts him down.

The British need to hold on as they are losing figures at a rapid rate. They draw 10 AP.
With the French Lieutenant exposed, the sniper moves twice to a new position where line of sight is not obscured by the rise. He raised his rifle, aims, shoots, and downs the Lieutenant. (Three cards firing versus three cards defending, so a 50-50 shot.)
The other remaining rifleman takes a shot at the Chasseur but misses. The last remaining Line soldier, seeing his position flanked by the charging Frenchman, moves back into cover before taking a potshot at him. (He also misses.)

The British gain initiative, giving them a double move. They draw 9 AP.
The sniper, seeing an opportunity, moves twice to the cannon, draws a bead on the French Sergeant, and drops him with a single shot. (Note that the sniper does not get a bonus for shooting leaders, just the French Officer. So this was another 50-50 shot.)
The second rifleman draws a careful aim against the Chasseur and also drops him with the shot. Finally, the Line soldier shoots and downs the French soldier, but runs out of AP so he cannot bayonet the downed foe. Three shots and three hits. That really hurt the French. They only have three models remaining that can act.

The French draw 6 AP. Both soldiers fire at the sniper and miss. The Joker is drawn, so the turn ends.

The French have 9 casualties, so they need an 8 or better. As both French leaders are downed, they have only one card. They draw a Queen and pass the morale check.
The British have 8 casualties, so they need a 6 or better. They draw the Ace of Clubs, the lowest valued card in the deck, and fail their morale! The British decide that this cannon is not worth the blood that has been shed and retreat, ending the game in a French victory.

The British that were taken out of action.

The French that were taken out of action.

Drama – do the rules create tension during play?
For the most part, combat actions have a 50-50 success rate. Many times both sides were drawing one card in the attack and two cards in defense, but because both sides had the same odds, it largely felt even. In either case, fortunes could swing wildly from phase to phase.
One element that supported that drama was close combat being so decisive. Losing meant you were out of action, rather than merely downed, and if you were downed when attacked, you automatically lost. This led to lots of action around downed figures. Maybe as I play it more and understand the risks better, the drama will reduce, but there were several time where I had 50-50 shots and got four hits in a row. That can decimate a force's ability to act in a heartbeat.
These rules rate 3 out of 5 in Drama.
Uncertainty – are there enough elements that introduce uncertainty into the game?
The three primary mechanics that create uncertainty are: will I act first or second; how many AP will I receive; and when will the turn end. This last element, when will the turn end, could cause the turn to end rather quickly, generally not impacting you in terms of accomplishing something that turn, but very probably ruining your chances at winning the scenario. If you are not playing a time-restricted scenario, this element will probably not produce much tension.
The order of acting being randomized allows you to gamble with your actions when you are second player. If you get first player next action phase and get a sufficient number of action points, you will likely look like a tactical genius. As for the opposite occurring, well it was a great plan but the cards were against you.
These rules rate 4 out of 5 in Uncertainty.
Engaging – do the rules allow the player to make meaningful decisions that lead to consequences?
Moving out of cover into the open definitely changes your odds. The basic combat is the attacker shooting with one card. A defender would have two cards in light cover and three cards in hard cover, Not impossible to overcome, but still not in the attacker's favor. Move out into the open and suddenly you defend with one card, a 50-50 shot.
I see spending AP like managing a hand of cards in a Command & Colors game. You need to be patient and take no rash actions until you build your hand. With OHSW you need to turtle when you draw low AP and make the bold moves when you have high AP, especially when you are second player.
These rules rate 4 out of 5 in Engaging.
Unobtrusiveness – do the rules get in the way?
No. Obtrusive have lots of exceptions for special cases. These rules have few such special cases to worry about.
These rules rate 5 out of 5 in Unobtrusiveness.
Heads Up – are the rules playable without frequent reference to a quick reference sheet?
Basically you need to memorize the stats for your troops at the beginning of the game, but given that most figures are the same, this is not really an issue. Stats may change as you switch from period to period, but within the period being played, pretty much everyone is the same, save for a few key figures.
The majority of my test game was played without the rules being nearby. Once you get the hang of the rules, you will only access them to refresh on stats before you start a new game.
These rules rate 5 out of 5 in Heads Up.
Appropriately Flavored – do the rules 'feel' like they represent the period or genre being played?
If anything, this is where the rules 'fail'. Yes, there are differences between weapon systems, even within a period. For example, in the Napoleonics test game the Rifles were infinite range, the Muskets an 18" range, the Carbines a 12" range (if the cavalry was firing while mounted, otherwise it was the same range as a Musket), and the Pistols 6". Everything was one shot per Fire action. Compare that to a single-shot breechloader in the Colonial period, where it has an infinite range and a single shot. The issue is not the range, but: a) the weapons are equally accurate; and b) the firing rate – every action phase – is the same.
Only time, and playing other periods, will tell if these have the right flavor. Right now, it feels really good for Age of Machine and onwards. It felt funny for Napoleonics.
These rules rate 2 out of 5 in Appropriately Flavored.
Scalable – can the rules be scaled up or down – in terms of figures or number of units played – from a 'normal' game?
Although the number of figures may vary from scenario to scenario, that really does not address scaling. The two primary mechanisms for 'how much can I do' are determining action points and determining when the turn ends. There is no scaling mechanism based on any factor, much less the number of models you are using. If you use a small number of models per side you will find that a higher percentage of models will get used in a game compared to when you use more models. Activity tends to cluster around a few models making aggressive moves. This system is designed to limit the number of points a single model can spend, so high AP draws will tend to allow figures on the periphery of combat to act, When you have the same number of points but more models, the periphery of combat will expand, so I suspect larger games will feel like more figures standing around doing nothing. But hey, you got the figures on the table!
These rules rate 2 out of 5 in Scalable.
Lacks Fiddly Geometry – do the rules require fiddly measurements or angles?
Anything with freeform movement will result in games in which you are 'just out'. Infantry moves 6" per move action and cavalry moves 9". Being forced to pay for a second move because you are 'just out' is actually very costly as second moves take more action points than first moves. This game would benefit from a grid. (Note that I say that with all games.)
The other aspect of the game that is fiddly is determining cover. Part of this may be that I do not like area terrain for a low scale skirmish game. Trees should not move around on a piece of felt and be 'just wherever' at this scale; they are immovable trees. So because I played that way I was basically eyeballing line of sight, which I find fiddly. Playing solo. this does not bother me, but I would never play it this way competitively.
These rules rate 3 out of 5 in Fiddly Geometry.
Tournament Tight™ Rules – are the rules clear and comprehensive, or do the players need to 'fill in the blanks'?
Let me start by saying that my preference is towards tighter rules, where everything is spelled out clearly by the author, not looser rules where the author leaves certain mechanics up to the individual players, gentlemen's agreements, and a roll of the die where agreements cannot be found. So a high value means 'tight' and a low value means 'loose'. If you like looser rules, subtract my rating from '6' and that would probably be your rating!
Although the author defines the different periods and weapon systems pretty sharply, he clearly intends that players develop their own modifications to suit their taste. Clearly a set of rules that covers from Muskets to Laser Rifles is not going to lock everything conceivable down.
That said, there is one area that they left wide open and clearly state they intend the players to work out before starting a game: terrain effects. They give you some basic game effect that you can apply to terrain, but leave it to you to determine which ones are in effect by talking it over with your opponent when going over the scenario. This is very much like Flames of War version 2 was. Effects described, suggestions made, few hard and fast rules.
Only one situation came up where they do not resolve it in the rules. Because there are two Jokers in each deck, and the turn ends after the first Joker is drawn, it is very possible that a Joker will be drawn while checking morale or resolving casualties. The rules state that a card's value is from 1 (Ace) to 13 (King), but if a Joker is drawn it is undetermined. (I ruled that it counts as a 0.)
Many decks have a Red Joker and a Black Joker, so if you draw one during casualty resolution, just use the color of the Joker to determine Dead or Back.
I think the lack of hard terrain definitions is significant, hence scoring this factor as average. Otherwise I cannot think of any ambiguity during play. Then again, that is pretty typical of solo play.
These rules rate 3 out of 5 in Tournament Tight™ Rules.
Solo Suitability – do the rules have elements conducive to solo play?
There are no hidden elements to the game so that alone usually grants the rules high solitaire suitability. Having a mechanism to randomize which units act next is usually an element that solo gamers inject into other rules, sometimes with disastrous results. So having that mechanism built in and accounted for is just icing on the cake. Because it does not have a mechanism for which figure acts, it is not given a perfect rating.
These rules rate 4 out of 5 in Solo Suitability.
Component Quality – are the components provided made with quality?
This is a new rating, meant primarily for board games and books, which addresses the quality of the physical components.
These rules only come printed. This is a paperback book with quality binding. However, it is not a lay-flat binding. Given the thinness of the book (just over 100 pages) it is capable of having a lay-flat binding. The quality of the paper and the legibility of the type screams quality. At $23, I think this book is a good value. I wish it had more scenario material, but I am happy with my purchase.
These rules rate 4 out of 5 in Component Quality.
Will everyone like these rules? No! Every rules author must decide where to add detail and where to abstract them away and players will not always agree on where that line should be drawn. If you think that there is "no way" you could play a set of rules that don't have modifiers to your probability to hit based on range or a myriad of other circumstances, you probably won't like OHSW. If you think there is "no way" you could play a set of rules that don't care about facing, then you probably hate board games and probably won't like OHSW also.
If you like Neil Thomas and wish he had come up with skirmish rules closer to his later design principles – after Wargaming, An Introduction but before One-Hour Wargames you will probably not like these rules. Neil Thomas liked tables and modifiers in that design period and these have none. If you like the raw simplicity of One-Hour Wargames and were always tempted to tweak them (or did), it is very possible that you will like these rules. This is probably why Pen and Sword decided to brand these under the One-Hour label.
Recommended.
Turn 2
When we left off the British had inflicted three casualties on the French, who had inflicted two in return.One note I should make is that I read the scenario wrong. It is the British that must get within 6" of the cannon at the end of the game, not the French. I wrote it correctly in the last post, but my brain did not register it correctly. Change of plans! Thank goodness I am playing this solo!The French gain the initiative and get 8 Action Points (AP). The French infantry behind the rise continue to fire at the British line in the woods, while the main body of infantry head towards the British right flank in order to clear out the woods of enemy. The French cavalry retreats back to the woods, not wanting to be picked off by the rifles, and an infantryman moves to cover the mounted French Lieutenant.
If a target is behind an obstruction that is ½ its height (or more) line of sight is considered blocked. I have been playing that a model on foot qualifies as such a blocking obstruction. If not, Mounted Leaders would be bullet magnets. Further, in this mission a British Rifleman has infinite range and a bonus to shooting Mounted Leaders, so it seemed rather strange to make such a critical model so vulnerable. I wanted to allow an opportunity shot or two for this scenario, not make the Officer's demise a foregone conclusion.

The British also receive 8 AP. They use those points to fire with four line and two rifles, downing four of the French infantry that were foolish enough to run into the open.
What I am finding out is that you have a basic choice when receiving an 'average' number of AP: move a few figures multiple times; or move a lot of figures once each. So far, moving a lot of figures at once has not worked as they have been shot down. I suspect had the French been the second player, there would have been a possibility of being the first player in the next Action Phase, giving them a 'double move'.

The French again get initiative, but only gain 5 AP. The cavalry makes a double move and charges the closest British infantryman in order to make it harder for the British to bayonet the downed French. The Chasseur succeeds in cutting the infantryman down. Given that the British has the next action, will it be a sacrifice?

The British get 7 AP and they make the cavalryman pay. One soldier shoots the cavalryman (making then 'downed') while another advances and bayonets them.
By the way, I do not consider a 'downed' model to be literally on the ground (although they may be). For example downed cavalry might be the rider trying to bring a rearing or wounded horse under control, making them easier to defeat in close combat. Basically I see this as a decisive combat mechanism that requires you provide at least two models cooperating against a single model. The first model shoots them successfully, getting a downed result, with the second coming in and finishing the task.As the threat in front of the British has largely been neutralized – at least for the remainder of the turn – the Line Sergeant makes a move towards the cannon, but does not have enough AP to get there.

With the Joker drawn the turn ends.
The British have three casualties, a 3 motivation, so they pass morale automatically. (The British will draw a minimum of an Ace (1), add your Motivation score (3), and have to exceed the number of casualties (3) that you have. So the British automatically pass. You should still draw the cards, however, as it might affect Casualty Resolution later.)
The French have four casualties, a 2 motivation, so they need to draw a 3 or higher. Because they have a Leader with a Leadership (2) skill, they get three cards, discarding the lowest two. They easily pass.
After casualty resolution, two of the French infantry were determined to be dead, while two have recovered.

Turn 3
The British win initiative this time, effectively giving them a double move. I must say that so far, the British have generally had more AP to spend and more double moves.The British receive 9 AP. The Line Sergeant finishes his move to the cannon and fires at one of the French in the open, as do other line soldiers. Finally one of the line moves twice, bayonetting the downed French soldiers, ending the threat to the woods.

With 8 casualties and the British in possession of the cannon, things are starting to look desperate for the French. Worse, the French draw 1 AP. The soldier behind the rise downs the British infantryman that bayonetted the French soldiers.

The French get the initiative, giving them a double move, but draw a miserable 2 AP! The soldier behind the rise fires at the Sergeant taking cover at the cannon and downs him. Meanwhile the soldier by the road advances on the cannon in an attempt to bayonet the Sergeant before the end of the turn.

There appears to be a lull in the action as the British also draw 2 AP for the Action Phase. The soldier at the edge of the woods succeeds in downing the advancing Frenchman, stopping the threat to the downed British Sergeant.

The French again get the initiative, getting 10 AP. This allows for a bold move by the French cavalryman by the road. He charges the downed British Sergeant and cuts him down. Noting that he is within 12" range of the Rifles Sergeant, he decides to take a potshot at him, despite him being in cover. He must have caught the Rifles Sergeant unawares as he downed him with a single shot!
The French soldier guarding the mounted French Lieutenant decides to take the opportunity to charge the downed British, bayonetting him, and then firing his musket at the British soldier hiding behind the tree. (A Joker comes out and the turn ends making him automatically miss.)
Although I knew that I could move and fire with a figure, if I spent the two points, initially I did not take advantage of that combination, to my detriment. You see a lot more figures on both sides starting to move an fire. I don't really have a problem with that in a Napoleonic skirmish game, but it feels a little too much like modern maneuver warfare.

The French have 8 casualties, a motivation of 2, so they need a 7 or better. They still have their Lieutenant so they draw three cards and pass the morale check.
The British have 5 casualties, a motivation of 3, so they need a 3 or better. They have lost one leader and the other is downed, so they will only draw one card. They still pass their morale check, however.
Casualties are resolved and it appears that the Rifle Sergeant was indeed dead from that lucky Chasseur's shot. So the British have now lost both of their leaders. One of the French soldiers also proved to be out of the fight.
Although I use terms like 'dead', 'killed', 'bayonetted', etc. I am just using those terms for color. The figures are really all just out of the fight for the rest of the scenario. If you are playing a campaign game all figures that were casualties at the end of the game would have a card drawn for them, just like for Casualty Resolution. Red is Dead and Black is Back, so it really takes two red cards to kill a figure or take it out of the campaign.

Turn 4
The French have been maintaining their casualty spread – about 50% more than the British – but they have a Leadership advantage. Although the card they must draw is higher in value than the British, they draw three cards to the British one due to their leaders still being in action.So far I have kept the French leaders out of the fray in order to protect them. Leaders, however, not only draw additional cards during the end of turn morale check, they also draw extra cards when they are attacking or defending. So leaders are better fighters, but if you lose them, your whole force may rout from the loss.The French get the initiative and receive 5 AP. The French Lieutenant advances forward, so I can use his combat on the following Action Phase. As he is mounted he is better in close combat, in addition to being better because he is a leader. For example, he would draw five cards in close combat when attacking (four when defending) compared to the one for an infantryman. When being shot at in the open, he draws three cards rather than one, making him harder to down.
Meanwhile the French infantry shoot at the British in the woods, downing one (who is subsequently bayonetted by an advancing French soldier), but missing the last one.
The French Chasseur, fresh from his victory over the Rifle Sergeant, charges the British line at the rear and cuts him down.

The British need to hold on as they are losing figures at a rapid rate. They draw 10 AP.
With the French Lieutenant exposed, the sniper moves twice to a new position where line of sight is not obscured by the rise. He raised his rifle, aims, shoots, and downs the Lieutenant. (Three cards firing versus three cards defending, so a 50-50 shot.)
The other remaining rifleman takes a shot at the Chasseur but misses. The last remaining Line soldier, seeing his position flanked by the charging Frenchman, moves back into cover before taking a potshot at him. (He also misses.)

The British gain initiative, giving them a double move. They draw 9 AP.
The sniper, seeing an opportunity, moves twice to the cannon, draws a bead on the French Sergeant, and drops him with a single shot. (Note that the sniper does not get a bonus for shooting leaders, just the French Officer. So this was another 50-50 shot.)
The second rifleman draws a careful aim against the Chasseur and also drops him with the shot. Finally, the Line soldier shoots and downs the French soldier, but runs out of AP so he cannot bayonet the downed foe. Three shots and three hits. That really hurt the French. They only have three models remaining that can act.

The French draw 6 AP. Both soldiers fire at the sniper and miss. The Joker is drawn, so the turn ends.

The French have 9 casualties, so they need an 8 or better. As both French leaders are downed, they have only one card. They draw a Queen and pass the morale check.
The British have 8 casualties, so they need a 6 or better. They draw the Ace of Clubs, the lowest valued card in the deck, and fail their morale! The British decide that this cannon is not worth the blood that has been shed and retreat, ending the game in a French victory.

The British that were taken out of action.

The French that were taken out of action.

Initial Thoughts
I obviously changed the way I played as I got a better feel for the rules. All of the play after Turn 1 was done in about an 90 minutes, but that includes taking notes, picture taking, and the actual gameplay itself. It really felt like the action was moving very fast. Also, I did not have the rules at my side with this session, so once you get the hang of it, you really do not need the rules any more. The odds of success are basically I have X number of cards, you have Y number of cards, whoever draws the highest card wins. Determining how many cards you draw is easily memorized.
Ironically there is one strange rule (to me): determining who has the highest card when you draw the same card value, but with different suits. The author uses the card suit ranking system from bridge, which I have never played, and indicated the best way to remember the order is some little mnemonic that I could not remember. Rather than fetching the rules I went to Wikipedia to determine the suit ranking and they had a much more memorable method for remembering: the suits are ranked in alphabetical order, ascending. So Clubs is lower than Diamonds (C comes before D), then it is Hearts, and finally Spades. His little was something about Super Heroes Do C...? Hell if I remember.The rules are dead simple. The play is very fast once you get the hang of the mechanics. It makes for a good game where you want to throw figures on the table along with some terrain and get to playing quickly. One hour? Not sure about that, but that is okay. It matches the concept even if it runs over the time.
Rules Ratings
Using the review system from before, here are the game ratings for One-Hour Skirmish Wargames (OHSW).Drama – do the rules create tension during play?
For the most part, combat actions have a 50-50 success rate. Many times both sides were drawing one card in the attack and two cards in defense, but because both sides had the same odds, it largely felt even. In either case, fortunes could swing wildly from phase to phase.
One element that supported that drama was close combat being so decisive. Losing meant you were out of action, rather than merely downed, and if you were downed when attacked, you automatically lost. This led to lots of action around downed figures. Maybe as I play it more and understand the risks better, the drama will reduce, but there were several time where I had 50-50 shots and got four hits in a row. That can decimate a force's ability to act in a heartbeat.
These rules rate 3 out of 5 in Drama.
Uncertainty – are there enough elements that introduce uncertainty into the game?
The three primary mechanics that create uncertainty are: will I act first or second; how many AP will I receive; and when will the turn end. This last element, when will the turn end, could cause the turn to end rather quickly, generally not impacting you in terms of accomplishing something that turn, but very probably ruining your chances at winning the scenario. If you are not playing a time-restricted scenario, this element will probably not produce much tension.
The order of acting being randomized allows you to gamble with your actions when you are second player. If you get first player next action phase and get a sufficient number of action points, you will likely look like a tactical genius. As for the opposite occurring, well it was a great plan but the cards were against you.
Engaging – do the rules allow the player to make meaningful decisions that lead to consequences?
Moving out of cover into the open definitely changes your odds. The basic combat is the attacker shooting with one card. A defender would have two cards in light cover and three cards in hard cover, Not impossible to overcome, but still not in the attacker's favor. Move out into the open and suddenly you defend with one card, a 50-50 shot.
I see spending AP like managing a hand of cards in a Command & Colors game. You need to be patient and take no rash actions until you build your hand. With OHSW you need to turtle when you draw low AP and make the bold moves when you have high AP, especially when you are second player.
These rules rate 4 out of 5 in Engaging.
Unobtrusiveness – do the rules get in the way?
No. Obtrusive have lots of exceptions for special cases. These rules have few such special cases to worry about.
These rules rate 5 out of 5 in Unobtrusiveness.
Heads Up – are the rules playable without frequent reference to a quick reference sheet?
Basically you need to memorize the stats for your troops at the beginning of the game, but given that most figures are the same, this is not really an issue. Stats may change as you switch from period to period, but within the period being played, pretty much everyone is the same, save for a few key figures.
The majority of my test game was played without the rules being nearby. Once you get the hang of the rules, you will only access them to refresh on stats before you start a new game.
These rules rate 5 out of 5 in Heads Up.
Appropriately Flavored – do the rules 'feel' like they represent the period or genre being played?
If anything, this is where the rules 'fail'. Yes, there are differences between weapon systems, even within a period. For example, in the Napoleonics test game the Rifles were infinite range, the Muskets an 18" range, the Carbines a 12" range (if the cavalry was firing while mounted, otherwise it was the same range as a Musket), and the Pistols 6". Everything was one shot per Fire action. Compare that to a single-shot breechloader in the Colonial period, where it has an infinite range and a single shot. The issue is not the range, but: a) the weapons are equally accurate; and b) the firing rate – every action phase – is the same.
Only time, and playing other periods, will tell if these have the right flavor. Right now, it feels really good for Age of Machine and onwards. It felt funny for Napoleonics.
These rules rate 2 out of 5 in Appropriately Flavored.
Scalable – can the rules be scaled up or down – in terms of figures or number of units played – from a 'normal' game?
Although the number of figures may vary from scenario to scenario, that really does not address scaling. The two primary mechanisms for 'how much can I do' are determining action points and determining when the turn ends. There is no scaling mechanism based on any factor, much less the number of models you are using. If you use a small number of models per side you will find that a higher percentage of models will get used in a game compared to when you use more models. Activity tends to cluster around a few models making aggressive moves. This system is designed to limit the number of points a single model can spend, so high AP draws will tend to allow figures on the periphery of combat to act, When you have the same number of points but more models, the periphery of combat will expand, so I suspect larger games will feel like more figures standing around doing nothing. But hey, you got the figures on the table!
These rules rate 2 out of 5 in Scalable.
Lacks Fiddly Geometry – do the rules require fiddly measurements or angles?
Anything with freeform movement will result in games in which you are 'just out'. Infantry moves 6" per move action and cavalry moves 9". Being forced to pay for a second move because you are 'just out' is actually very costly as second moves take more action points than first moves. This game would benefit from a grid. (Note that I say that with all games.)
The other aspect of the game that is fiddly is determining cover. Part of this may be that I do not like area terrain for a low scale skirmish game. Trees should not move around on a piece of felt and be 'just wherever' at this scale; they are immovable trees. So because I played that way I was basically eyeballing line of sight, which I find fiddly. Playing solo. this does not bother me, but I would never play it this way competitively.
These rules rate 3 out of 5 in Fiddly Geometry.
Tournament Tight™ Rules – are the rules clear and comprehensive, or do the players need to 'fill in the blanks'?
Let me start by saying that my preference is towards tighter rules, where everything is spelled out clearly by the author, not looser rules where the author leaves certain mechanics up to the individual players, gentlemen's agreements, and a roll of the die where agreements cannot be found. So a high value means 'tight' and a low value means 'loose'. If you like looser rules, subtract my rating from '6' and that would probably be your rating!
Although the author defines the different periods and weapon systems pretty sharply, he clearly intends that players develop their own modifications to suit their taste. Clearly a set of rules that covers from Muskets to Laser Rifles is not going to lock everything conceivable down.
That said, there is one area that they left wide open and clearly state they intend the players to work out before starting a game: terrain effects. They give you some basic game effect that you can apply to terrain, but leave it to you to determine which ones are in effect by talking it over with your opponent when going over the scenario. This is very much like Flames of War version 2 was. Effects described, suggestions made, few hard and fast rules.
Only one situation came up where they do not resolve it in the rules. Because there are two Jokers in each deck, and the turn ends after the first Joker is drawn, it is very possible that a Joker will be drawn while checking morale or resolving casualties. The rules state that a card's value is from 1 (Ace) to 13 (King), but if a Joker is drawn it is undetermined. (I ruled that it counts as a 0.)
Many decks have a Red Joker and a Black Joker, so if you draw one during casualty resolution, just use the color of the Joker to determine Dead or Back.
I think the lack of hard terrain definitions is significant, hence scoring this factor as average. Otherwise I cannot think of any ambiguity during play. Then again, that is pretty typical of solo play.
These rules rate 3 out of 5 in Tournament Tight™ Rules.
Solo Suitability – do the rules have elements conducive to solo play?
There are no hidden elements to the game so that alone usually grants the rules high solitaire suitability. Having a mechanism to randomize which units act next is usually an element that solo gamers inject into other rules, sometimes with disastrous results. So having that mechanism built in and accounted for is just icing on the cake. Because it does not have a mechanism for which figure acts, it is not given a perfect rating.
These rules rate 4 out of 5 in Solo Suitability.
Component Quality – are the components provided made with quality?
This is a new rating, meant primarily for board games and books, which addresses the quality of the physical components.
These rules only come printed. This is a paperback book with quality binding. However, it is not a lay-flat binding. Given the thinness of the book (just over 100 pages) it is capable of having a lay-flat binding. The quality of the paper and the legibility of the type screams quality. At $23, I think this book is a good value. I wish it had more scenario material, but I am happy with my purchase.
These rules rate 4 out of 5 in Component Quality.
Summary
There is much of this book that I did not cover – such as the scenarios for the other periods, the differences between periods, the points system (it is a little lightweight), and the notes on running campaigns (again, pretty lightweight) – for the most part I review rules, not books. These rules are very accessible, in my opinion clear and understandable (moreso when you break out the figures and try them), will possibly lead to disputes about terrain and 'just out' cases, and can provide a decisive game in a reasonable amount of time.Will everyone like these rules? No! Every rules author must decide where to add detail and where to abstract them away and players will not always agree on where that line should be drawn. If you think that there is "no way" you could play a set of rules that don't have modifiers to your probability to hit based on range or a myriad of other circumstances, you probably won't like OHSW. If you think there is "no way" you could play a set of rules that don't care about facing, then you probably hate board games and probably won't like OHSW also.
If you like Neil Thomas and wish he had come up with skirmish rules closer to his later design principles – after Wargaming, An Introduction but before One-Hour Wargames you will probably not like these rules. Neil Thomas liked tables and modifiers in that design period and these have none. If you like the raw simplicity of One-Hour Wargames and were always tempted to tweak them (or did), it is very possible that you will like these rules. This is probably why Pen and Sword decided to brand these under the One-Hour label.
Recommended.
Postscript
Even though I think this feels better for Age of Machine and later skirmishes, I cannot understand why the author felt this system should focus on the Age of Firearms. I think they would do well for ancient and medieval skirmishing too.
Monday, December 10, 2018
One-Hour Skirmish Wargames Review – Part 1
If you saw the "One-Hour" title and thought "Neil Thomas has put out another one", well you thought like I did. But no, although this is under the "One-Hour" brand, it is another author, John Lambshead, from the John's Toy Soldiers blog.
One-Hour Skirmish Wargames: Fast-Play Dice-less Rules for Small Actions from Napoleonics to Sci-Fi (OHSW [not an affiliate link]) is a new book from Pen and Sword in the vein of Neil Thomas' One-Hour Wargames (OHW), sort of. Basically it follows the mantra of stripping away the minutiae of detail that, in the author's opinion, doesn't lend to the decisiveness of the action. Keep it simple, keep it moving, make it fun.
Let me start by addressing three things that leapt out at me with OHW and compare them to OHSW.
Just because there are no dice doesn't mean there is no element of chance or a randomizer. OHSW uses cards for its chance element, the idea being that the probability of success is built into the cards; you just need to know the card combinations used to indicate success for each action.
Basically, cards are used for everything random.
The turn immediately ends when either player has to draw a card and a Joker turns up. Given that there are two decks and each has two Jokers, and cards are being drawn for all sorts of action resolution, ending the turn can happen at any time. Immediate ending also means that the current action is not completed, say if you were resolving a combat.
Each figure must complete all Move actions, if it is going to move, before taking a Fire action. As the author indicates, this is so cowardly players do not try and Fire and then move out of line of sight.
A figure can move up to three times, but the third Move action costs more action points than the second, which costs more than the first. So moving three figures costs fewer action points than moving one figure three times. This encourages using more figures in a single Action Phase than trying to create a super-move with one or two figures.


The French get a good card and also get 12 AP. A Chasseur charges forward at the Portuguese soldier, not only to protect the downed Chasseur, but to take revenge on the brother-in-arms lost. He cuts the soldier down with ease.

Spinning his horse, the Chasseur does a second Move action and cuts down another rifleman (who, for the sharp-eyed, looks suspiciously like a French Voltigeur). Although the French have the AP to spare, that ends that figure's move.

With the remaining AP, two French infantry take cover behind the rise and return fire at the British in the woods. Four other infantry march down the road towards the cannon.
Lots of risky moves by the French. Can they get the initiative for the next Action Phase?

Unfortunately for the French, no. The British retain the initiative.
The British draw 13 AP. The Sergeant of the Rifles shoots down the charging Chasseur, Meanwhile, after some maneuvering with the line infantry, they lay down fire into the French line marching up the road. The take two more soldiers down before a Joker is drawn, immediately ending the turn.
This is a good example of the asymmetric game play in that the British had three Action Phases while the French only had two. Further, the French only had 15 AP to spend while the British had 35 AP (although they did not get to spend the last 7 AP because the Joker came up).

Morale is checked for each side. Note that downed figures are not casualties; we have not determined if they are casualties or to be brought back. So when we check morale, they do not go against the casualty count.
The morale check is fairly simple. Draw a card, add the side's Motivation to the value. (Motivation is indicated in the scenario, or determined by the amount spent in a points-based force.) This number must exceed the number of casualties taken. Again, because the cards are valued from 1 to 13, unless you get a really low draw, it is easy to beat it, especially as leaders allow you to draw more than one card for the check. Both sides pass.
After the morale check you determine the fate for the downed figures. Red is Dead and Black is Back, so at the end of the turn one French soldier is dead, for a total of three figures lost, against two lost for the British.

One-Hour Skirmish Wargames: Fast-Play Dice-less Rules for Small Actions from Napoleonics to Sci-Fi (OHSW [not an affiliate link]) is a new book from Pen and Sword in the vein of Neil Thomas' One-Hour Wargames (OHW), sort of. Basically it follows the mantra of stripping away the minutiae of detail that, in the author's opinion, doesn't lend to the decisiveness of the action. Keep it simple, keep it moving, make it fun.
Let me start by addressing three things that leapt out at me with OHW and compare them to OHSW.
- The rules for OHW were very simple. Basically it came down to rolling a D6 number of hits when combat occurred and when the number of hits on a unit totaled 15, the unit was removed from the table.
- The scenarios were the main attraction. Many were similar to Tabletop Battles and other classic scenario books, but they were clean and precise on what they wanted you to do.
- The number of units was small and force composition was randomized.
- Although the rules are still simple, they are nowhere near as lacking in detail as OHW. These rules you might really want to play. (OHW rules never attracted me at all.)
- There are no generic skirmish scenarios. There is one specific scenario designed for each period presented (Napoleonics, Colonial, Post-WW I (Interwar), WW II, Cold War, and Pulp Action). There are no variations to those scenarios.
- There are no army lists, force composition tables, or any of that. The force composition for each scenario is specific, with no variation. There is a points system, and the points allocated for each side in each scenario. It is expected for you to use this if you wish to modify your forces.
Dice-less
Let's address this elephant in the room. The first review thread I saw on The Miniatures Page immediately jumped on that part of the title and many members condemned it, simply because they believed these sorts of games need dice.Just because there are no dice doesn't mean there is no element of chance or a randomizer. OHSW uses cards for its chance element, the idea being that the probability of success is built into the cards; you just need to know the card combinations used to indicate success for each action.
Basically, cards are used for everything random.
- Who goes first in a phase.
- When a turn ends.
- How many action points each player has to spend in a phase.
- Combat resolution.
- Casualty resolution.
I am always worried, when reviewing rules, that I am providing enough information for you to make an informed decision on whether the rules are 'for you' or not, without giving away all of the good stuff from the rules. Authors work hard to write their rules, so I don't want to be a party to giving it all away. If you feel like I don't explain clearly enough the rules concepts below, let me know in the comments section.
Initiative
Who goes first? Both sides flip a card, high card is the first player. The turn sequence is:- Determine initiative.
- First Player gets action points, spends them, and resolves all actions.
- Second Player gets action points, spends them, and resolves all actions.
- Assuming the turn did not end, start over at step 1.
Ending a Turn
Step 4 indicates that ending the turn is variable; there can be one or more Action Phases per turn. In fact, it is possible that players may have an uneven number of opportunities to act.The turn immediately ends when either player has to draw a card and a Joker turns up. Given that there are two decks and each has two Jokers, and cards are being drawn for all sorts of action resolution, ending the turn can happen at any time. Immediate ending also means that the current action is not completed, say if you were resolving a combat.
Action Points
There are two basic actions: moving and firing. Each figure can act only once per Action Phase and it must finish all of its intended actions before moving on to the next figure. You can spend action points on as many figures as you have action points, but know that moving and firing are separate actions, each costing points.Each figure must complete all Move actions, if it is going to move, before taking a Fire action. As the author indicates, this is so cowardly players do not try and Fire and then move out of line of sight.
A figure can move up to three times, but the third Move action costs more action points than the second, which costs more than the first. So moving three figures costs fewer action points than moving one figure three times. This encourages using more figures in a single Action Phase than trying to create a super-move with one or two figures.
So, how many action points do you get? Draw a card and the card's value (1 to 13) indicates the number of points. This makes for an incredibly wide spread of available points.
Combat Resolution
Here is the interesting part to me because people were tripping on the 'dice-less' moniker. Everything done in OHSW with cards could be done with dice, but they would be done with a four-sided die and a 13-sided die, which would be weird. Given the way the author uses probabilities, cards are more readable.
Basically combat is very simple: each player draws a card and the highest value card 'wins'. In close combat winning means your opponent is killed. In shooting winning means your target is 'downed' if you are the shooter, or you are missed if you are the target.
Varying probability is handled by drawing more cards. Skilled shooters draw more cards when shooting and targets in cover draw more cards when being shot at. Take the highest value card and discard the rest.
Some weapons have more than one 'shot' with a Fire action. This usually represents a rapid-firing weapon, multiple rounds, or an exploding round. So the first shot may miss, but the second may get the target. If the first shot gets the target, subsequent shots can go against an additional target within 3" of the original target, allowing you to simulate automatic weapons spraying, getting hit with canister, or getting hit by a grenade.
So, combat is very simple – highest draw (or if it were dice, roll) wins – and thus very quick to resolve. Very few figures get additional cards for being a skilled shooter or close combat expert. Weapons with multiple shots are dependent upon the period you are playing, so generally either everyone has that weapon or no one does.
The author intentionally stated that he did not want there to be any math involved with combat resolution. The situation determines the number of cards each side will draw, the players choose the highest drawn card, the two cards are compared to determine who is the winner.
Casualty Resolution
In the above I said that in close combat the loser is killed – the author indicates that close combat is intentionally made more decisive – whereas in the more common case of shooting, a hit target is 'downed'. A downed figure is laid on its side. It may not longer take any actions for the remainder of the turn. (Remember that a turn consists of one or more Action Phases.) Once the turn is complete, you determine the status of all downed figures by drawing a card for each. Red is Dead and Black is Back (stand the figure back up).
Casualties impact the morale check taken at the end of the turn (but before Casualty Resolution). If you fail this end-of-the-turn morale check, you have lost the scenario.
Movement
This is a free movement game. Because this is a skirmish game – which by the author's definition means that not only does one figure equal one person (or crewed weapon, or vehicle, or whatever), but each figure is a unit that is ordered separately – each figure is ordered and moved separately. So figures can only stay in formation if you have the action point to maintain it. There are no 'follow me' or 'group move' commands.
Infantry moves 6" per move, cavalry 9", crew-served heavy weapons cannot move (but may pivot), wheeled vehicles 6" off-road and 24" on-road, and tracked vehicles 12" per Move action. Any figure or model designated as 'Fast' moves an additional 3" per Move action. For Sci-Fi you can pretty much define whatever you want, so flying, skimmer, jump pack, and submersible movement would be additional modes to consider.
Terrain is defined as Area or Linear. Basically infantry is not affected by Area terrain unless it is declared Impassable. Basically players are required to clearly define and agree to terrain impacts prior to game play.
Well, there you have it. The basics of the OHSW rules. Let's try a test game (solo) to see how it plays out before rating it.
Test Game – Napoleonic Scenario "Capture the Cannon"
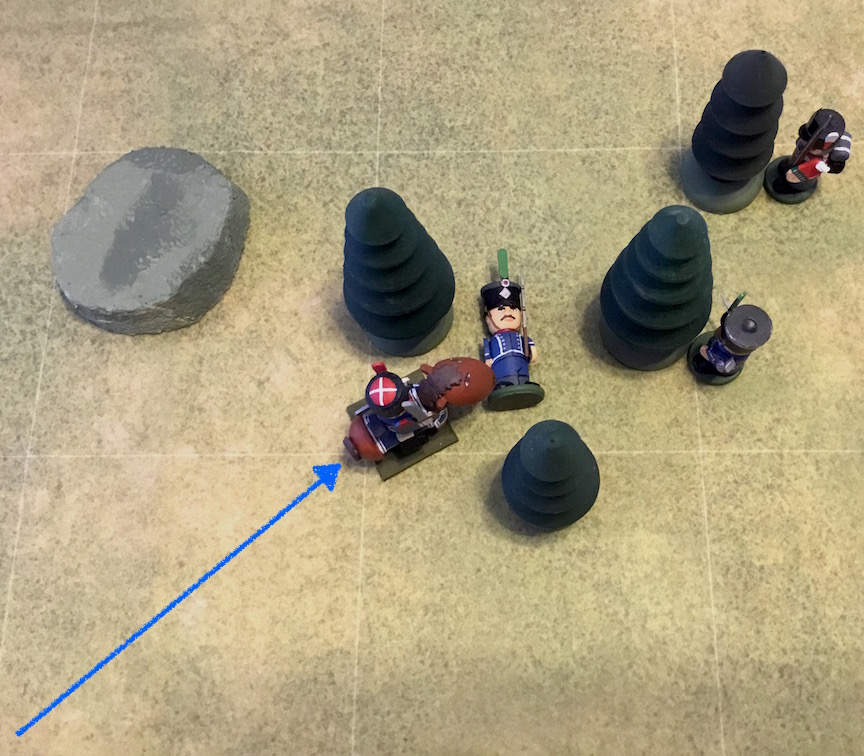
The Napoleonic scenario included with OHSW has the British attempting to recover an abandoned French cannon and the French rearguard returning to retrieve it. The cannon is in the center of the map, on the road. The British have the left half of the board in the picture below (bottom in all other pictures), while the French have the right quarter of the board (top in all other pictures).
The British have four riflemen (one of whom is a Sergeant and one of whom is a officer-killing sniper) and seven line infantry (one of whom is a Sergeant and one of whom is a close combat brawler). The rifles are significant in that they have an infinite range and take 2 action points to fire and reload. Muskets have an 18" range and take 1 action point to fire and reload.
The French have five mounted Chasseurs (sabers and carbines), nine line infantry (one of whom is a Sergeant), one artillery man (no difference than the line infantry man, just wanted to use him to retrieve the artillery for color), and one mounted Officer.
The British win by having a figure within 6" of the cannon at game's end (five turns or the breaking of either force), while the French win by breaking the British force. Any other result is a draw.
I am treating the tree models as individual trees, so the tree model is Impassable and provides light cover (they are thin trunks). Figures must move between the tree models. The hills are rises in the ground that provide heavy cover and can be seen and fired over. The road provides no movement bonus. The cannon model provides light cover.
Note that cover modifiers only apply if the line of fire passes over the model providing cover, so cover can be flanked.

Setup
I set the British up first as they are defending. For the most part I put the riflemen on the left flank, where their infinite range can come into play better, behind individual trees. The sniper (in a firing pose) is on the far left and the leader is nearer to the center.
The British line are setup on the right flank and center. The close combat brawler is distinct in that he is wearing a blue uniform (a Portuguese soldier who has lost his family to the French). He is forward, behind the hill, and ready to pounce on the cannon.
The French line infantry mass in the center, around the road, and are going to march straight in and take the cannon in force. The cavalry operates on the French right flank against the rifles. The hope is that they will tie up the rifles, distracting them from firing on the French infantry.
Turn 1
The French get the first action phase, but they draw a miserable 3 for action points (AP). I decide to move with one of the cavalry and fire at the sniper (and missing), while moving forward with a second cavalryman.

The British draw and get 10 AP. Each rifle takes 2 AP to fire and reload, so firing the left three rifles consumed 6 AP right off the bat and they all missed! Three of the line infantry maneuver (once each) and one fires on the flank of the French infantry formation, also missing.

Because we have completed the Action Phase (one go for the First Player and one for the Second Player), we draw for Initiative again. This time the British act first.
The British get 12 AP this time! Two of the British rifles fire, each downing one French cavalryman. The Portuguese soldier cannot stand the temptation and rushes out to bayonet a downed cavalryman.
In close combat, if your opponent is Downed, it automatically loses. The result of close combat is that the loser is automatically killed, so this meant that all the soldier needed to do was contact the figure at the end of movement. (Close combat is not a separate action, but done at the end of a Move action in which the moving figure ends in contact with an enemy figure.) Because it took two Move actions to reach the first cavalryman, a third Move action was too expensive for the soldier to bayonet the second cavalryman. (Remember, it costs an increasing number of AP to make a second and third move with a figure.)

The infantry on the right fire into the French formation, this time hitting two figures and putting them down. The French now have one casualty and three down.

The French get a good card and also get 12 AP. A Chasseur charges forward at the Portuguese soldier, not only to protect the downed Chasseur, but to take revenge on the brother-in-arms lost. He cuts the soldier down with ease.
Actually, it was a somewhat dicey move. The Portuguese soldier was a close combat brawler so he gets an extra card in both attack and defense. A cavalryman also gets an extra card over an infantryman, in addition to the extra card gained for attacking. So the cavalryman had three cards while the infantryman had two.

Spinning his horse, the Chasseur does a second Move action and cuts down another rifleman (who, for the sharp-eyed, looks suspiciously like a French Voltigeur). Although the French have the AP to spare, that ends that figure's move.
With the remaining AP, two French infantry take cover behind the rise and return fire at the British in the woods. Four other infantry march down the road towards the cannon.
Lots of risky moves by the French. Can they get the initiative for the next Action Phase?

Unfortunately for the French, no. The British retain the initiative.
The British draw 13 AP. The Sergeant of the Rifles shoots down the charging Chasseur, Meanwhile, after some maneuvering with the line infantry, they lay down fire into the French line marching up the road. The take two more soldiers down before a Joker is drawn, immediately ending the turn.
This is a good example of the asymmetric game play in that the British had three Action Phases while the French only had two. Further, the French only had 15 AP to spend while the British had 35 AP (although they did not get to spend the last 7 AP because the Joker came up).

Morale is checked for each side. Note that downed figures are not casualties; we have not determined if they are casualties or to be brought back. So when we check morale, they do not go against the casualty count.
The morale check is fairly simple. Draw a card, add the side's Motivation to the value. (Motivation is indicated in the scenario, or determined by the amount spent in a points-based force.) This number must exceed the number of casualties taken. Again, because the cards are valued from 1 to 13, unless you get a really low draw, it is easy to beat it, especially as leaders allow you to draw more than one card for the check. Both sides pass.
After the morale check you determine the fate for the downed figures. Red is Dead and Black is Back, so at the end of the turn one French soldier is dead, for a total of three figures lost, against two lost for the British.

End Turn 1
That should give you an idea of how One-Hour Skirmish Wargames plays. Let me say that more than one hour went into this game so far – although it included terrain setup, placing figures, game play, taking pictures, documenting moves, and fumbling around – but given that this is turn 1 of a five turn game, I cannot see how this would be considered a one-hour wargame, even counting only time for game play. That said, I am okay with that.
Next time I will show you how the game turned out, discuss how I think it all fared, and give my ratings for the rules.
Wednesday, December 05, 2018
Falling Dominoes of the Mind
One of the reasons that I like to collect rules is because I have this nasty tendency of taking a bit from here and a bit from there and using it to tweak other rule systems. Sometimes when I latch onto a new system, I am amazed at how something reminds me of this other system, which is like this other system over there, and so on. Like dominoes falling in your mind.
Case in point was (some time back) finding a set of rules using Warhammer 40K figures and lore, but rules nothing like Warhammer 40K itself, in any of its incarnations. I started work on expanding it – largely because it covered only two army lists, one of which I did not have – but I kept getting tripped up over certain details. (By the way, the rules are the SciFi Company Action rules at Grid-based Gaming (but not always).)
The main issue was I did not know that these rules were heavily based on the Tank on Tank rules by Lock n' Load, which I was not familiar with either. So I didn't 'get' the concepts behind them. Thus 'tweaking' them wasn't working.
To make a long story short, Tank on Tank is listed as an introductory board game focusing mainly tank battles of WW II. It does, however, include infantry, artillery, anti-tank guns, supply, positions, and air power, so it is not tanks exclusively. Although there are stat lines for each counter, which seems to represent either a platoon or company of the unit type, they are not detailed stat lines like you would find with other WW II games that include tanks, like Flames of War, Bolt Action, or Tank! Actually, there are only three stats: range, defense, and movement. Interestingly there is no offense or firepower stat. (A variant does sort of add an offense stat, but it is more of a modifier. More on that later.)
 So, a Panther would have a range of 3 hexes, a movement of 2 hexes, and require a die roll of 10 or more on 2D6 to be destroyed. A Sherman on the other hand, has a range and movement of 2 hexes and require a die roll of 9 or more to be destroyed.
Now, you may be wondering, doesn't the Panther get a bump in killing the Sherman because of its better gun? No. Whether firing from a Panzer IV or a Panther, it still takes a 9 or more to destroy the Sherman. I think this is largely because of the scale of what the counter represents. It is not a single tank, but rather a unit of that tank type. Largely the lesson of this rule set is concentration of firepower and that is reflected in the primary modifier to the die roll is adding the number of units that are firing upon the target. So, if I have two units firing on the Sherman unit (let's call it a platoon), you receive +1 per unit firing at it, with an additional +1 if one or more units are firing from the flank. (There are also terrain modifiers. You can download the rules for free if you want to explore it more thoroughly.) As you can see, putting more units on the target increases the chances of taking out the target. Killing the King Tiger, with its Defense of 12, is done by putting more firepower to bear on the unit, especially putting at least one on the flank, so you have a decent chance for a kill.
This started me thinking about the rules Ritter, Fusilier, Ein Ritter Spiel, etc. that I reviewed some time ago and played a test game with. The concept in those rules was to also bring multiple units to bear on a single target in order to achieve a kill, for example three musketeers firing on a single infantry unit will defeat it. I have always wanted to make a more modern version of Ein Ritter Spiel and it seems like combining these two offers an interesting, if simple set of rules. Ein Panzer Spiel!
Actually, I always think it is better to get the role of infantry right first, so I started thinking about the role of machine guns and rifles. How many WW II rules have you played and you thought that simulating the tactics of covering fire and maneuver just didn't play out in the rules? Bolt Action and Flames of War come to mind for me. (If I remember correctly it worked out fine with Hail of Fire though.) Bottom line though is fire and maneuver, suppression fire, and killing fire all need to be modeled out.
For example, you could create these rules to model suppression fire:
Case in point was (some time back) finding a set of rules using Warhammer 40K figures and lore, but rules nothing like Warhammer 40K itself, in any of its incarnations. I started work on expanding it – largely because it covered only two army lists, one of which I did not have – but I kept getting tripped up over certain details. (By the way, the rules are the SciFi Company Action rules at Grid-based Gaming (but not always).)
The main issue was I did not know that these rules were heavily based on the Tank on Tank rules by Lock n' Load, which I was not familiar with either. So I didn't 'get' the concepts behind them. Thus 'tweaking' them wasn't working.
To make a long story short, Tank on Tank is listed as an introductory board game focusing mainly tank battles of WW II. It does, however, include infantry, artillery, anti-tank guns, supply, positions, and air power, so it is not tanks exclusively. Although there are stat lines for each counter, which seems to represent either a platoon or company of the unit type, they are not detailed stat lines like you would find with other WW II games that include tanks, like Flames of War, Bolt Action, or Tank! Actually, there are only three stats: range, defense, and movement. Interestingly there is no offense or firepower stat. (A variant does sort of add an offense stat, but it is more of a modifier. More on that later.)

Now, you may be wondering, doesn't the Panther get a bump in killing the Sherman because of its better gun? No. Whether firing from a Panzer IV or a Panther, it still takes a 9 or more to destroy the Sherman. I think this is largely because of the scale of what the counter represents. It is not a single tank, but rather a unit of that tank type. Largely the lesson of this rule set is concentration of firepower and that is reflected in the primary modifier to the die roll is adding the number of units that are firing upon the target. So, if I have two units firing on the Sherman unit (let's call it a platoon), you receive +1 per unit firing at it, with an additional +1 if one or more units are firing from the flank. (There are also terrain modifiers. You can download the rules for free if you want to explore it more thoroughly.) As you can see, putting more units on the target increases the chances of taking out the target. Killing the King Tiger, with its Defense of 12, is done by putting more firepower to bear on the unit, especially putting at least one on the flank, so you have a decent chance for a kill.
This started me thinking about the rules Ritter, Fusilier, Ein Ritter Spiel, etc. that I reviewed some time ago and played a test game with. The concept in those rules was to also bring multiple units to bear on a single target in order to achieve a kill, for example three musketeers firing on a single infantry unit will defeat it. I have always wanted to make a more modern version of Ein Ritter Spiel and it seems like combining these two offers an interesting, if simple set of rules. Ein Panzer Spiel!
Actually, I always think it is better to get the role of infantry right first, so I started thinking about the role of machine guns and rifles. How many WW II rules have you played and you thought that simulating the tactics of covering fire and maneuver just didn't play out in the rules? Bolt Action and Flames of War come to mind for me. (If I remember correctly it worked out fine with Hail of Fire though.) Bottom line though is fire and maneuver, suppression fire, and killing fire all need to be modeled out.
For example, you could create these rules to model suppression fire:
- A machine gun unit will suppress the fire of an infantry unit for the remainder of the turn.
- Two infantry units can suppress the first of an infantry unit for the remainder of the turn.
- A machine gun unit and one infantry unit will kill an infantry unit in the open that they both can target.
- Three infantry units will kill an infantry unit in the open that they all can target.
Subscribe to:
Posts (Atom)
About Me

- Dale
- Huachuca City, Arizona, United States
- I am 58 yrs old now. I bought a house in Huachuca City, AZ working for a software company for the last three years. To while away the hours I like to wargame -- with wooden, lead, and sometimes paper miniatures -- usually solo. Although I am a 'rules junkie', I almost always use rules of my own (I like to build upon others' ideas, but it seems like there is always something "missing" or "wrong").