My blog about my wargaming activities. I collect a lot of 15mm miniatures for the American War of Independence and so collect a lot of rules for this period. I started miniatures with Napoleonics, so I have a number of armies in 6mm and 15mm figures for skirmishing. I have15mm WW II figures that I use for Flames of War, Memoir '44, and someday, Poor Bloody Infantry. Finally there is my on-again, off-again relationship with paper soldiers that I sometimes write about.

Showing posts with label terrain. Show all posts

Monday, August 14, 2023

Skirmish Scenario Design (Part One)

The game of Song of Drums and Shakos that I played at the last convention not only convinced me to play more skirmish games (where I can), but to possibly try my hand at running a game at the next convention I have lined up, SouthwestCon 2023 in Tolleson, AZ. To that end I decided to start designing a scenario to play and then do a few dry runs to refine it.

The first decision to make is what rules to use. Because the Song of engine re-kindled my interest, I am going to go with that. It is a relatively simple game that you can add as little or as much 'crunch' as you like, by adding in the special abilities. Also, every turn the player has numerous little decisions to make such as how many activation dice to use, so player engagement is relatively high.

The next decision is what period to play. My initial inclination was to use my wooden 43mm Dark Ages figures, to get them out on the table again. (The more I think about it, the more I realize I probably use them the most, of all the 43mm wooden figures I have.) Another alternative is Napoleonics. If I want to drop down to 28mm (and blow off some serious dust) I could make it WW II, but I would have to seriously tweak the Flying Lead rules (which I ranted about more than 10 years ago).


Several Playtests

So far I have played two Dark Ages and one Napoleonics version of a 'King of the Hill' scenario (where possession of the hill determines the victor) and the results brought up some interesting points, all of which make the scenario rather stale.

The Only Objective is to Eliminate the Enemy

The official scenario objective was "at the end of the game to have more figures on the hill than the enemy". However, there was always one overriding victory: elimination of the enemy, typically accomplished by them hitting a breakpoint and failing morale. If you did that, then it was assumed that you would take the hill unopposed after the enemy's rout.

In one scenario I remember losing enough figures early that I determined the only way to win was to break the enemy and thus capturing the hill was totally irrelevant. I ended up pursuing his leader attempting to run him down. If I had been able to accomplish that, half of the enemy forces would likely have routed and those that had not would either have vacated the hill, or if they had stood, been isolated and picked off.

Combat Becomes Static

Although this might sound like an inevitability with Dark Ages troops, as everyone gets into melee and maneuver essentially ceases, but it happens in Napoleonics too as troops settle into cover and start sniping at one another. This is either because the primary objective (the hill) is a static location or because everyone is 'stuck in' and movement only occurs when some figure is eliminated.

The Rest of the Board is Fairly Useless

Unless you both decide to ignore the primary objective and simply go for breaking the enemy force everyone is likely to be heading for the hill. Potentially terrain close to the hill might be of value as you snipe away at people on the hill, but in the end you have to be on the hill to win. But any terrain out of line of sight of the hill is essentially just window dressing.

A recent scenario is a good example of this. In the scenario depicted below, when I first reported about it, I left out all terrain detail, other than the town (in the lower right-hand corner). That is because everything other than the town was irrelevant. As it happened there were forests on the left, a ridge line on the French right flank, and roads. In this battle the town was worth 5 VP, a road on the enemy's baseline was worth 1 VP, all other terrain worth nothing, and destroying enemy troops worth variable VPs. (By way of comparison, I was able to score 3 VP for troop elimination against the enemy while they were able to score 2 VP against me.) I did not bother to draw other details because the town was the sole piece of terrain that mattered.

The 'King of the Hill' scenario feels the same way. Any terrain off of the hill just seems like window dressing.

Skirmish Scenario Design Objectives

So, what are the objectives of a good scenario design, especially for skirmish games? Let's start by taking a look at some rules and scenario books to see how they present victory conditions and scenarios.

Star Wars Shatterpoint Scenarios

One of my recent regrettable purchases was the game Star Wars Shatterpoint (SWS).

The game design looks good, but is just way too crunchy for my old brain. Like Star Wars Legion, but at a skirmish scale. The figures and terrain are really nice looking though, although some figures are a nightmare to assemble. I could have learned all of this had I watched more videos as content creators put them out, but I am generally a latecomer to rules and I wanted to be an early adopter this time. That will teach me!

SWS does have any interesting objective-based victory condition system. You start by picking a mission card, which defines where the objective markers are placed. All objectives are initially inactive (circles marked in gray).

SWS currently only has one mission card – the one shown above – and it evenly spaces out nine objective markers range 4 from the board edges and range 5 between each. If a marker appears where multi-level terrain is, it is placed on the upper level.

SWS has three different phases of the game, called Struggles. At the beginning of each Struggle a card is drawn which identifies which objective markers are active. In the example below, on the left, there are five objectives active, with the remaining four inactive throughout Struggle I. After the victory conditions of Struggle I are met, Struggle II is revealed, showing which objective markers are inactive and active. In the example below, on the right, a die is rolled on each player's turn to see which single objective marker is made active.

The net effect of this system is that it generally keeps players moving as they try and capture active objectives, keeping the enemy away from them. Between each struggle a winning position – in terms of who is successfully holding active objective positions – may turn into a losing one as the objectives have moved and you hold few or none of them. Players camp on positions, but generally not for the entire game.

Although an interesting concept and one that gives these rules the reputation for cinematic movement and action, one wonders how long before the shine comes off because players don't actually do anything at these locations, they just simply control them by outnumbering the enemy within a certain distance from the marker. In the example above, on the left, the objectives are supposed to be representing "stealing the secret plans", but there is no guarantee that there will be a computer terminal or a safe at each of these points; just an orange marker. Players are not required to have a figure perform an action, only that they are standing within a certain distance from it. They might have been full engaged moving or fighting. Still, it gets players to move into locations that might be out in the open rather than in cover, or have them move rather than make another attach in order to get 1" closer to the marker to contest. Put another way, it gets players to make sub-optimal moves rather than having them sit in heavy cover safely sniping away. At that it succeeds.

SWS has one of the best cures for people settling into cover and turtling there: you lose the game because you don't receive victory points for that. You get points for moving to and capturing points on the tabletop.

Intermission

You may not believe this, but it has taken me more than a week to write just this. My writing style is … chaotic. I sort of write in a stream of consciousness and edit it a bit afterwards. It is not so much that it is a lot of 'work', just that I want to get ideas out there and flowing and I sometimes wonder whether this is the best platform.

If I want to just send it out to you, with feedback limited to plain text comments, then I suppose this is the best method. But I am not sure that is what I want. I have been watching how Twitter/X has been changing as a platform and wonder whether that might be more suitable. I tried podcasting, but that is just as intensive as blogging – if not more so – and sort of limiting for the consumer. Twitter, on the other hand, is rather easy to consume. I can limit each thought to 280 characters (unless I get verified, then it is 4,000 characters I think). More importantly I have learned how to use the thread feature, so you can keep adding bits to a topic thread as ideas come to you.

I am thinking of trying that – maybe as a way of sorting out my thoughts and getting feedback – and then posting a completed thread here. There are lots of wargamers on there. If you are (or are not) interested, let me know. The account I use for this will not contain any personal posts, like vacation photos or political topics. Just straight up wargaming ideas. When I get the Twitter/X account sorted, I will post it here.

I'll pick up more on scenario design in the next post.

Thursday, October 06, 2022

A Fistful of Lead (Reloaded)

 Fistful of Lead (Reloaded)

A gaming buddy in Tucson, Bill Bushong (YouTube channel), invited me to a game today. Given that his schedule and mine rarely meshed, it has been a while since I have gamed with Bill as his terrain is always outstanding (as you will see). Now that I am retired and healed, I was able to synch with his schedule and we met up to play an Old West scenario using the rules Fistful of Lead (Reloaded) (FoLR). As I had never played these rules – although I watched The Joy of Wargaming YouTube channel use them – I went ahead and bought them thinking that this was Bill's Old West go-to rules.

I read through the rules portion (skipping the scenarios, campaign material, and such) and realized that somebody I had been watching plays them "wrong". (Actually, I think it would be more accurate to say he intentionally plays a specific game mechanic wrong in order to facilitate decision making while gaming solo.) These rules are pretty simple and clean. Only two things came up where we played it wrong and only one thing was not spelled out sufficiently where it required we come to an agreement, during the middle of a game, on how to interpret it. Bill being the easy-going guy that he is decided to go with my interpretation, as it would affect us equally in a positive way.

Turn Sequence

FoLR uses cards to handle activation and sequencing. Each player is dealt one card per model. The player takes those cards into a hand and plays them during the turn. The cards are called out from King down to Deuce in turn and if a player has one of those cards he activates one of his figures that have not yet been activated and takes two actions. (Aces and Jokers are wild, meaning you can assign them a value of any other card.) Some cards have special effects, such as allowing a player to reload without having to take an action, add +1 to shooting, or heal 1 wound. Once all cards are played by both sides, the cards are shuffled and the next turn started.

It is interesting to note that Bill and I did not shuffle the deck until it was exhausted, rather than shuffling at the start of each turn. I actually preferred this method because once the special cards are played, you know they won't come up again until the deck is reshuffled. So the odds are not constant from turn-to-turn and card counting actually has a use.

Actions

The basic actions a figure can take are move, shoot, aim, reload, climb, jump, etc. Because you have two actions you can mix and match them in the order you want (move then shoot, shoot then move, etc.), allowing a player to use micro-tactics. There is no holding of actions (i.e. overwatch), so no complicated rules regarding that. Simple, like I like it.

Shooting

Basically you have a target number for short range firing and another for long range firing. If you moved, or the enemy moved this turn, that gives a -1 penalty (each). Each wound taken also grants a -1 penalty. Finally soft and hard cover grant a -1 and -2 penalty, respectively. That is pretty much it. There are a few other special case modifiers (card special effects, being pinned, etc.), but it is all very easy to keep in your head. A '1' is out of ammo and a '10' is always a hit.

If you roll the target number or higher on a 1D10 (1D12 for a crack shot; 1D8 with a green horn) you have hit your target. You then roll a 1D10 to wound the target. (This may also be modified by a weapon, such as a shotgun at close range.) The wounds can be Pin (go to ground), Wounded (three wounds = dead), and Dead.

Close Combat

This is an opposed 1D10 die roll (with a few modifiers) between the two sides. The highest roller wins. For every point of difference between the two modified rolls 1D10 is rolled to wound. All of the effects rolled are applied. (Close combat is deadly!) The worst effect rolled is applied.

Wounding

As stated previously, each figure has three wounds. In addition, two Pin results in a Wound. Wounds affect movement, shooting accuracy, and close combat. Wounds and Pins force a player to recover at the start of the next turn, which has a 50/50 chance. If you recover, you get one action; if you don't you can't do anything but crawl away.

That's pretty much it. A very simple, clean system. Their activation system will appease those that hate activation systems because everyone will eventually activate, while those that love them will lie this because it still creates the chaos/fog of war/friction that they always rave about.

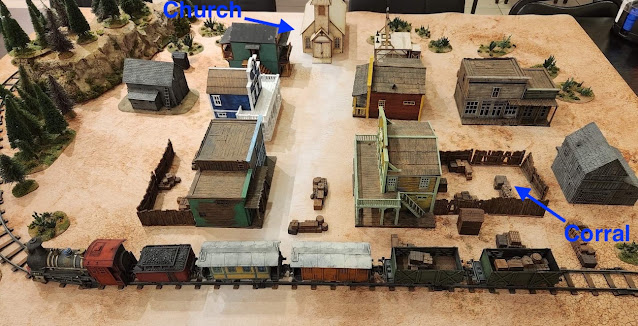
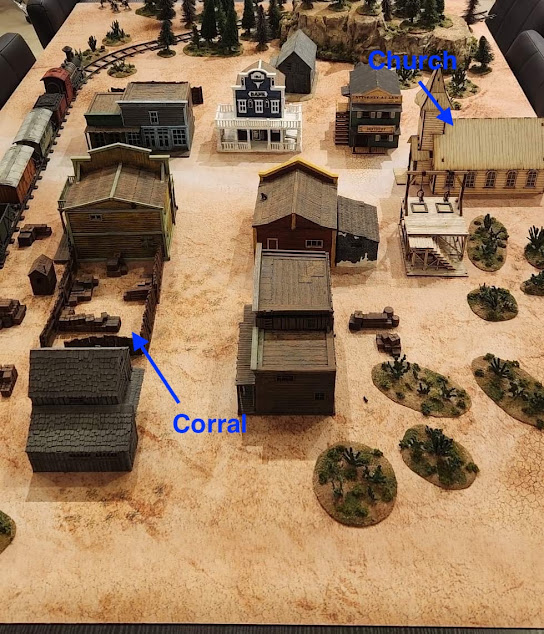
Gunfight at the Lazy Corral

View from the South Side of Town

When I saw this layout it was just "Wow!". Bill puts on a good table. The figures were all well painted too.

View from the East Side of Town

This scenario finds the rowdy Stinky Pete Gang drunk at the Lazy Corral. The Marshal has been looking for Stinky Pete 'dead or alive' so a townsman alerts the Marshal and his posse of 5 to their presence. Meanwhile another townsman alerts Stinky Pete and his 5 gang members that the Marshal is coming for them.

The Marshal and his group start on the north side of town, west of the church. Stinky Pete and his gang all start within the corral. Two major modifiers from what looks like an even scenario:

  • Each gang member must roll to see if they are drunk at the start of the game. (50/50 chance) Being drunk counts as being wounded once. (Half of my gang, including Stinky Pete, were drunk.)
  • Figures were WYSIWYG, so the Marshal's posse all had pistols, save for one shotgun. The gang all started with pistols and two additionally had carbines.

I personally thought the scenario was lopsided agains the gang. I still think it is, despite the results.

Stinky Pete is a known gunfighter and thus rolls a 1D12 when shooting (rather than 1D10). He has one green horn who rolls 1D8 though. The Marshal was also supposed to be a gunfighter.

Please note that I forgot to take photos in the beginning, but that did not matter as it was mostly moving into 12" pistol range and early long range shots missed.

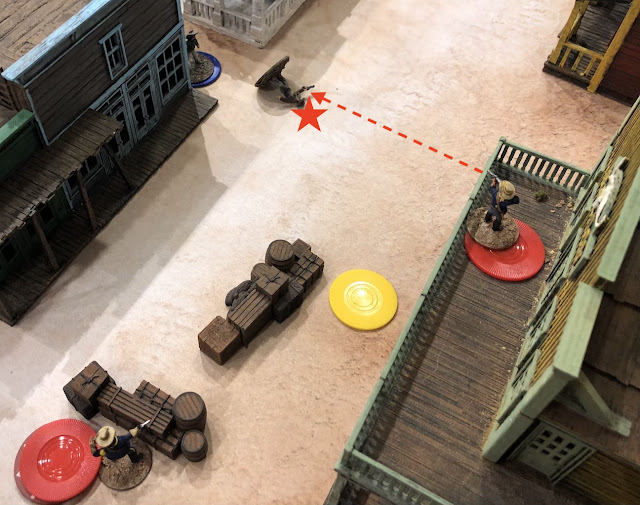
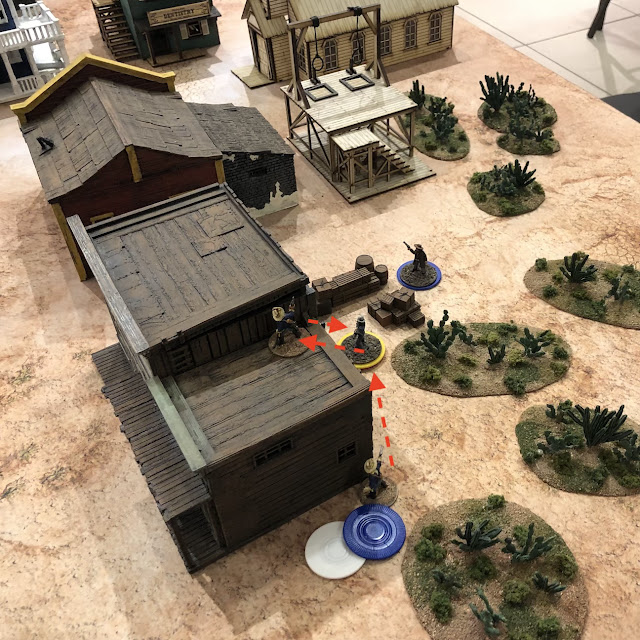
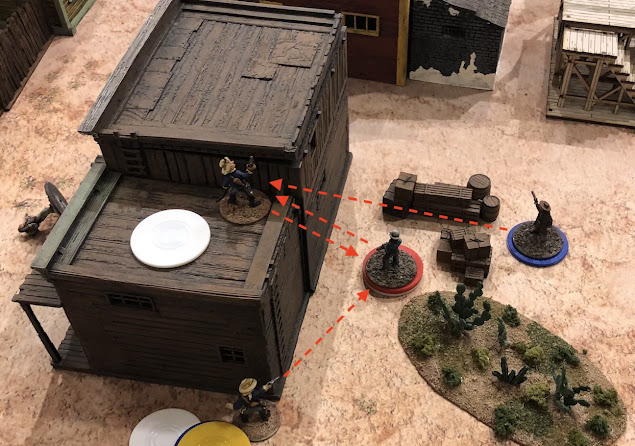
1 - The Left Flank
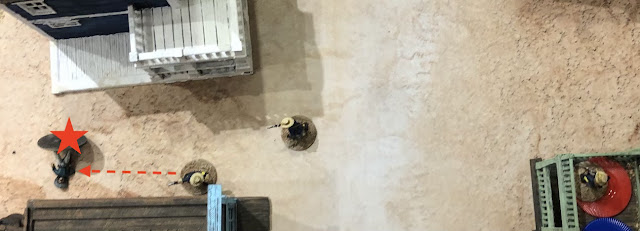
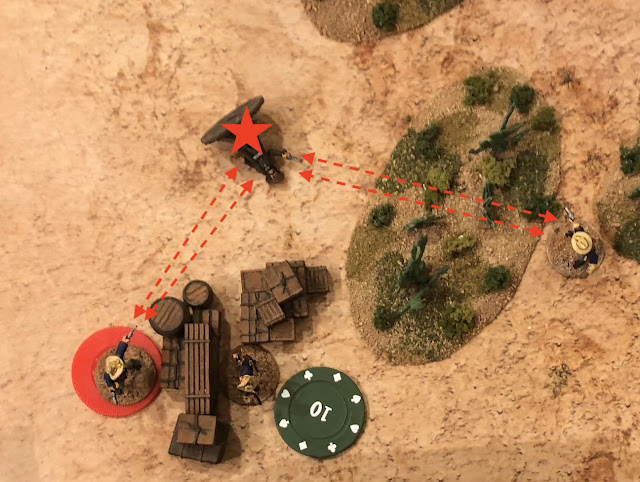
Gang Member with Carbine kills Deputy

Please note that a red chip represents one wound; yellow the unit is pinned; blue that the figure has an unloaded weapon; and white that the unit has activated this turn. (As this is the end of a turn, no white chips should be showing, but …)

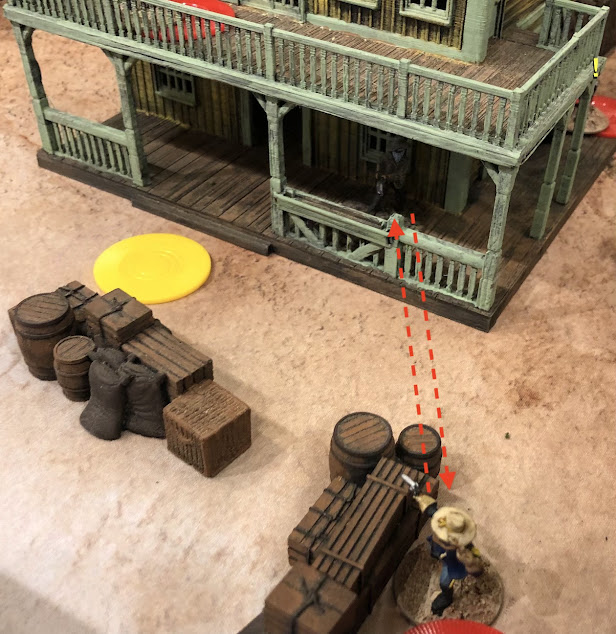
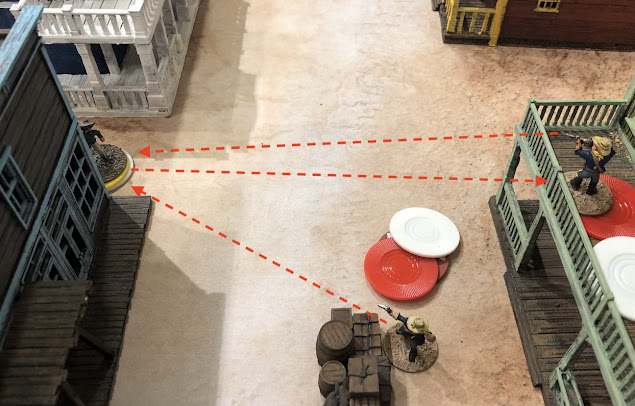
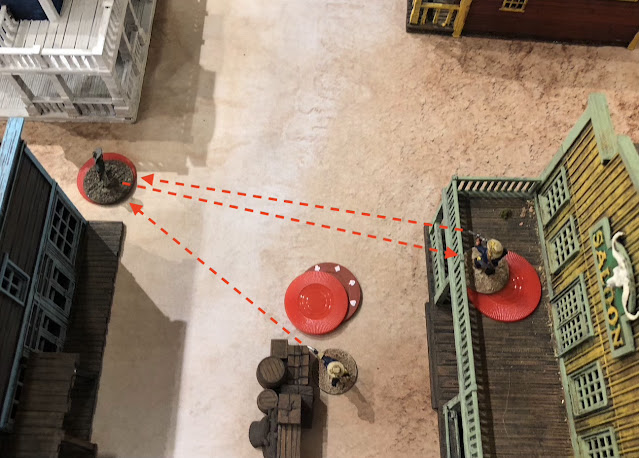
1 - The Center
Stinky Pete and the posse member with the shotgun trade shots, resulting in the latter being pinned.

Note that the Marshal's side did not notice the gang member sneaking up from the rear (upper right corner by the yellow '!'). This becomes critical next turn.

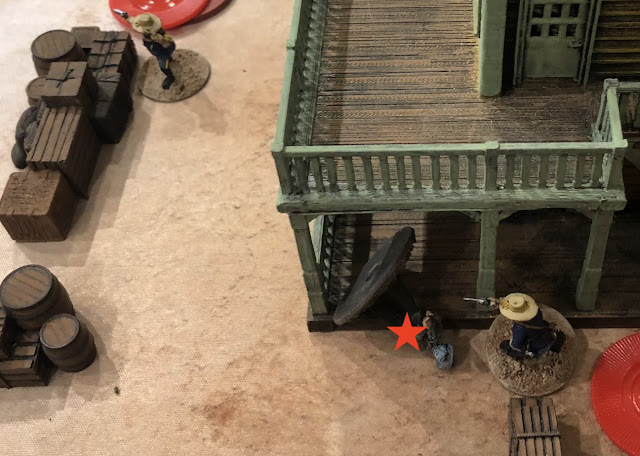
1 - The Right Flank
The green horn climbs up to the roof of the building and trades shots with a deputy below. Another gang member fires with his carbine around the corner and pins the deputy in the open.

Note that both sides have one figure that was not shown in these pictures. They are getting ready to face off outside the fence of the Lazy Corral.

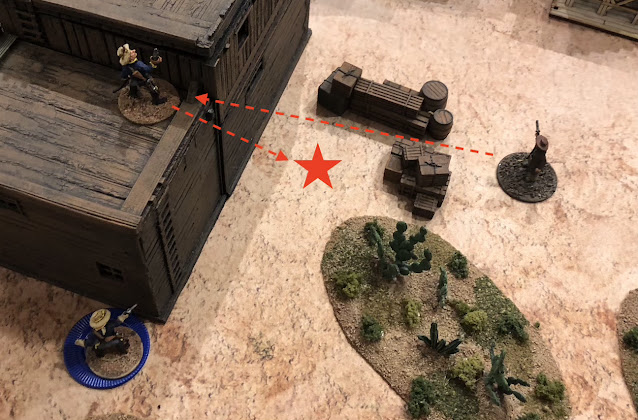
2 - The Left Flank
The gang continues to trade fire with the deputy, pinning him.
2 - Left Center
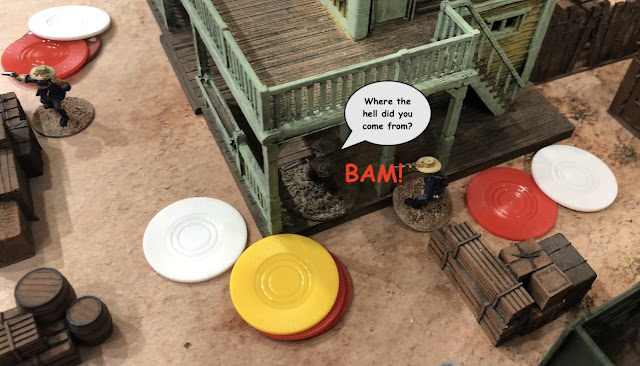
Sneaky Pete smacks the Deputy from behind, wounding him and knocking him down.

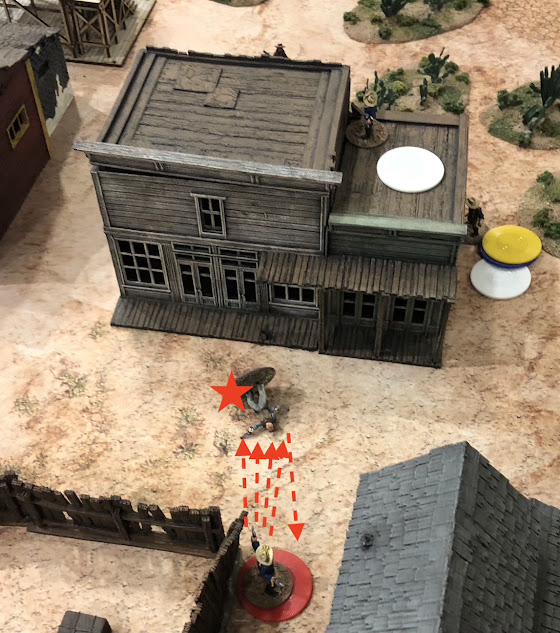
2 - Right Center
Deputy 'Sundance' Butch charges 'Two Pistol' Pete who guns him down.

One of the special effects in the game is that if a Deuce is played, each Shooting action allows two shots. You still run out of ammo at the same rate, but you definitely increase the change of wounding the enemy.

2 - The Right Flank
The gang members again exchange fire with the Marshal and his Deputy. The Deputy gets wounded and pinned. The Marshal and the gang member with the carbine both run end unloaded.

3 - The Left Flank
Both sides continue to blaze away, with the Deputy getting wounded.

3 - Center
Sneaky Pete finished off the Deputy with the shotgun. (He did not really stand a chance.)

3 - The Right Flank
Another Deputy goes down, this time at the hands of the green horn gang member.

At this point law enforcement is down to the Marshal and one Deputy, but still they press on.

6 - The Left Flank
Stinky Pete finishes off the last Deputy with his shotgun.

6 - The Right Flank
The Marshal gets caught in a crossfire and gets taken down.

Scenario Summary

I really thought, and still think, that the gang is at a disadvantage. So why did they win so thoroughly, taking no casualties while killing all of the enemy?

  • The gang having two long arms while law enforcement had none was a significant advantage. There were numerous times when I was shooting at short range and the return fire was at long range. The difference in range is a -30% penalty to hit.
  • The Jokers produce a random event. Two of those random events caused one of the gang members a -1 penalty for one turn each. Fortunately, they happened when those figures were out of combat, so had no effect on play. The other random event was a figure found a shotgun and shells. That figure was Stinky Pete. Because he rolled 1D12 to hit, that made the shotgun deadly.
  • The law was much more aggressive than the gang. Because the latter had long arms they were able to plink away at their enemies while the ones packing pistols maneuvered in close. Too many times the law ran out into the open, hoping for a lucky shot at a gang member in cover. (Essentially they were looking for a '10'.)
  • At the end of turn 2 the law was down, 4 to 6. By the end of turn 3 it was 2 to 6. I can understand them taking a chance of coming back on turn 3 as this game has a reputation for see-sawing back and forth quickly, but after turn 3, the odds were too great. They should have voluntarily retreated.

Game Summary

I like these rules. I would definitely like to get another supplement, say for WW II or modern, to see how they handle weapons with a higher rate of fire. I don't have a good set of skirmish rules for these periods. (For horse & musket and pre-gunpowder periods I am good with One-Hour Skirmish Wargames (OHSW). I will have to try those rules with WW II again someday.)

I like the semi-random activation order that FoLR uses (the same as both Bolt Action and The Sword and the Flame does) much better than the random order that specifies the side and unit activation order that Tin Soldiers in Action uses, or the random roll to see whether the unit activates, and the order stop if you fail (Warmaster, Black Powder, all of the ~ Rampant series, etc.). In the end I prefer rules that allow every unit to act each turn. IGO-UGO turn sequences where the entire side goes are simpler, but leads to all kinds of issues – the Alpha Strike being the primary one – unless it is specifically controlled for.

The simplicity of the combat system is nice. Die roll modifiers are a tried and true mechanism and works well as long as the list of modifiers do not get out of hand. If you can easily keep them in mind (with a 60 year-old brain), then that is about right.

The only morale, per se, is if a figure is pinned and then, when they attempt to recover, they roll a '1', the figure routs off of the board. Otherwise no rolls are made when wounded or you see someone die. In this regard, I like the fact that OHSW has a mechanism for determining if your force gives up the fight.

UPDATE: there were so many errors played in this game, it is not funny. I had watched these rules played on YouTube (several channels) and so I only skimmed the rules before playing. There were some differences I spotted, but there was a lot wrong. (I no longer rely on YouTube videos to 'teach' me how to play a game. Unless it is Rodney Smith on the Watch it Played channel, I just don't trust that they are going to get it all correct.)

Because of all of the errors in this game I am glad I did not formally review the rules.

Saturday, November 20, 2021

Clear Acrylic Bases

I had a truly horrendous mishap with a set of plastic Warhammer 40K figures that I have had for at least 20 years. I put them in a Sterlite plastic tub that – although not airtight, had a pretty good seal – and some sort of material started decomposing to a gas. When I was excavating through my pile, looking at old troops and found these in a long lost vein of plastic and pewter, I opened the tub and out came a very strong chemical smell, much like plastic solvent.

When I started going through the troops I realized that nearly all were damaged. The bases were curled or melted, and guns were warped out of shape.

There are a number of things to fix with some of them – like the above Dark Eldar army I bought – but my beloved Tau were the things I wanted to fix first, which largely only had base damage.

I have seen clear acrylic bases for sale, mostly touted for basing in skirmish games (individual figures or a weapon team), with the advantage being that your bases would 'match' the surface you are gaming on because you would see the board, table, cloth, or mat below. No more troops with a desert landscape scheme on top of your NW Europe landscape board. Because I had to rebase these troops, I decided to give Litko's bases a try. (This was before I purchased my own laser cutter.)

Here are the troops on a simple 'desert' felt gaming mat.

Same troops on a 'grass' felt gaming mat.

Same troops on a textured 'desert' canvas game board.

And finally on a cyberpunk-themed, silk-screen on neoprene, game mat.

Clearly, the bases are not going to be 'invisible'. The light will always catch the edges. But one thing I have noticed is that the smaller the scale of the figure, the more that it is the base of the figure(s) that catch the eye and not the figures themselves. So not having a large contrast between the base and the board does seem to make the figures pop.

What do you think?

Monday, January 25, 2021

I Received My Dream Tool: A Laser

This was long overdue, but as I head towards retirement (three more years) I decided it was time to stop procrastinating and to buy a dream tool that I had been pondering for a long time: a laser cutter and engraver. Now you might be wondering why this is on this particular blog and the answer is because it will absolutely play a role in cutting out parts for my wooden warriors.

In the past I used a Cricut cutting machine to cut out arm shapes and Spanish bicornes from craft foam sheet and, although I liked the flexibility of the material, I did not like how it took paint. With a laser I will easily be able to cut out shapes in 3mm and 1/8" thickness.

Right now I am in the experimental phase. I have long drawn images for wargaming using various drawing packages on the Macintosh. I bought the Glowforge Plus and it accepts SVG format files as input for 2D work, i.e. cutting and scoring. I have been using Inkscape for years, and that saves in many of the formats that the Glowforge accepts.

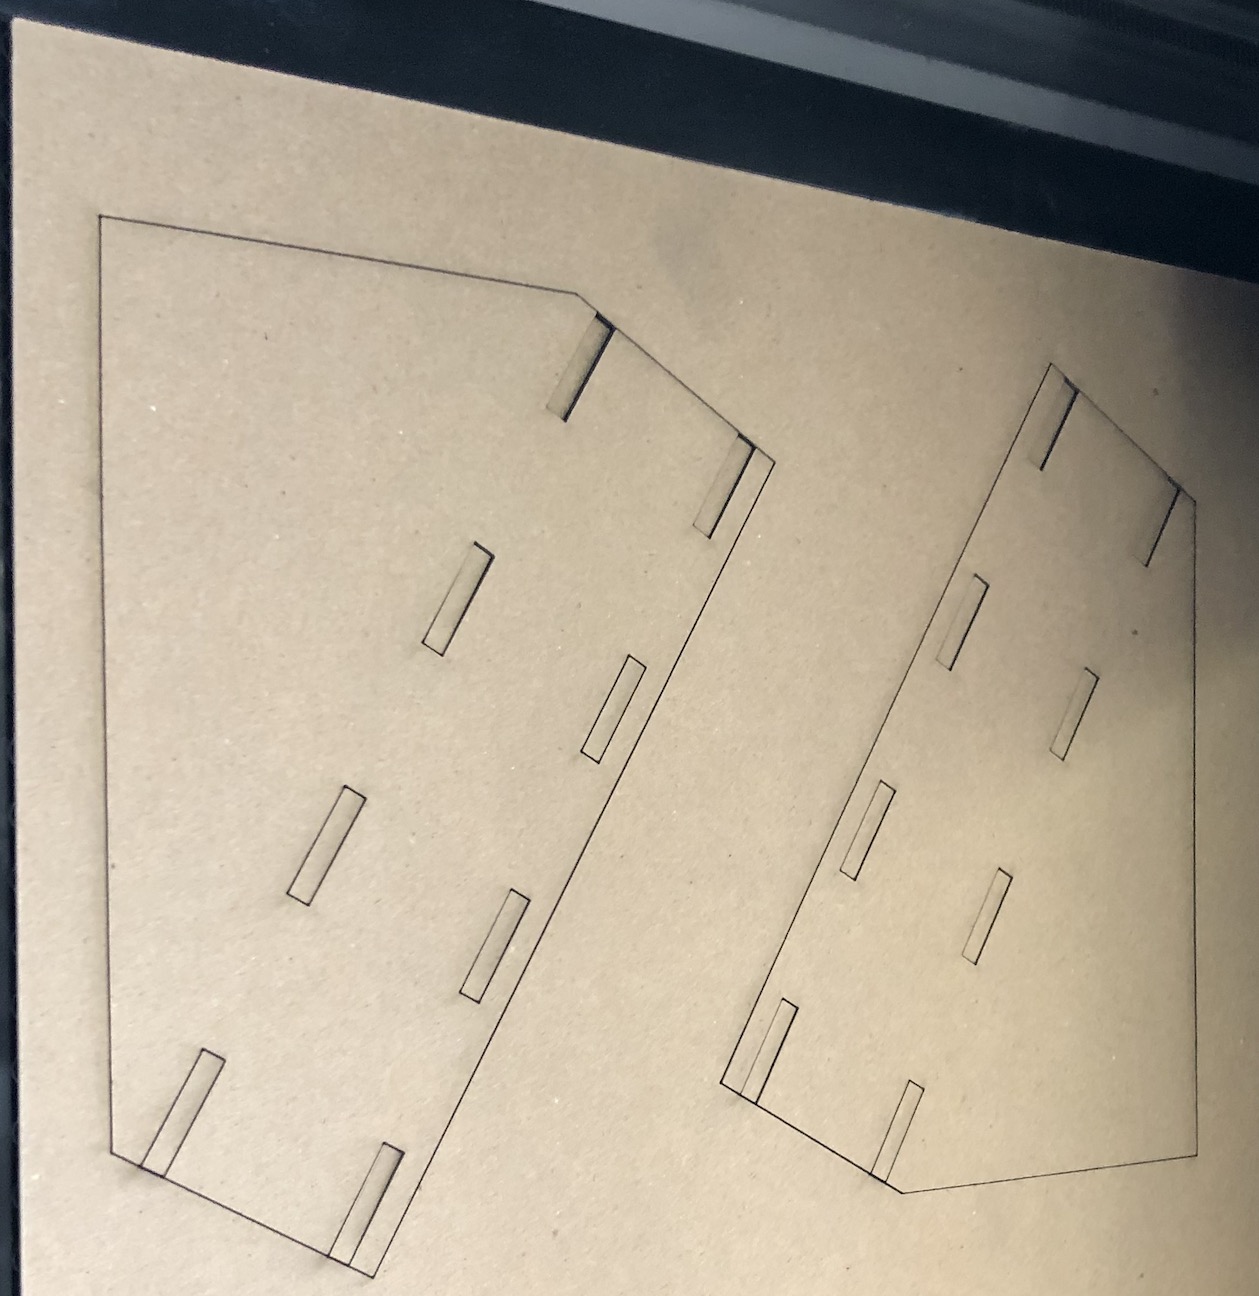
My first experiment was creating a painting rack for my paints. I use Pro Acryl mostly right now and they have a large bottle size than the craft paints and the Vallejo/Army Painter sized bottles, so I thought I would cut out my own as an initial project.

I looked at other paint holders and I noticed that many have the paint bottles standing straight up and down. The better ones stack one on top of another. I didn't really want that kind. I wanted the bottles angled and showing the color as much as possible.

The top plate of the holder has holes slightly larger than the bottle's diameter (30mm) so the paint bottle can slide in comfortably.

I decided to cut out two of these sheets so I could double up on the sides and make it stiffer.

The bottom has small holes so the bottle's tip could slide in.

I really like how I can see all the colors so easily. It takes up a bit of space, but I don't want stackable holders where I have to unstack them to remove a paint bottle and I am tired of having to pick up bottles to look at the color from holders where the bottles stand straight. If I were afraid of the bottles leaking I could still reverse them (tips up) and see the colors while being able to easily grab the bottle.

This was a really instructive project and I look forward to doing more. Right now all of my projects are more wargame accessories and the like. I generally don't like markers and tokens on the table, but use them in battle reports. Arrows to show movement or retreat, X to show combat or unit elimination, etc. I used to cut them from craft foam. Now I can draw up anything and have it cut from cardboard.

Sunday, December 20, 2020

Battle Systems Terrain

Like everyone I have been home a little more than usual (but not too much more, given I am this side of a shut-in) and I have been wondering why I have not been gaming as much as I think I would like. The more I thought about it the more I realized that when it comes to gaming, I have been a little too neglectful with the other hobby[1]: terrain making.

For example, I have a lot of Warhammer 40,000 miniatures and have almost zero terrain for it, other than a few generic trees and hills. But that is about it. Most of my terrain is for 15mm figures, and more oriented towards WW II. (The roads, for example, have tank tread marks, so are generally unsuitable for earlier periods unless you just overlook it.) Second is cartoony wooden terrain for my homemade 42mm wooden soldiers. 

Sometimes I feel like I should either get out of a lot of scales and periods, or get busy with making terrain. (I actually should do both, but let's not go there...)

The FLGS (Isle of Games in Tucson, Arizona) was having a 25% off Christmas sale (30% for "Big Kahunas" like me[2]) so I decided to head the 75 miles there and see what I could get in the way of terrain.

I saw the Battle Systems tabletop terrain sets on the shelf before, but I rarely gave it more than a glance. There was an open box once and it was printed cardboard, not plastic or MDF. It looked to be pretty flimsy cardboard at that. So I always passed it by.

Well yesterday I did not pass it by. One thing I noticed that I had not before was that the box included a neoprene mat that acted as the board. I recently wrote to Alpha Terrain about their MDF products and they showed a setup on a mat and with bases that looked like floors and sidewalks that the buildings and walls were on. It turned out that all of that was for show and was not included in their set, nor could you apparently buy it. The Battle System kit appeared to be showing exactly what was in the box. I decided to give it a try. In fact I bought not only the Cyberpunk Core Set shown above, I bought the City Block Core Set and the Frontier Core Set.

As the Cyberpunk Core Set was the smallest, and I was looking to play a scenario of Hardwired and maybe one of Chrome Hammer (the author of the latter is local), I decided to put that together first. Although this set makes a 2' by 2' table – a little small for 28mm figures – it is actually pretty adequate because the walls and such break up lines of sight really well, so this promises to be setup good for a close quarters battle scenario.

The first thing I want to point out is that this is my setup, not promotional pictures from the website. Second, this is most, but not all, of what is included. There were some additional signage and gizmos that I was not really able to figure out how to incorporate (yet). More on that later.

As you can see in the image above it has a nice number of walls and furniture. You are provided with extra straight, corner, t- and four-way intersection clips to connect the walls, so you are not limited to the setup shown on the back of the box. Further, Battle Systems sells additional walls and gubbins from this set so you can definitely expand beyond what you see. They even sell the mat.

The detail of the printing is pretty good. Note the one thing I did was go around all of the edges and blacken them with a permanent marker. When I looked closer at the images on the box and the website I noticed that they painted them, using appropriate colors (red, for the neon sign, for example, and steel for the wall tops and edges). I may go back and do that.

Here is a scene where my Tau have a Dark Eldar cornered. All in all it looks pretty good.

As I was assembling everything I started to wonder if these were a little too ... small.  As you can see with my GW figures below they are actually scaled pretty well with them. The crate is about 1/2 body height, even with the thick bases. They would probably look a bit small for Space Marines, but hey ... Space Marines.

They would look really well with the Star Wars figures from Imperial Assault. (I am not so sure about with the figures from Star Wars: Legion, which I also bought into.)

In case you didn't notice, there is a square grid printed on the mat. They are 1" squares, so if you play games where not knowing the range is a thing... Me, I don't play those sorts of games. I love the grid and before I noticed it, I was considering putting dots on the mat to demark the grid. So one less thing to do.

So, is it all pie in the sky? There are some minor issues, like a little bit of warping and wondering whether there will be wear and tear as I keep setting it up and tearing it down. But let me tell you, the ability to quickly get a board together like this was certainly worth the cost (about $75 for this set and $110 each for the other two sets). Again, Battle Systems has additional sets and individual parts so assuming that this holds up to my gaming, I can see getting more and gaming this genre more. So far I am impressed.

Footnotes

[1] One of the other things I have come to realize is that "gaming" is generally not a single hobby for most people. There is the miniature collecting hobby, the miniature painting hobby, the terrain making hobby, and the gaming hobby. I think the only people that get away with "just" gaming are those that show up for games at the hobby shop or your home, use your miniatures, and generally never know the rules.

[2] I get that "Kahuna" and "Big Kahuna" are rankings that speak to the "Isle" theme, but I think the real definition is "a wise man", which isn't really accurate, given they add the label for big spenders. I think they use it instead of another island-themed term: whale.

Sunday, April 07, 2013

Barks' Gameboard - Wow!

Every so often I go through the list of people following this blog and see what blogs they have and follow. There are some really good blogs out there. In fact, most of the blogs I follow come from that list of readers' blogs or blogs they follow.

I looked at Barks profile and found his Wargaming with Barks blog and was immediately struck by the appearance of his gameboard. (By the way, Barks has an interesting series of articles on painting the Battlefront river terrain pieces, making them look even better. You should check them out, especially if you have those terrain pieces.)

Back to the gameboard. It really has a good look to it. So I started searching for an article to see how he made it. I was shocked to learn that it was a Citadel (GW) Realm of Battle Gameboard, which I had never heard of. Barks' article on how he did his gameboard is really interesting. Even though Citadel's gameboard is $300, for what essentially looks like a 6' by 4' injection molded plastic model, it looks very tempting, especially when you see the results Barks obtained.

Which brings me to my point. We tend to spend quite a bit of money and time on our figures, and even to some extent on basing those figures, but it is the rare person that spends that time and money on really good terrain. In the end, is $300 really that expensive for the 'ground covering' of a 6' x 4' table? (You can extend the table size by getting two 2' x 2' squares for an additional $100.) Granted, you still need to get woods, buildings, rivers, and roads, plus some extra hills might be nice.

This also hearkens me back to an old What Would Patton Do (WWPD) podcast with Shawn Morris (The Terrain Guy) where they discussed the idea of gaming on static gameboards. (By the way, the Realm of Battle Gameboard is not exactly static. As shown on the web page, it can be rearranged a number of ways to add some variety.) Although Shawn made a compelling argument about using static gameboards, other than Jon Baber's Arnhem gameboard, it does not sound like the WWPD really took to the idea, in the long run.

I've seen a number of your blogs, and battle reports for those that do them, and I see most people do it like I do. Lay down a game cloth or mat (I have an old US Army blanket, some grass green micro-fleeces from Wal-Mart, and a Citadel Game Mat that I switch between), plop some terrain down, and then game. The conclusion is that terrain variety seems to be more important than, say, a cohesive set of terrain pieces that actually look like they go together. (That is more a comment on my terrain, dear readers, and not on yours! In my AWI games you can unfortunately see tank tread marks in the muddy roads!)

So, is that true? Do you favor terrain configurations and variety over a cohesive, but static or semi-static vision? Has anyone every played a fair number of games over the same terrain, but with different scenarios, goals, and objectives? Can you shed any light on what it is really like?

Blog Archive

Blog and Forum Pages

Popular Posts

Followers

About Me

My photo
Huachuca City, Arizona, United States
I am 58 yrs old now. I bought a house in Huachuca City, AZ working for a software company for the last three years. To while away the hours I like to wargame -- with wooden, lead, and sometimes paper miniatures -- usually solo. Although I am a 'rules junkie', I almost always use rules of my own (I like to build upon others' ideas, but it seems like there is always something "missing" or "wrong").