Fistful of Lead (Reloaded)
A gaming buddy in Tucson, Bill Bushong (YouTube channel), invited me to a game today. Given that his schedule and mine rarely meshed, it has been a while since I have gamed with Bill as his terrain is always outstanding (as you will see). Now that I am retired and healed, I was able to synch with his schedule and we met up to play an Old West scenario using the rules Fistful of Lead (Reloaded) (FoLR). As I had never played these rules – although I watched The Joy of Wargaming YouTube channel use them – I went ahead and bought them thinking that this was Bill's Old West go-to rules.
I read through the rules portion (skipping the scenarios, campaign material, and such) and realized that somebody I had been watching plays them "wrong". (Actually, I think it would be more accurate to say he intentionally plays a specific game mechanic wrong in order to facilitate decision making while gaming solo.) These rules are pretty simple and clean. Only two things came up where we played it wrong and only one thing was not spelled out sufficiently where it required we come to an agreement, during the middle of a game, on how to interpret it. Bill being the easy-going guy that he is decided to go with my interpretation, as it would affect us equally in a positive way.
Turn Sequence
FoLR uses cards to handle activation and sequencing. Each player is dealt one card per model. The player takes those cards into a hand and plays them during the turn. The cards are called out from King down to Deuce in turn and if a player has one of those cards he activates one of his figures that have not yet been activated and takes two actions. (Aces and Jokers are wild, meaning you can assign them a value of any other card.) Some cards have special effects, such as allowing a player to reload without having to take an action, add +1 to shooting, or heal 1 wound. Once all cards are played by both sides, the cards are shuffled and the next turn started.
It is interesting to note that Bill and I did not shuffle the deck until it was exhausted, rather than shuffling at the start of each turn. I actually preferred this method because once the special cards are played, you know they won't come up again until the deck is reshuffled. So the odds are not constant from turn-to-turn and card counting actually has a use.
Actions
The basic actions a figure can take are move, shoot, aim, reload, climb, jump, etc. Because you have two actions you can mix and match them in the order you want (move then shoot, shoot then move, etc.), allowing a player to use micro-tactics. There is no holding of actions (i.e. overwatch), so no complicated rules regarding that. Simple, like I like it.
Shooting
Basically you have a target number for short range firing and another for long range firing. If you moved, or the enemy moved this turn, that gives a -1 penalty (each). Each wound taken also grants a -1 penalty. Finally soft and hard cover grant a -1 and -2 penalty, respectively. That is pretty much it. There are a few other special case modifiers (card special effects, being pinned, etc.), but it is all very easy to keep in your head. A '1' is out of ammo and a '10' is always a hit.
If you roll the target number or higher on a 1D10 (1D12 for a crack shot; 1D8 with a green horn) you have hit your target. You then roll a 1D10 to wound the target. (This may also be modified by a weapon, such as a shotgun at close range.) The wounds can be Pin (go to ground), Wounded (three wounds = dead), and Dead.
Close Combat
This is an opposed 1D10 die roll (with a few modifiers) between the two sides. The highest roller wins. For every point of difference between the two modified rolls 1D10 is rolled to wound. All of the effects rolled are applied. (Close combat is deadly!) The worst effect rolled is applied.
Wounding
As stated previously, each figure has three wounds. In addition, two Pin results in a Wound. Wounds affect movement, shooting accuracy, and close combat. Wounds and Pins force a player to recover at the start of the next turn, which has a 50/50 chance. If you recover, you get one action; if you don't you can't do anything but crawl away.
That's pretty much it. A very simple, clean system. Their activation system will appease those that hate activation systems because everyone will eventually activate, while those that love them will lie this because it still creates the chaos/fog of war/friction that they always rave about.
Gunfight at the Lazy Corral
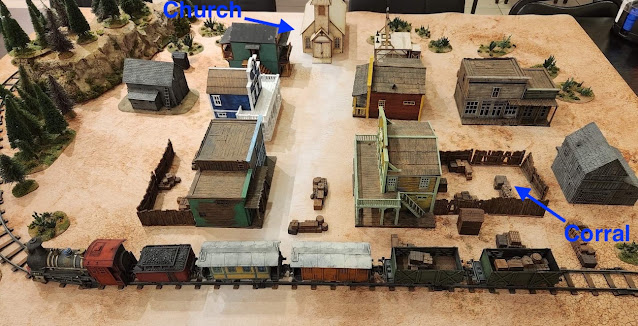 |
| View from the South Side of Town |
When I saw this layout it was just "Wow!". Bill puts on a good table. The figures were all well painted too.
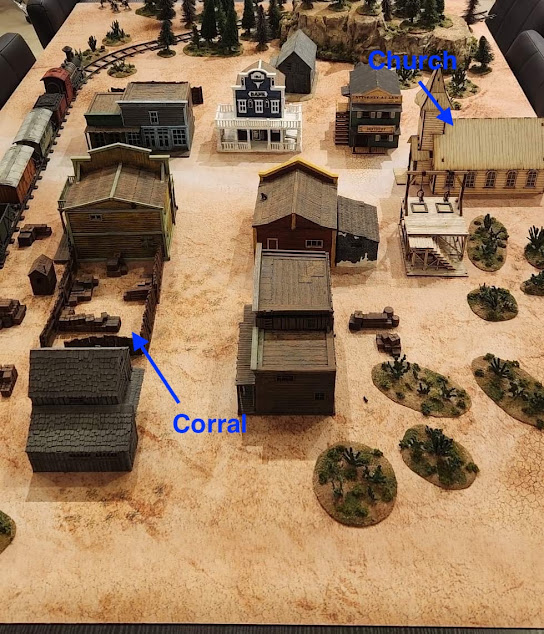 |
| View from the East Side of Town |
This scenario finds the rowdy Stinky Pete Gang drunk at the Lazy Corral. The Marshal has been looking for Stinky Pete 'dead or alive' so a townsman alerts the Marshal and his posse of 5 to their presence. Meanwhile another townsman alerts Stinky Pete and his 5 gang members that the Marshal is coming for them.
The Marshal and his group start on the north side of town, west of the church. Stinky Pete and his gang all start within the corral. Two major modifiers from what looks like an even scenario:
- Each gang member must roll to see if they are drunk at the start of the game. (50/50 chance) Being drunk counts as being wounded once. (Half of my gang, including Stinky Pete, were drunk.)
- Figures were WYSIWYG, so the Marshal's posse all had pistols, save for one shotgun. The gang all started with pistols and two additionally had carbines.
I personally thought the scenario was lopsided agains the gang. I still think it is, despite the results.
Stinky Pete is a known gunfighter and thus rolls a 1D12 when shooting (rather than 1D10). He has one green horn who rolls 1D8 though. The Marshal was also supposed to be a gunfighter.
Please note that I forgot to take photos in the beginning, but that did not matter as it was mostly moving into 12" pistol range and early long range shots missed.
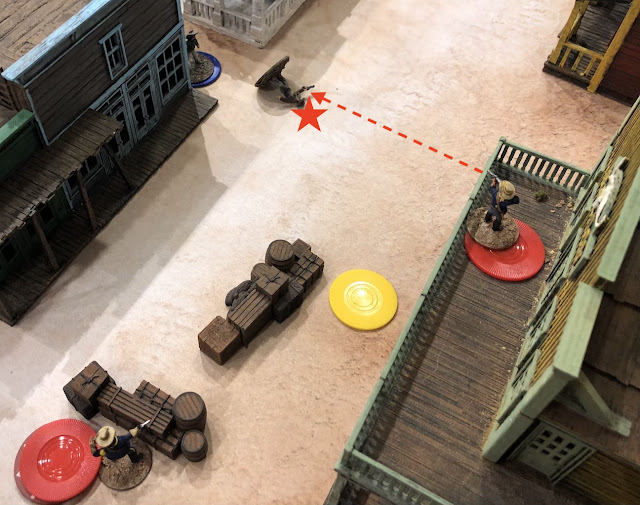 |
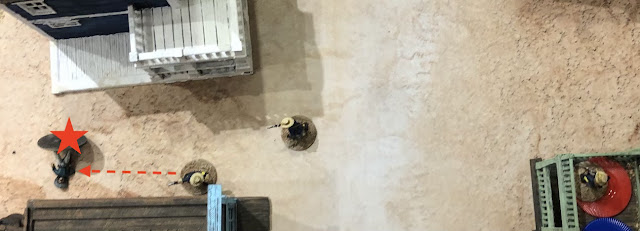
| 1 - The Left Flank Gang Member with Carbine kills Deputy |
Please note that a red chip represents one wound; yellow the unit is pinned; blue that the figure has an unloaded weapon; and white that the unit has activated this turn. (As this is the end of a turn, no white chips should be showing, but …)
 |
| 1 - The Center Stinky Pete and the posse member with the shotgun trade shots, resulting in the latter being pinned. |
Note that the Marshal's side did not notice the gang member sneaking up from the rear (upper right corner by the yellow '!'). This becomes critical next turn.
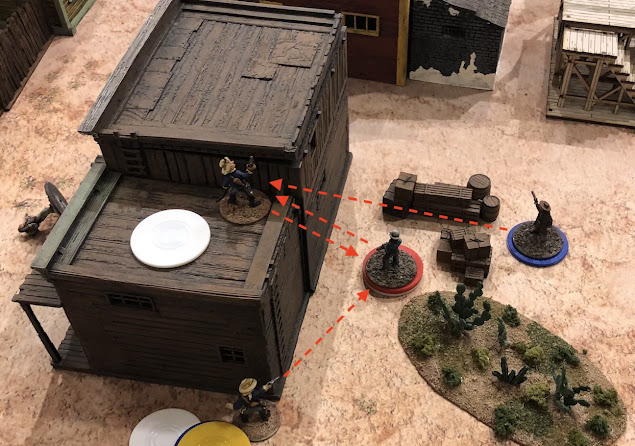
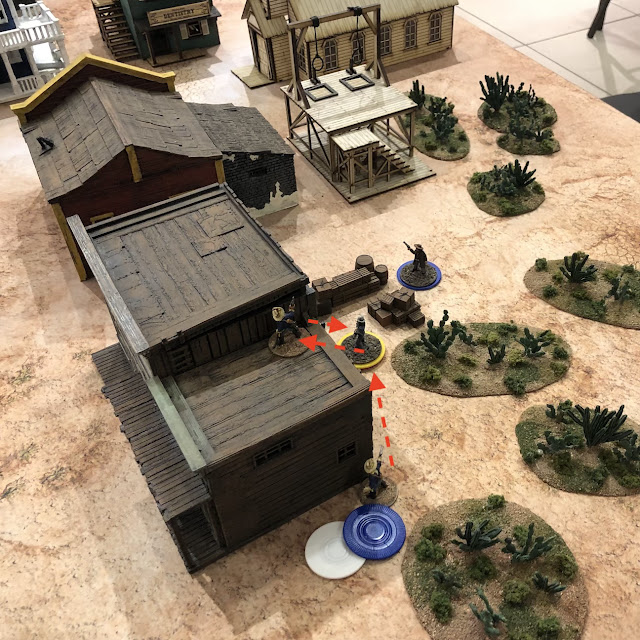 |
| 1 - The Right Flank The green horn climbs up to the roof of the building and trades shots with a deputy below. Another gang member fires with his carbine around the corner and pins the deputy in the open. |
Note that both sides have one figure that was not shown in these pictures. They are getting ready to face off outside the fence of the Lazy Corral.
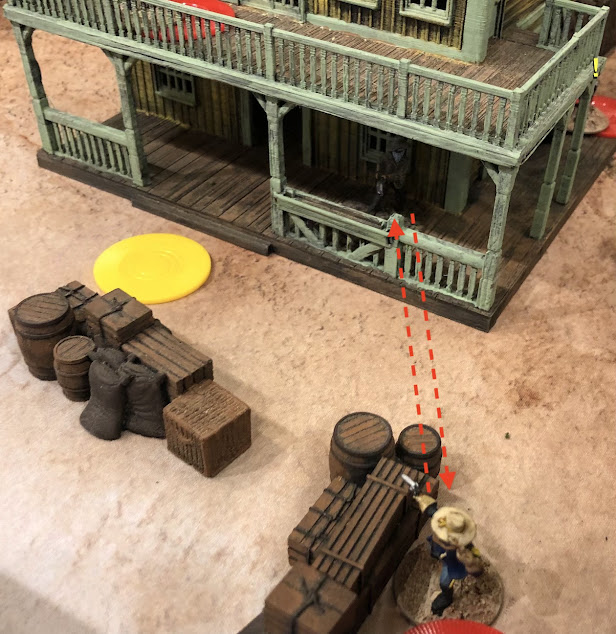
 |
| 2 - The Left Flank The gang continues to trade fire with the deputy, pinning him. |
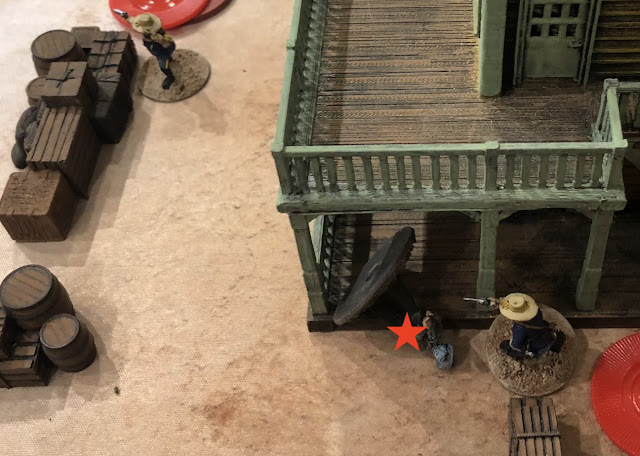
 |
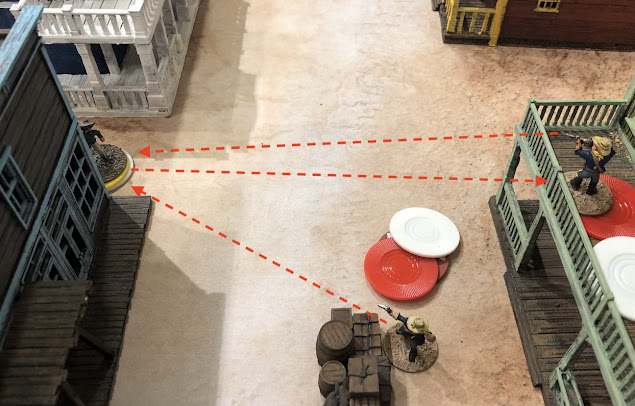
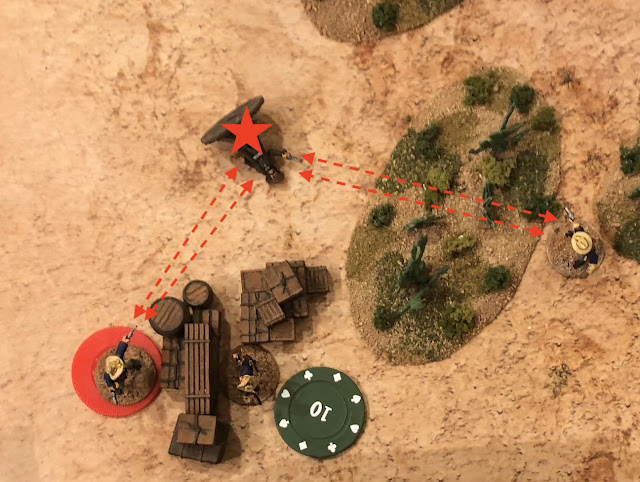
| 2 - Left Center Sneaky Pete smacks the Deputy from behind, wounding him and knocking him down. |
 |
| 2 - Right Center Deputy 'Sundance' Butch charges 'Two Pistol' Pete who guns him down. |
One of the special effects in the game is that if a Deuce is played, each Shooting action allows two shots. You still run out of ammo at the same rate, but you definitely increase the change of wounding the enemy.
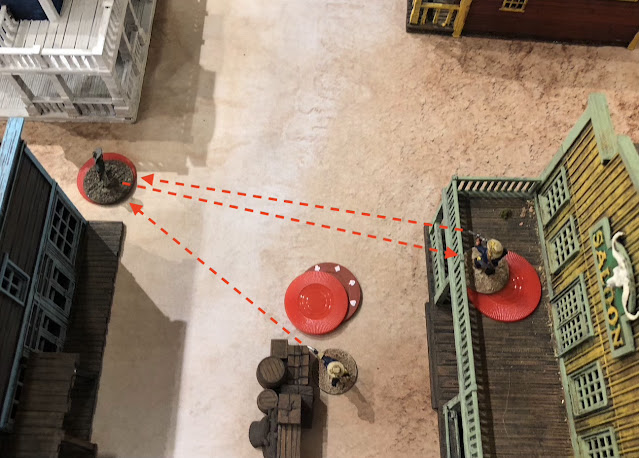
 |
| 2 - The Right Flank The gang members again exchange fire with the Marshal and his Deputy. The Deputy gets wounded and pinned. The Marshal and the gang member with the carbine both run end unloaded. |
 |
| 3 - The Left Flank Both sides continue to blaze away, with the Deputy getting wounded. |
 |
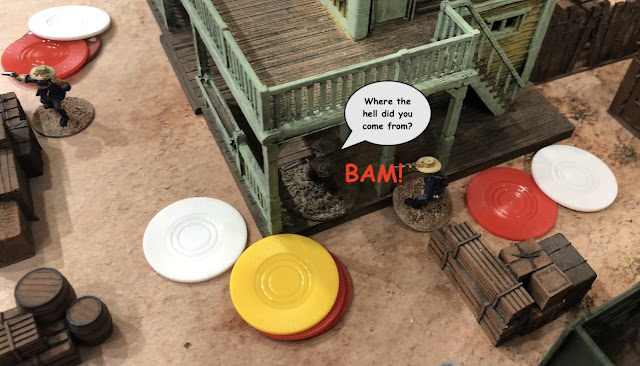
| 3 - Center Sneaky Pete finished off the Deputy with the shotgun. (He did not really stand a chance.) |
 |
| 3 - The Right Flank Another Deputy goes down, this time at the hands of the green horn gang member. |
At this point law enforcement is down to the Marshal and one Deputy, but still they press on.
 |
| 6 - The Left Flank Stinky Pete finishes off the last Deputy with his shotgun. |
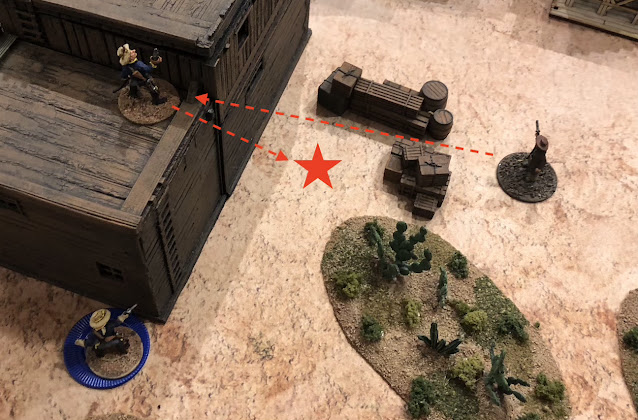
 |
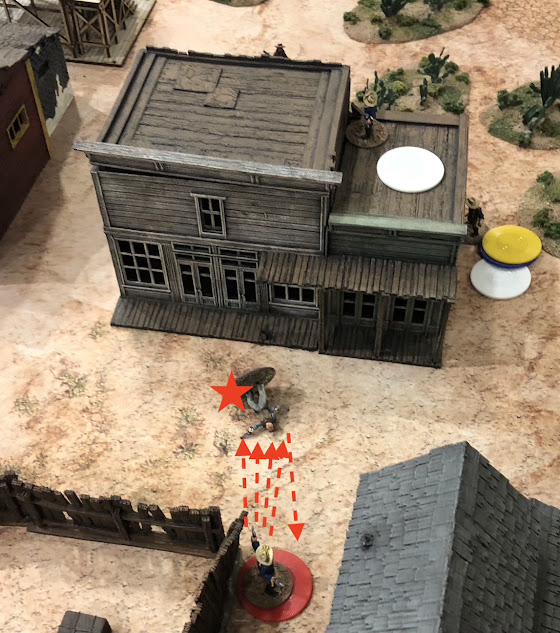
| 6 - The Right Flank The Marshal gets caught in a crossfire and gets taken down. |
Scenario Summary
I really thought, and still think, that the gang is at a disadvantage. So why did they win so thoroughly, taking no casualties while killing all of the enemy?
- The gang having two long arms while law enforcement had none was a significant advantage. There were numerous times when I was shooting at short range and the return fire was at long range. The difference in range is a -30% penalty to hit.
- The Jokers produce a random event. Two of those random events caused one of the gang members a -1 penalty for one turn each. Fortunately, they happened when those figures were out of combat, so had no effect on play. The other random event was a figure found a shotgun and shells. That figure was Stinky Pete. Because he rolled 1D12 to hit, that made the shotgun deadly.
- The law was much more aggressive than the gang. Because the latter had long arms they were able to plink away at their enemies while the ones packing pistols maneuvered in close. Too many times the law ran out into the open, hoping for a lucky shot at a gang member in cover. (Essentially they were looking for a '10'.)
- At the end of turn 2 the law was down, 4 to 6. By the end of turn 3 it was 2 to 6. I can understand them taking a chance of coming back on turn 3 as this game has a reputation for see-sawing back and forth quickly, but after turn 3, the odds were too great. They should have voluntarily retreated.
Game Summary
I like these rules. I would definitely like to get another supplement, say for WW II or modern, to see how they handle weapons with a higher rate of fire. I don't have a good set of skirmish rules for these periods. (For horse & musket and pre-gunpowder periods I am good with One-Hour Skirmish Wargames (OHSW). I will have to try those rules with WW II again someday.)
I like the semi-random activation order that FoLR uses (the same as both Bolt Action and The Sword and the Flame does) much better than the random order that specifies the side and unit activation order that Tin Soldiers in Action uses, or the random roll to see whether the unit activates, and the order stop if you fail (Warmaster, Black Powder, all of the ~ Rampant series, etc.). In the end I prefer rules that allow every unit to act each turn. IGO-UGO turn sequences where the entire side goes are simpler, but leads to all kinds of issues – the Alpha Strike being the primary one – unless it is specifically controlled for.
The simplicity of the combat system is nice. Die roll modifiers are a tried and true mechanism and works well as long as the list of modifiers do not get out of hand. If you can easily keep them in mind (with a 60 year-old brain), then that is about right.
The only morale, per se, is if a figure is pinned and then, when they attempt to recover, they roll a '1', the figure routs off of the board. Otherwise no rolls are made when wounded or you see someone die. In this regard, I like the fact that OHSW has a mechanism for determining if your force gives up the fight.
UPDATE: there were so many errors played in this game, it is not funny. I had watched these rules played on YouTube (several channels) and so I only skimmed the rules before playing. There were some differences I spotted, but there was a lot wrong. (I no longer rely on YouTube videos to 'teach' me how to play a game. Unless it is Rodney Smith on the Watch it Played channel, I just don't trust that they are going to get it all correct.)
Because of all of the errors in this game I am glad I did not formally review the rules.

I got Fistful of Lead (orginal) early this year, played a game and then bought Reloaded and Galactic Heroes. There are minor differences in the rules between the orignal, reloaded and Galactic Heroes but cannot remember what they were but seem to remember I fall back to using the orginal rules where possible. Played it a few more times, then coverted from 1d10 to 1d6 as I like d6s and not fond of d10s :-). Played it more times (mostly Galactic Heroes). I am also vary sparing on the traits. I really like the game. I think you summed it up nicely at the end - simple combat, tried and true mechanisms and the activation system is really great for skirmish. For this year at least it is my current favourite skirmish system.
ReplyDelete