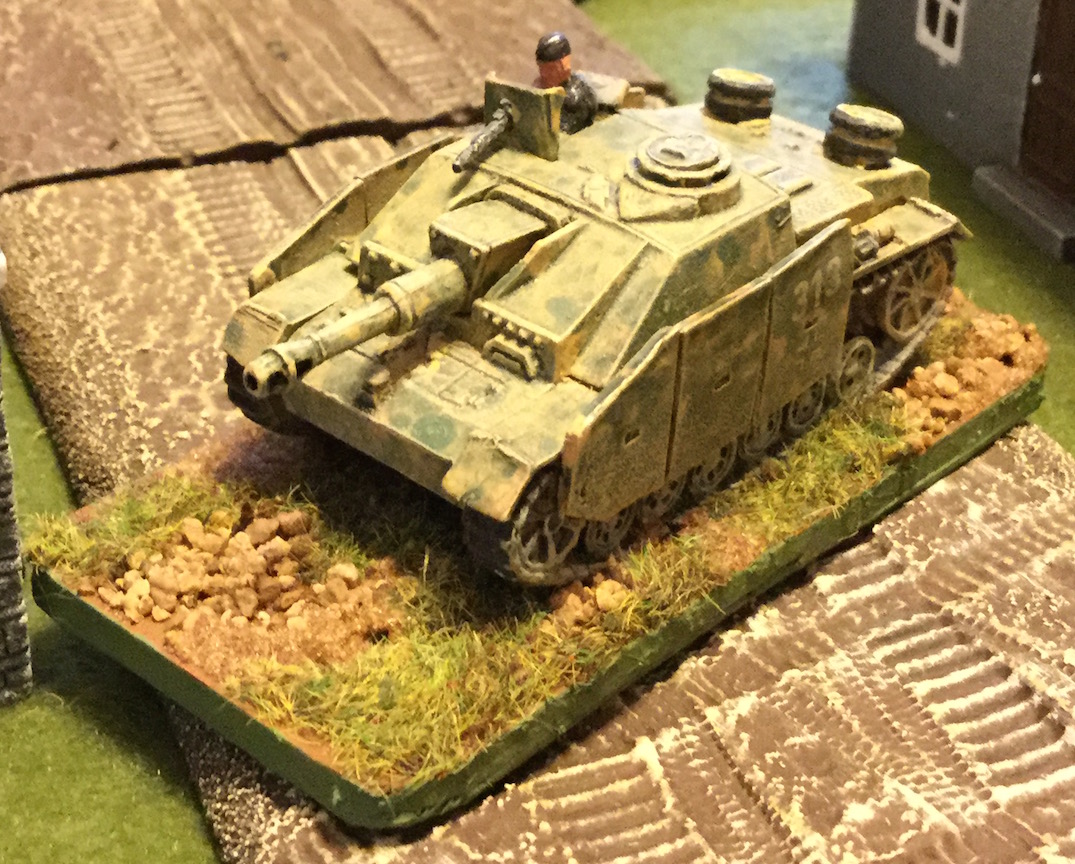
My blog about my wargaming activities. I collect a lot of 15mm miniatures for the American War of Independence and so collect a lot of rules for this period. I started miniatures with Napoleonics, so I have a number of armies in 6mm and 15mm figures for skirmishing. I have15mm WW II figures that I use for Flames of War, Memoir '44, and someday, Poor Bloody Infantry. Finally there is my on-again, off-again relationship with paper soldiers that I sometimes write about.

Showing posts with label Flames of War. Show all posts

Monday, November 14, 2016

Testing Hail of Fire, Part One

After a few false starts I have decided not to review rules until after I get a good test game or two in. It is usually only one test if I think the results are good. If the game itself has some interesting concepts that I am working through I will sometimes post the battle report before post the review. That does not mean that the game has passed muster, but that it has certainly piqued my interest.

Hail of Fire (available in beta on WargameVault) is a:
company-level, WWII themed miniatures war game designed to be both simple and easy to learn while keeping both players engaged in the action! And best of all, the rules are only few pages long! So print out the PDF, throw some models on the table, and jump right into the exciting tabletop combat!

Using a fast, interactive turn sequence, players are always in the fight. The addition of hidden action points, fast and easy deployment, and a delayed combat resolution system ensures that both commanders will be fighting the friction and fog of war as much as they are each other!
After chatting with the author on TMP in various threads I also learned that these rules can easily be used with troops using Flames of War basing, which is why I picked them up. I like Neil Thomas'  Second World War Wargaming, and intend to give them another try, but I am still open to other rules.

I purchased the rules, downloaded and printed them out, and decided to give them a try this weekend. Now blogging the action while gaming always slows the game down tremendously, but it also helps you remember what part of the rules you got stuck on in the moment you got stuck. As I wanted to provide some good feedback to the author, I figured that in the beginning I needed to take this slower approach. Besides, I had already read the author's rules previously, resulting in asked questions, and I discovered that his writing style is a bit ... subtle. So here goes part one of the first test game.

Hail of Fire Test Game 1

Terrain

The battle runs east-west with the Americans attacking from the west and the Germans defending the east side of the board. Note that I am not playing on the long edges, but the short ones.

View from the South
View from the North
By the way, ignore the river that suddenly ends. That was the spot where I was keeping my iPad while blogging.

Forces

Initially I just started pulling out troops and using what looked good and sounded reasonable. At some point I thought I was way out of line in points, so I decided to buy my troops according to my Third Edition Flames of War army books. I used the generic ones, not any unit or battle-specific ones.

The Germans have the following forces:
  • Grenadierkompanie
    • Company Command HQ
      • Two Panzerfaust SMG teams @ 35 + 20 
      • Anti-Tank section of one Panzerschreck team @ 20
      • Mortar section of two 8cm GW43 mortar teams @ 40
      • Sniper section of two Sniper teams @ 100 
    •  Grenadier platoons 3 @ 120 + 10 each
      • Platoon HQ section of one Panzerfaust SMG team
      • Three Grenadier squads totaling six Rifle/MG teams
    • Grenadier Machine Gun platoon (under strength) @ 60 + 5 + 50
      • Platoon HQ section of one Command Panzerknacker SMG team
      • Machine Gun section of two MG42 HMG teams
      • Two HMG nests
    • Grenadier Anti-Tank platoon @ 80
      • Platoon HQ section of one Command SMG team
      • Two 7.5cm PaK 40 gun teams
    • Grenadier Assault Gun platoon @ 220
      • Platoon HQ section of one StuG G
      • Two Assault Gun sections of one StuG G each
Total: 1020 points.

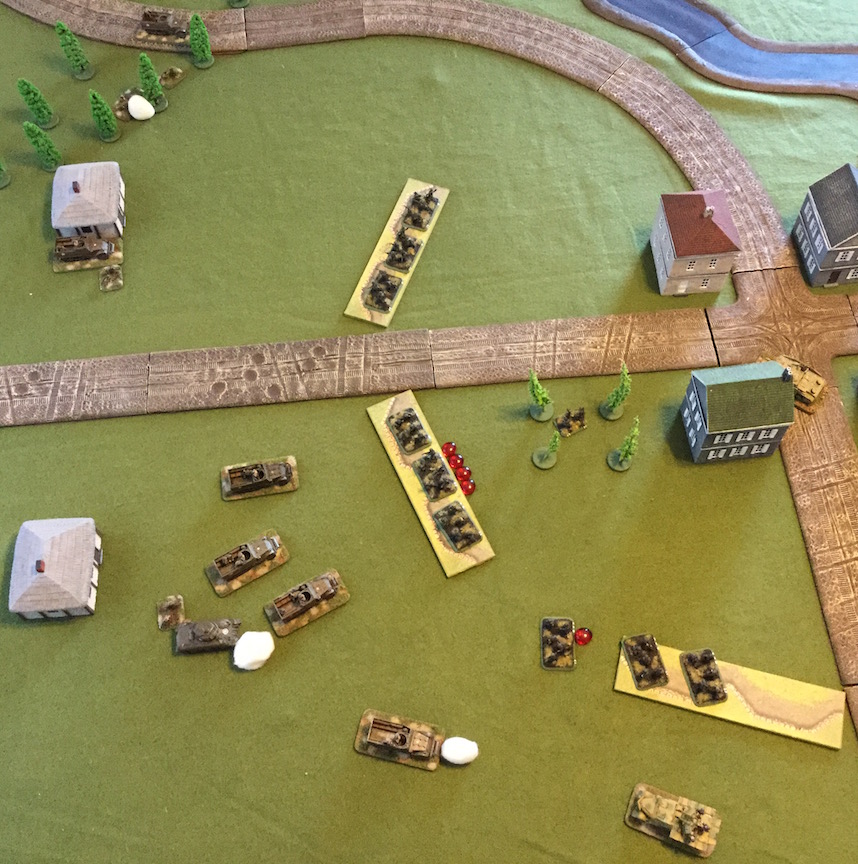
The German forces arrayed
I am allowing all of the Company HQ to be on the board and not count towards the unit totals. Unlike man other rules, one-half of the defender's force must be kept off-board in reserve. That means three units are on the board (the Anti-Tank platoon, the Machine Gun platoon and a single Grenadier platoon) and three are off (two Grenadier platoons and the Assault Gun platoon).

The Americans have the following forces:
  • Medium Tank company
    • Company Command HQ
      • Two M4A1 Shermans @ 140
    • Medium Tank platoons 2 @ 205 each
      • Platoon HQ section of one M4A1 Sherman
      • Two Tank sections of one M4A1 Sherman each
    • Armored Reconnaissance platoon @ 110 + 5
      • Platoon Command M8 armored car team
      • M8 armored car team
      • Mortar Jeep team with Hull MG
      • Recon Jeep team with AA MG
    • Armored Infantry platoon @ 225 + 20
      • Platoon HQ section
        • One Command Rifle team
        • One Rifle team
        • One Bazooka team
        • One M3 half-track with .50 cal AA MG
      • Two Armored Infantry squads each of
        • Two Rifle teams
        • One Bazooka team
        • One M3 half-track with .50 cal AA MG
      • 60mm Mortar squad
        • One M2 60mm mortar squad
        • One Bazooka team
        • One M3 half-track with .50 cal AA MG
      • LMG squad
        • Two M1919 LMG teams
        • One Bazooka team
        • One M3 half-track with .50 cal AA MG
    • Field Artillery Battery (155mm) @ 110
      • One Gun section of two M1 155mm howitzer teams (off board)
      • One Observer Carbine team with Jeep
Total: 1020 points.

The American forces, all fuzzy
Any American units can start up to 14" on the board from the western baseline.

Pre-Game

I did change the pre-game rules a bit, but it should have no real affect on game play.
  • My playing area is 50" by 60", not 48" by 72".
  • My baselines were the short edges, not the long edges. I did that so I could have more range and because the terrain "felt better" going east-west than it did north-south. Plus, I did not want to rotate all of the terrain after I spent so much time setting it up.
All defending forces on the board are considered hidden and dug-in (in hard cover, until they move). All attacking forces are considered hidden1, but not dug in. The interesting part is that hidden troops do not need to pre-plot their positions and are revealed later in the game. This reminds me of the Flames of War ambush rules. When a hidden infantry or gun team is revealed it must be in the player's deployment zone – although it may possibly be deployed even farther forward (but not farther than their forwardmost unit) – and must be either outside of line of sight of the enemy or in concealing terrain at least 12" away from enemy infantry and gun teams or 4" away from enemy vehicle teams. Hidden, defending, vehicle teams that are concealed are spotted at twice the above distances. Reconnaissance units can spot enemy teams further still.

Turn 0

Hail of Fire uses a command system to determine how many orders each side gets each turn. At the start of the game each player secretly rolls a D6 and that is the number of "Hero" points that they have. These are essentially command points that can be used at any time. Once used they are gone. However, there is a luck-based system for replenishing Hero points.

The Americans roll a '4' for their Hero die while the Germans roll a '3'.

The Germans place their objective, a communications bunker to the east of the village, west of the river.

Objective for the Americans to capture
The Americans indicate that their objective is the farm house south of road.

Objective for the Germans to capture
It wasn't really clear to me on how to start. Technically both sides are hidden1, which means you cannot check line of sight to see who is revealed. So I decided to allow the Americans to deploy all of the units that they wanted to deploy onto the board, revealed. The rest would remain hidden and thus have to follow the rules of hidden units revealing themselves. After the Americans deployed all of the revealed units, the Germans would then reveal any of the units they wanted to and deploy those forces to the board.

If no units were in line of sight, it would still be "Turn 0" and the Americans could then move, unit by unit without regard to the number of Order (as described in the rules) until something did come into line of sight of the Germans. At that point Turn 1 would start. Of course, if after deployment by the Americans and Germans enemy units were in sight of each other, Turn 1 would immediately start.

The Americans decided to deploy their reconnaissance platoon and nothing else. As they are reconnaissance teams in vehicles, they can spot enemy infantry and gun teams out to 10" (to 20" for enemy vehicle teams). Because there are linear instances everywhere (hedges, but not hedgerows), the reconnaissance team is 16" from the centerline (which is the German's deployment zone) and they can only see 10" (there are no vehicles hidden on the board), the Germans can decide to deploy nothing. However, because they want the Americans to go to Turn 1 as soon as possible, they decide to deploy a sniper.

American recon moves in from the west while a German sniper is revealed as being deployed in a house

Turn 1

The Americans roll a '6' and the Germans a '5' for their orders. This means the Americans get one order while the Germans will get five and can act first. Ambush!

The Germans start by trying to bring one Grenadier platoon on (south of the road, east of the field complex) and the Assault Gun platoon on (via the east road) by using three orders. Only two infantry teams appear on the edge of the table. (No picture, because it is right where the iPad sits.)

The sniper wants to fire on the lead (recon) jeep so we can see how that works. Now there are no Sniper team rules in Hail of Fire so here is what I am doing.
Sniper: 24" range, Rate of Fire 1, Armored Vehicle Assault -, Infantry, -1 Firing modifier
In hindsight, the range should probably be 16" as the firing modifier allows the sniper to fire at double range and still obtain a hit fairly easily (4+).
The sniper uses the fourth order to fire and scores a Received Fire Point (RFP) on the recon jeep. The recon jeep will have to resolve the effect of the RFP once the unit receives an order.
The concept that you don't know the effect of your fire until the target unit receives an order is an interesting one. A player can completely avoid the effects of fire until he needs to unit to do something (like move or fire). This allows a unit to survive on an objective, for example, until it acts. Unfortunately, you have to take that Received Fire Check right at the time you need the unit to do something, so waiting too long increases the chance that the unit is destroyed from accumulated fire.
Now I reach a questionable part of the rules: can a unit fire more than once? It specifically states that "a Unit may be given several orders over a single turn" and does not put any qualifiers on that statement. Elsewhere in the rules it indicates a gun team may not use a fire order after having used a move order in that turn. But that is it. I am going to allow it, until I get an answer from the author on TMP.2

So, does the reconnaissance platoon want to use its order to return fire, move to cover in reaction, or does it want to wait until it is the acting player to move or fire?  There really is no reason to wait so the Americans decide to use its single order to make a reaction move.

First, the Americans have to resolve the RFP on the recon jeep team. This is passing a Received Fire Check (RFC). All small arms fire at soft-skinned vehicles resolve as if firing at infantry in hard cover. The sniper gets a suppressed result against the recon jeep indicating it must be rallied before it can move or fire. Rallying can be attempted each time the unit receives an order and it has no RFPs (so not this time). Rallying is basically passing a Quality Check, which is rolling a 4+ for this team.

The reconnaissance platoon rolls a '7' on 2D6 for a movement of 7". The command M8 can add 12" to that move if it stays on the road. Everyone moves to a position of cover (as best as possible).

The American recon platoon reacts to the sniper fire
However, the lead M8 has moved forward enough that it is within 10" of a hedge line that I was considering for placing my German grenadier platoon. If I don't place it now – allowing the recon unit to spot them – I will lose my chance to place them there.
There is a rule that states: "If revealed during enemy movement, subtract the distance moved from the listed ranges." So, the M8 moved 7", reducing their spotting distance from 10" to 3". That rule allows the Germans to reveal an infantry or gun team in concealing terrain as close as 3" away if done in reaction to the M8 unit's move. Once its move is over, that rule would no longer apply, so the unit would need to be outside of 10" range.
I decide to reveal the Grenadier unit and place it behind the hedge. It is just too good a position, and I need to put forces on the board to stop the drive on the communications bunker.

The German grenadiers are revealed
I need to keep RFPs on the recon jeep so that it cannot rally, so I fire the sniper at it again as my last German order for the turn. Unfortunately, the sniper did not like the idea of sticking his head out when staring at six machine guns and two 37mm cannons, and he missed the shot.

Turn 2

The Americans get two order and can act first while the Germans get one order.

The American give a fire order to the reconnaissance platoon. This allows the recon jeep to attempt to rally, but it doesn't succeed, so it does not get to fire with the rest of the teams.

The grenadier platoon – actually one specific team – is declared the target and any other team within 6" (and apparently, whether in the same unit or not3) can also be an eligible target if enough RFPs are scored.

There are, of course, no M8 armored cars defined in the game this early in the development cycle, so I use the M3 Stuart for the main gun stats and note that the M8 has two Vehicle MG entries.
M8 AC: armor off the scale at the low end
Main Gun: 16" range, ROF 2, AT 2
Vehicle MG x 2: 16" range, ROF 2, AVA -, AT -, May not fire if Main Gun is firing
It looks like it makes more sense to fire the MGs, given that main guns and vehicle machines guns – whether hull, co-axial, or the commander's AA MG – may not both fire. With the two M8s I would get eight dice @ -1 (concealment) as opposed to four dice @ 0 (no concealment when firing HE from main guns). The mortar jeep adds two more dice @ -1 for a total of ten dice @ -1. There are a total of five teams that can be hit and an astonishing five hits are scored!

Germans undergoing heavy fire from the American reconnaissance platoon

The Germans decide not to react, so play stays with the Americans, who think it is time to order a tank platoon. It is at this point that I realize only defending vehicle units can be hidden on board, and as there are no positions on the board for American vehicles to be out of line of sight, so that means they have to come on from off board.

Actually, I am good with that as the action so far has represented the reconnaissance platoon revealing the potential ambushes and now the cavalry is riding to the rescue. The Americans order a platoon of Shermans to move up the road. With their roll and the road bonus they move 14".

American Sherman platoon advances on the board

The Germans have one more order and the sniper again attempts to continue the recon jeep's suppression, this time succeeding to put an RFP on it.

With American tanks coming on the Germans need armor reinforcements. The Germans decide to use all three Hero points to obtain reinforcements and they succeed. The assault gun platoon can now be ordered onto the board next turn!

German StuG platoon ready to clank on the board

Thoughts So Far

Quite simply, I like the almost episodic style of the combat. Something occurs in one area until some event triggers, forcing focus to shift to another area. It feels like the battle is unfolding.

Note that there are only two turns played. To be honest, it took me two days to get this far, but it was really my fault. I did not clean up from my last game. (I can leave games setup without fear of it being disturbed.) I spent a lot of time digging up and laying out the terrain. I organized my units in order to find certain elements I wanted to try, etc., etc., etc. It took me two tries to get a final army list for both sides. (I finally succumbed to using the Flames of War army lists and points system.)

I also have a habit of skimming the rules and deep reading a section when it finally comes up in play. That did not work very well here because the sections on setup and hidden units deeply affect play. These rules are like Peter Pig's PBI in that the defender's purchased force is not the force that you are going to have available at the start of the game. That alone caused me to reboot the game once.

I absolutely love the simple, yet effective way the author has made hidden unit deployment so accessible to the gamer. When I started the game I sat there for a few minutes thinking "Now what?" I was staring at a terrain-filled board with no enemy units showing. You had to start thinking about lines of sight and avenues of approach ... just like they taught you in the US Marine Corps manuals! If there is any negative to this approach it is that many casual gamers simply react to the situation whenever it is their turn to move. They would likely be stymied by this approach.

So far this has been very accessible playing solo. The "unfolding" aspect of it is what I think does it. Although the Hero die is supposed to be hidden information, it escapes me why it is. Who cares if you have six points? I as the opposing player am not going to change how I play one bit knowing that you have six points and I have two. Maybe I missed some bidding aspect of the rules in a section I skimmed over?

To Be Continued in Part Two…

Footnotes

1 As it turns out, this was incorrect. Vehicle teams on the attacker's side are not considered hidden. This is a case where one general rules says all attackers are hidden and then a later rule specifies that only the defender's vehicle teams are hidden. This is what I mean about the author's sometimes subtle style of rules writing.

2 Asked and answered. Yes, a unit can fire more than once per turn if given multiple orders. If it has enough orders it can fire multiple times in both the active and reactive phases.

3 Asked and answered. Yes, fire designated as being at a team with one unit can hit a team in a different unit as long as that second team is within 6" of the first team and within range and line of sight of the firers.

Sunday, November 06, 2016

Second World War Wargaming

Second World War Wargaming (SWWW) is one of the chapters, and thus a set of rules, from Neil Thomas' book Wargaming an Introduction.


I have a fair number of well-painted, 15mm WWII miniatures, all based for Flames of War, which I no longer play. (I don't know of anyone in the immediate area that still play those rules, although there are a number of people that have collections from when FoW was the "thing".)


I have been looking for quite some time for an alternate set of rules where I can use my troops, based as they are, and still get a good game going.


The latest attempt was using NUTS! Big Battles. I usually play rules from Two Hour Wargames incorrectly for at least the first three tries. I don't know why. But these did not feel right.


Previously, I had tried Peter Pig's Poor Bloody Infantry (PBI), but I always got hung up on the pre-game. So maybe "tried" is not the correct word. I thought about it a lot. A few people said I would probably need to make some additional LMG bases given that they are embedded in FoW and they are separate entities in PBI. Right or wrong, that sort of turned me off.


When I first read SWWW I noted that they were intended as "skirmish" rules (every miniature represented a single man, weapon, or vehicle) using singly-based miniatures, but included army lists in the classic Neil Thomas style, where you would have a variety of unit types and weapon systems befitting a battalion strength attack, but were playing somewhere in the platoon to company level.


As I indicated previously, that aspect of Neil Thomas' rules turned me off, although I admit I am warming up to it.


Well today I decided to actually try some of these rules that I purchased and see if they have the problems that you imagine they do when you simply read through them. I find that some of the issues that you flag turn out to be nothing. Either you missed a rule or a rule is more nuanced than you originally read, so the issue becomes a non-issue. Sometimes, however, there are issues that arise that develop from a game, and you realize that the rules don't cover the situation adequately. Such as this game using these rules.

Before I gave the rules a try I read a particular blog article about these rules. The article was over on Soldier's East and it provided a number of observations about the rules. One thing that struck me is that how to operate armored infantry in a half-track wasn't very clear to him either. As it happens, my scenario sort of pushes that boundary.

Battle for Some Village

This is actually the same board that a gaming buddy and I used for our test game of NUTS! Big Battles. The forces were pretty much the same too.

The Germans would have three large Pioneer squads entrenched outside a village at a key crossroads. Also in attendance was a single StuG III assault gun and an armored truck packing a quad 20mm anti-aircraft gun. The Germans would be defending the center plus the entrenchments to the west. On turn four a Gepanzerte Panzergrenadier squad would enter from the road to the east. On turn eight a second StuG III would also enter, from the same road.


The American forces consisted of a full armored infantry platoon, fully kitted out with weapons and half-tracks. They would enter the board, along with a single Sherman tank, from the west or the road in the northwest corner.


On turn ten two Sherman tanks would appear on the northwest road as reinforcements. As you can see by the force above, the starting American forces are pretty formidable. Six M3 half-tracks with six Bazooka teams, two LMG teams, one Mortar team, one Sherman, and a lot of infantry makes for quite a starting advantage.

My setup for the Germans was pretty standard. The AA is in the crossroads, ready to catch a marauding American aircraft trying to attack the StuG III. The StuG is hunkered down, ready to take a shot at anything that comes down the road. The three infantry squads are in entrenchments (pretty significant cover), while the platoon commander is resting in the shade in the small wooded area by the town.


When I played the Americans in FoW I frequently tried using the armored infantry mounted in half-tracks. I liked the looks of them, but was never really sure how they operated. I finally bought a copy of Osprey Publishing's World War II US Armored Infantry Tactics, but it was so confused (as it actually was during the war), that I did not get much from it. In fact, within the span of a few paragraphs you can read how the half-tracks were not and were used to support the infantry with their machine guns after the infantry dismounted.


Nice looking pictures though!

Put another way, I am never sure when to dismount my infantry: as soon as possible or ... until it is too late? (The latter usually happens to me, to be honest.)

So, one good way to test a set of rules is to do something ... 'stupid' ... and see what happens. If it works out, those are probably rules to step away from. My initial thought was to move infantry into the two farm houses on the west side and engage the entrenchments with fire. But then I decided to take a few squads and just run up on the entrenched troops and keep the infantry mounted. Let's see what happens!

Turn 1


First and Second squads swing around the south end of the western approach to the village. Because they moved more than a half move they cannot fire. Meanwhile the Third Squad and the Machine Gun Squad advance onto the board and dismount. Because they transported units are dismounting the half-tracks can only make a half move. The Mortar Squad sneaks down the wooded road from the northwest, but does not dismount the mortar team. The platoon headquarters remains in the center, hiding from the StuG. The Sherman barrels down the down to engage the StuG.
As a side note, all of Thomas' rules are eminently tweakable. For example, the American Shermans have gyro-stabilizers on them, allowing them to fire on the move. The normal rule for firing the tank main gun on the move is that the tank may only make a half move and fire. I decide that American gyro-stabilizers allow the tank to make a full move and still fire the main gun. Adds a little flavor without too much added detail.
The Sherman – being at very long range – misses the StuG.

The first thing that I note is that the ranges of the rifles and LMGs are basically only 12", with 6" being short range. So I actually have to move up to 12" before I can even fire. First surprise: the small arms firing ranges are not very long.


The Germans return fire with all of the infantry stands that they can and get nothing. At this point it was necessary to work out how the armored infantry in half-tracks would work. Shooting at the infantry is like shooting at a unit in cover, so you roll to hit on the Cover line. Once you have obtained a hit the infantry gets a save. Normally infantry can have anywhere from a 3+ save to a 5+ save, due to its morale state. But because armored infantry does not check its morale while mounted in its half-tracks, that means that its save while mounted is 5+. (Remember, the bonus for cover has already been accounted for in the To Hit roll.)

I fumble a bit trying to calculate the firepower numbers. That is basically because I am unfamiliar with my troops, they are a non-standard formation (in size and composition), and I keep changing my mind on what the figures represent (use WYSIWYG or a standardized formation?), plus there is the unfamiliarity with the rules.
Pro tip: don't print your rules double-sided. It only adds to the confusion in trying to find charts because then you have to look on both sides of the page.
The StuG fire also missed the very long range shot. Being an assault gun, the StuG cannot move and fire. The best it can do is pivot and fire. Meanwhile the AA truck repositions to south of the village in order to disrupt the armored infantry attack. I figure the half-tracks won't stand up to quad 20mm guns for very long.

Turn 2

The Americans continue to swing to the south of the village. This allows them to put the buildings and the small woods between their fragile half-tracks and the StuG. If the StuG crew wishes to fire at the attack, it will have to move, sacrificing its fire for at least one turn.


This is where the second surprise comes in. The armored infantry and machine guns from the half-tracks find out that you cannot obtain an effective hit against entrenched troops until you get to short range, or 6" or less! So again the armored infantry do not get to fire as they are still out of range.

The Sherman, however, switches to HE and lands a hit on one of the entrenched squads (indicated by the orange blast marker). This shell is equivalent to ten mortar shells(!), but again the chance to hit entrenched troops is so low that no hits result.

I decide to flank the turning flank of the American armored infantry with my AA truck. Going over the open ground with that vehicle is horribly slow! (I think I was mistakenly moving it as a Truck, rather than an Average speed half-track.)

I also decide to move one of the infantry squads out of their entrenchments so they can better get stuck in and support the center trench. Maybe not the best of moves against all of those mobile American pillboxes (the half-tracks), but I have to try something.


I decide to gamble and shoot at the flanking half-track on the north side of the village rather than shifting the StuG to the south. It misses.

Although several German units are firing, and there are a few hits at long range, all of the hits are saved so no American casualties have occurred yet.

Turn 3

I now understand that I have to move up to close range with my American armored infantry in order to effect any hits against entrenched troops. Now I know that the German pioneers don't have any panzerfausts, panzerschrecks, and such amongst them, but the Americans should have expected them to. Nonetheless, I continue to push forward on the attack in order to see just how much of a mobile pillbox these rules allow armored infantry in half-tracks to be.


I pour fire into the central entrenchment three half-tracks, a armored infantry squad, and the platoon headquarters and amazingly obtain four hits. Now we are getting somewhere! But rather than use my final half-track and armored infantry squad to pour fire into the exposed infantry, I only fire a few SMGs at them, obtaining one additional hit. The remaining fire goes against the (armored) AA truck, to know avail. Further, the Sherman again misses its shot at the dodging and weaving AA truck!

Turn 3

After making the morale checks, this is what the German units look like. Yellow markers indicate that the bases are suppressed, meaning it can neither move nor fire. But, it also means that the figures get a save of 3–6! Light green markers indicate that the bases are partially suppressed, meaning it can move half and fire at half effect, while it has a save of 4–6. (Note that Thomas never uses the term "suppressed" or "pinned"; that is just my description.)

By the way, I use red glass pebbles to indicate a hit that happens this turn (as a reminder for the unit to take a morale check) and then convert the hits to grass green markers to show previous hits.


The colors are a bit hard to distinguish in the photos, but the central squad is suppressed and the southern squad is partially suppressed.

Although it looked pretty bad for the Germans, between the AA truck unleashing its quad 20mm fire, and the remaining squads getting really lucky with their fire, you start to see what happens when you don't calculate the math of getting into close range. The American armored infantry were blown away.


Let's review the math, shall we? The armored infantry needed to get into short range as long range shots are totally ineffective against infantry entrenched. When in short range they hit on a '6' and the enemy saved on a '5–6'. When the infantry return fire they hit the armored infantry on a '4–6' and they save on a '5–6'. Basically triple the casualties.


I did two things wrong here though. I definitely did not mark the entire southern squad as partially suppressed, so 2/3rds of the squad fired at full strength. I also might have accidentally fired the central squad. It looks like an awful lot of casualties for a situation where the central squad could not fire at all. If I did that – and I am not really sure if I did – the central armored infantry squad (with seven hits) would have been unscathed.

That said, the AA truck counted as two HMGs (that had to fire on the same target), for a total of 12 dice. It had a good roll and combined with the fire of the southern squad, filled that half-track with holes. The fire against the headquarters half-track (top of the picture) was very lucky. The Germans landed all three shots and the Americans saved none. It happens.

With the attacking forces crippled, I draw a curtain closed on the scenario. (That and my gaming cave was getting a little chilly and the dogs wanted their dinner.)

Conclusions

I liked the game, but there was a lot of futzing about, and that was caused purely by using bases of multiple figures rather than singly based figures. The idea is that you look at the unit, count the rifles, count the SMGs, and count the LMGs and calculate the firepower. Easy to do with singly based figures and the suggested 1/72nd figures; harder with multiple 15mm figures on a base. The fact that I tried to use standardized squad sizes rather than the actual figure counts on the bases did not help, either.

If I were to do this again, and there is no reason not to, as it was a pretty fun game, I would do something like the figure below. I would put three numbers on the back of every base. The first number represents the number of rifles, the second the number of SMGs, and the third the number of LMGs. For each hit on the base I would remove one rifle until they are all gone, then one SMG until they are all gone, and finally the LMGs. I would not consider randomizing hits to see who goes unless I were using singly based figures.


This method would allow you to quickly see how many of each weapon system you have and calculate the Firepower. (I might even include a fourth number, which represents unarmed loaders, ammo bearers, etc.) You could also include the Firepower total, but would probably end up calculating anyway if the base has any SMGs.
UPDATE: after consideration, I think I would do what Neil Thomas does in his other rules: take hits until the unit has taken a sufficient number and then remove the unit. Until that number is hit, the firepower is not decreased. This simplifies things considerably.
A second change I would make would be to get rid of the two range bands for SMGs. Make no long range for SMGs; count it all as short range. The reason for this is convenience. As the maximum range for an SMG is the same as long range for rifles and LMGs, this allows you to calculate firepower much more simply. If you are at long range for rifles, don't count the SMGs. If you are at the rifle's short range, count your SMGs. Much simpler.
UPDATE: Further, instead of listing out rifles, SMGs, and LMGs, simply indicate its firepower with SMGs and its firepower without. This requires using the change to SMGs that I list above. Normally these rules do not change the firepower rating by range, but rather how much firepower can reach out to a given range.
The biggest question is: should half-tracks be forced to move to the rear when armored infantry dismounts or can it continue to provide support with its LMG? I think the latter is true. Re-reading my book on US Armored Infantry it seems someone was always manning the LMG (later the HMG) while troops were dismounted. But they would be in support, and certainly not leading the attack. In the end, you need a rule to wipe out the LMG gunner if the player decides to use it offensively. I think simply one unsaved hit removes the gunner, which then forces the driver to retreat with the vehicle.

One interesting point that came out of my reading is that the bazooka team was not an add-on, as it is with Flames of War army lists; it was a replacement for rifles. When the troop dismounted the squad leader called "Rockets out!" if he wanted the designated squad members to grab the bazooka and their rounds. This might be a little problematic with bases with multiple figures. You might have to do something like shown in the photo below.


If the unit deploys the two man bazooka base then the normal squad base only counts as having one rifle and one SMG, rather than three and one when the bazooka is not deployed.
UPDATE: If using the firepower ratings indicated above, rather than the weapon breakdown, then you could simply have a firepower rating with and without bazookas.
All in all, it was a fun game. I might well try it again, but with singly based 28mm figures. The main thing will be to try it without using entrenchments, which really made this scenario a tough nut to crack. I really just sat there for about five minutes trying to figure out how to approach it. (Must be the reason why one of my gaming buddies hated it when I purchased dug-in infantry in Flames of War.)

Sunday, November 18, 2012

A Test Game of Company-level WW II Rules

I did a quick test game of the new Company-level WW II rules I am working on. (The working title is Memories of War – in homage to its origins – but it is just that, a working title.)

All I have worked on so far is infantry (small arms) fire, light anti-tank weapons, direct fire for mortars, and halftracks. With that started, I decided to throw the miniatures on the table and give the rules a try, to see where the problems are.

I decided to choose a small area – 9 squares wide by 7 squares deep (36" x 28") – with a simple objective: attack an enemy platoon dug in defense. Mind you, this game is not intended to be fair (it is one platoon attacking another platoon dug in, with no points advantage), nor is this an example of how to properly attack or defend in this situation. The goal was to get as much engaged as possible, looking at the interactions, and seeing if they "felt" right. With the excuses for my poor play out of the way, I present "Defense of Hill 327". (You can click on any image to see a larger, 800x600 pixel version.)


Yes, some artillery and smoke would have been nice for the Germans to have. Something to suppress those LMGs on the hill. As it played, however, I was fairly happy with the results. Infantry, even in woods, were not going to face off against two LMGs with impunity. The Germans thought they would be clever and creep up to the American line, using the MGs on the halftracks to pin the Bazooka skirmish line, but the 37mm anti-tank gun showed its usefulness.

Some changes from Flames of War that I allowed (or at least, some changes from the way I remember how they played):

  • Infantry units on hills can fire over infantry units as long as the target unit is farther from the intervening unit than the firer is from the intervening unit.
  • Anti-tank guns can fire over intervening infantry units that are dug-in or gone to ground.
  • Infantry count vehicles as concealment if either are moving, but as cover and concealment if both are stationary or if the vehicle is destroyed and in the same square.
  • MGs on halftracks (actually any open-topped vehicle's hull MG or co-axial MG, or any vehicle's AA MG) are subject to the effects of pinning, lowering their dice from 3 to 2 if pinned (while a .50 caliber MG would be lowered from 4 dice to 2).
  • A vehicle being destroyed in the same square as an infantry unit adds a (single) pin marker to it. The same applies to gun teams. (By default, unless a weapon indicates a separate ROF value when pinned, a weapon has an ROF of 1 when pinned. If it has a base ROF of 1, it cannot fire when pinned.)
  • A weapon with an ROF of 1 cannot fire on the move or when pinned. An exception would be if the weapon had stabilizers.
  • All infantry units in a square are hit by enemy units firing on that square. These hits are rolled separately, however. For example, if an LMG fires on a square with two infantry units in it, it would roll five dice separately against each unit. If the square is mixed – infantry and armored vehicles – the firer must state whether they are firing anti-personnel or anti-tank rounds. In that case the opposite unit type is not affected (i.e. anti-tank rounds do not affect infantry, etc.).
During play I realized that pin markers were racking up too high and that you would quickly get to a point where no one could move. The basic rule I was following was that a unit could roll two dice at the start of its turn to remove pin markers (Fearless 67% chance of success on each die, Confident 50%, and Reluctant 33%). With the basic chance of hitting (and thus inflicting a pin marker) on an infantry unit set at 50%, units were getting about 1-3 pin markers from concentrated fire. And as units were firing twice – once in their own turn and once in the enemy turn as defensive fire – pins were racking up fast. I then decided to limit the number of pin markers a unit could accumulate. Right now it is set at 3 for Fearless, 4 for Confident, and 5 for Reluctant, but it needs more testing. (It might be a case of "double jeopardy" to set the number of markers and the chance to remove those markers by morale rating. I think I might just limit it to four markers for all morale levels.)

One thing I like about these rules are that it is easier to see historical tactics in use. You can provide covering fire from some elements in an attempt to lay pin markers on enemy that might be able to sight your moving elements. It will not stop the enemy's fire, but it will generally restrict it.

I also liked ignoring the marginal cases, such as whether an MG or rifle could affect a halftrack. In Flames of War the infantry has an anti-tank value of '2', while a halftrack's armor rating is a '1'. So on a hit, if the halftrack rolled a '1' and the infantry rolled a '6' (1 chance in 36), the halftrack would have to bail out. In my rules I simply rate a rifle and an MG as unable to affect the halftrack at all. By the same token, a 37mm anti-tank gun has an anti-tank value of '7', meaning if it hits the halftrack must roll a '6' followed by the anti-tank gun rolling a '3' or less for the hit to not penetrate the halftrack; all other hits result in it being destroyed 50% or bailed out 50% of the time. I simplify this by giving the halftrack a simple save of 16%, per hit taken. (In addition, it takes a pin marker for each hit, if not destroyed.)

I have a lot of work remaining, however. Artillery bombardments are next and armored combat will be the big hurdle. I will keep reporting here as I make changes and progress.

Saturday, November 17, 2012

Company-level WW II (3)

Some News First

A bit of things have gone on since the last blog entry, but not much to report. I have been gaming a bit, but it has all been solo, and even that has not produced any material for my Solo Battles blog.

I have been on purchasing overload – much to the "chagrin" of my wife, considering that I am currently still living on the pay-out from my last employer – and to be honest, it has not been possible to absorb them all. I liked the sound of Bolt Action, but before the book made it to my mail box several at the gang of The Miniatures Page seemed to have panned it. I started to listen to the WWPD podcast where they interviewed Rick Priestly, but to be honest, I could not get through it, it was so boring. Then I started listening to the Bolt Action (WWPD) podcast, and it was also boring. So, the book sat unread; I only looked at the pictures.

Now, that may all sound bad, but I got to a point where I was backed up in listening to podcasts, so I started rolling them while painting (some French Napoleonic Carabiniers, which has not hit the Wooden Warriors blog yet) and I accidentally hit the WWPD podcast with the Rick Priestly interview again (I had listened to the original on the new WWPD iPad application) and as I was on a roll with painting I simply let it run on. Turns out that the interview had a good nugget of information about Bolt Action at the end of it. I then hit the second episode of the Bolt Action podcast and it was much better. So much so that I decided it might be better to ignore the detractors and try it myself. Maybe that will come along soon.

Other purchases include Saga (impulse buy), Napoleon's Triumph (I have wanted that board game for awhile), and Volume One and Volume Two of Wally Simon's Secrets of Wargame Design. I have mentioned Wally Simon's game design ideas before in this blog because philosophically we agree on what makes a fun game. Here is an excerpt from the first volume – the opening paragraph in fact – that gives you an idea of what I mean:
I am an admittedly unadulterated, pure-bred gamer – as opposed to a war-gaming simulationist (one who stands at table-side and actually imagines he's re-creating what went on the battlefield a hundred or thousand years ago). My interests lie in the gaming procedures and trying to furnish the participants with a number of decision points throughout the battle … at least enough to keep them awake.
What really sold me on purchasing these books was an article in Miniature Wargames magazine, Issue 356, called Revolutionary Morale, which is an "article" within the first book. Great ideas are in there, so I figured why not get the whole package from On Military Matters? I have a few of the articles listed in those books – I used to subscribe to MagWeb, which had old copies of the PW Review and MWAN magazines where most of these articles first appeared – but many I read at all. Expect to see some ideas of Wally's come out here in my own designs.

Speaking of which …

More on the Company-level WW II Rules

I decided to start incorporating Wally's ideas in the turn sequence. I dislike those IGO-UGO games where the turn sequence has A move and fire everything before B can do anything. Wally called this "Gotcha' Gaming" and the new name is "the Alpha Strike". Games like Warhammer 40,000 and Flames of War are clear examples of this (despite WH40K adding overwatch and FOW having defensive fire at the start of assaults). So, the draft turn sequence will be:

  1. Attacker's Phase
    1. Attacker rallies off Pin markers.
    2. Attacker determines who obeys orders.
    3. Attacker conducts bombardment.
    4. Attacker conducts covering fire.
    5. Attacker moves.
    6. Defender conducts fire.
    7. Attacker conducts moving fire.
    8. Attacker conducts assaults.
  2. Defender's Phase
    1. … reverse of Attacker's Phase …
The idea here is that this allows a player to simulate the tactics of the period: lay down covering fire from one element while the other element maneuvers forward. The defenders get to fire on the advancing elements before they can fire upon you in turn. Although it is still IGO-UGO – this style has its uses, primarily by giving the game an episodic or event-driven feel.

I actually did play a test game – no pictures of the game in progress, sorry – and found out that it was off mathematically. I expected that of course, but fortunately do not have to change my dice  (maybe just add some icons). By the way, the dice I made are shown below.


And my board. I just added some "+" marks to the game mat I use (a micro fleece blanket).


The game went way too fast, which is what convinced me that the math is off. I want a faster game, but not 2-3 turns!

One concept from Bolt Action that I am stealing is the concept of multiple pin markers (i.e. tracking hits) and having that as a modifier to the unit being able to act. (By the way, they are not the first rules to use that concept, just the most recent.) So each hit adds a pin marker and each pin marker requires the roll of a morale die, all of which must be passed in order to act. (In the case of defensive fire, the unit failing the morale die roll uses its pinned firing rate of fire.) The draft morale die is shown below (three stripes equals a veteran, two for trained, and one for a conscript unit).


So, as an example of how this might all work is as follows. An HMG team conducts covering fire on an infantry team, rolling six "anti-personnel" firing dice. This results in three hits, so three pin markers are placed on the infantry team. The infantry is allowed three "anti-personnel" saving dice and obtains an amazing three saves! When the chance comes for the defender to conduct fire the infantry team has to roll three morale dice – one for each pin marker – and all have to be passed in order for the unit to fire. As the unit is veteran it basically has 67% to pass on any single die. Passing on all three dice means they have about a 30% chance to pass on all three. (Please note that this is rather an exceptional example, as the unit passed three saves in the first place, where only one would be the norm, unless the unit were in cover in which case each die would have about an 83% chance for a save.)

If this sounds pretty deadly, it should. We are talking about an HMG firing at an infantry unit in the open. A rifle team firing at a rifle team has about a 50% chance of getting a single hit, and there being a 16% chance for a save (33% for a veteran). Yes, this casualty rate is higher than Flames of War, but I am okay with that for now. This will force people to use more cover, concealment (hiding behind vehicles or in smoke), and covering fire.

I am hoping to get in a test game that is publishable soon. Now that I have the basic firing and saving dice made, all I need left are the morale and skill dice.

Wednesday, September 05, 2012

Company-level WW II

As I have to start somewhere I think the easiest place would be a basic infantry-on-infantry fight. If you cannot get that right (and interesting) then you should scrap the ideas you have and start over.

Movement

For now, I am going to assume a 4" square grid1 and use FOW as the basis for a number of basic stats. The first problem is that distances in FOW tend to be in 4" increments, except for most notably infantry movement! That is okay, because I have never been keen on infantry moving the same distance over open ground as through cover, so the basic infantry move will be 2 squares in the open and 1 through difficult terrain. The basic infantry combat range will be 4 squares.

Shooting

One abstract concept where M44 and FOW differ is in the decrease of combat power over range. With infantry in FOW your combat power is the same throughout your single range band, unless you have a heavy weapon, like a mortar or an HMG. For now I am simply going to use a single range band with a single combat power for it. As there seems to be no reason to not use the FOW numbers, infantry small arms range will be four squares.

Another FOW concept that I like is the use of ROF to indicate the number of dice to be thrown. Again, at this point there is no reason to not use the same values as in FOW. Thus, rifles will have one die, rifles and one MG will have two dice, and rifles with two MGs or SMGs will have three dice. As with FOW I like the concept of more experienced troops being harder to hit, but like TOI I prefer the defender actually roll dice for their defense. The basic TOI combat mechanism is for the attacker to roll their dice looking for hits, and for the defender to roll their dice looking for saves. Saves subtracts from hits and any excess hits go towards damaging the defender. As I do not like the TOI mechanism of either hitting to kill or to suppress, but rather prefer the FOW mechanism of pinning if enough hits are achieved, the combat results have to reflect this increased chance to save against kills.

The question then becomes what is the basic chance to hit an infantry stand? In FOW the chance to hit conscripts are 2+, trained on 3+, and veterans on 4+. Of course, this is often modified by concealment and going to ground, both of which typically require markers on the table for infantry2. This will require a bit of pondering. My desire is to have both sides roll dice, either in an opposed roll fashion, or as hits and saves. I don't really want to reduce it down to a single die roll.


1 I could use an offset square grid, which allows you to simulate a hex grid, but will keep it as a simple square grid as is easier to show in the table.

2 I try to eliminate markers from my designs. I do not usually succeed, but by starting with the idea of not using markers it usually puts you in the proper mindset so you end up reducing the number of them.

Thursday, August 30, 2012

Re-thinking my approach to WW II Gaming

I have been talking with my gaming buddy Don, trying to figure out why we are both so unenthusiastic about the latest version of Flames of War, and it appears that we both agree that, although they have simplified certain aspects of the rules, they are no longer "easy". Maybe we are both just getting too old and have too much of work on our minds, but the same level of enthusiasm is just not there anymore.

I started in Flames of War much like I did with Warhammer 40K and Warmachine; it was what everyone else was playing. If you wanted to game, that was what you played. Otherwise, you had to buy and paint both sides and find players for the rules you wanted to try. That is basically what happened with me and the AWI. (Interestingly, DBA is the one game where it was introduced to us by someone outside of the group and several gamers all took to it pretty readily.) I collected a late war US force (but never really finished it) and later a late war German force. I now have enough that I do not need to add to it, other than to flesh out the US force that I never finished.

Dice as Chart Replacements

As Don and I talked I think we both came to the conclusion that one of the reasons we like Memoir '44 (M44) and other Command and Colors variants is that some of the charts are built into the dice themselves. For example, in M44 the basic chance to hit infantry is 50% (2 INFANTRY symbols and 1 GRENADE symbol), while the basic chance for a morale failure is 16% (1 FLAG symbol). The rules you have to remember are how many dice to throw and whether you can ignore certain results (ignore a FLAG for being in a bunker, for example). For the most part, those rules are relatively easy to remember, with only a quick re-read when a scenario introduces an element that you don't play that often (e.g. hospitals, mortars, etc.). I always find a game's FAQ best indicates where a game designer has introduced complexity without elegance (e.g. The quirks of mortars).

As I am looking for a set of rules that allows me to replace FOW, but use those forces without re-basing, it probably needs to be at the same scale (i.e. a company per side). Besides, that will allow me to use FOW's force lists and points, should I want to do a pickup game. More to the point, I want the rules to use the mechanisms I like about M44, so custom dice with the odds built in is something I want to use.

Grid-Based

Another aspect I like with M44 is the use of a grid to regulate distance. I have never been fond of measuring and any disagreements about fractions of an inch disturbs me. That miniature purists claim that I am playing a board game with miniatures instead of a miniatures game with a gridded board is of no consequence to me. Whether the grid should be squares or hexes seems almost a religious discussion, one that I have had quite a number of with my old gaming buddy Justo. He always favored the hex (for symmetry) and I the square (for aesthetics and linearity). Now my concern is more with it being easier to make square terrain pieces than hex ones, but I am working on that.

Special Abilities

I have had an old TSR dice game called Dragon Dice for a while now and one aspect of the game is the use of custom dice to represent special abilities. In addition to the normal combat dice, indicated above, a unit could have one or more custom dice where the icons represent special effects. Examples might be the ability to move through terrain quickly, moving without affecting the unit's rate of fire, etc. So in addition to throwing the normal dice during combat these ability dice would be thrown to see if special effects come into play.

Command and Control

The one area where I would not take M44 game mechanics would be its command and control system. The left-center-right sector mechanism works well for the level of M44, but it would not do for the tactical level that I wish to play. Something like Battles of Westeros would be more appropriate where the command and control system is leader-centric. Of course this really depends upon the amount of friction you wish to simulate. Games like Flames of War do not really simulate friction in the command and control system as every unit can be ordered every turn unless it has some form of morale failure, such as being pinned. Generally, I like some level of friction as it is one more choice that the player must make.

As I develop more ideas along this line I will be sure and post them.

Monday, August 13, 2012

He brought a knife to a gun fight ...

I was able to get a game of Flames of War in last weekend and it was interesting, but not quite as much as it could have been. I thought I had telegraphed my intentions as far a lists were concerned; I wanted to play the new Fearless Trained King Tigers list from the new Devil's Charge book. When Don told me he was bringing 76mm Shermans, I quickly looked at the stats and started sweating. Sure, my Kings could blow the Shermans apart with ease, but he was probably going to outnumber me 3:1 and would swarm my flanks, so I expected a tough fight. Then Don said he didn't want to learn the air rules yet, so I chucked my AA and tried the new Skorzeny Commandos on a lark.

Imagine my surprise when Don showed up with a U.S. Light Tank Company and there were no big guns. I was immediately suspicious, figuring that I was missing something somewhere, but no, Don had brought a knife to a gun fight! Today, he told me that after the game he had felt "violated". (I am sorry Don, but I am laughing right now.)

I had set up one of the best boards as I had lots of new terrain. I got one set of Farmhouses, the Calais House, one set of Fields and Fences, one set of Rural Roads Expansion, and another set of Rural Roads, all from Battlefront. The only irritation was that you get two fields in a set of Fields and Fences, but only enough fences for one of the fields. Still, they all look good. My only problem with Battlefront terrain has been with the rivers, which seems to be using a chemical that causes them to stick together. They are now losing their paint. But the roads and the farmhouses are absolutely must buys. Here are pictures of the empty board.


I gave Don the option of mission and side of the table, but Don wanted to roll. We rolled up Surrounded and with my force (optionally) Always Attacks, I ended up attacking the Americans in the center (the band of hedged fields) while my forces would come from the left and right (in the picture below).


Just as a note: I kept this board set up and we are going to use it again. Only this time Don will choose the scenario! I will definitely change the force (and possibly even the list), as I really did not like this King Tiger list all that much, especially at 1500 points!

Don set up his Armored Rifles platoon and a Stuart platoon on the bottom half (in the pictures above and below) and I attacked with one King Tiger from the left and one King Tiger CiC and a Gepanzerte Panzergrenadier platoon from the right. Don ended up popping 2 Scott Assault Guns in this section, facing my Panzergrenadiers.

My PG assaulted across the plowed field and over the hedges (they were not hedgerows) and took out one Scott before I started grinding the Armored Rifles. All that said, they did not have enough muscle or bodies to win, but I think that it helped Don and I re-learn the assault rules. (We only messed up maybe two or three times!)


On the top half of the board, Don kept his Priest Battery in the center, but they basically died from my CiC King Tiger's fire and a Panzer IV platoon (4 tanks) coming up the road. Don's luck was horrendous and whiffed all hit rolls as the Panzers approached, so it was really over before it started. Meanwhile my last King Tiger (I had 3) slaughtered the Stuarts guarding the objective in the ford while the second Stuart platoon was slaughtered on turn 1 by the Panzer IV (rolled 8 dice, needing a '6', and rolled 4 hits and 4 firepower checks!). No wonder Don felt violated!

The pictures above and below show the game at the end. White puffs are dead US tanks, save for 2 dead German halftracks.


One last look at the table from another angle.


The last picture shows the King Tiger that sat on the objective for three full turns and just kept shooting Stuarts that felt compelled to come out and contest the objective.


I won the game at the start of the sixth turn, so it took some grinding to get through all of that American metal.

Impressions

King Tigers: As strange as it sounds, King Tigers are not very exciting to play unless there is some threat to them. Otherwise it is boring and slow. I was looking forward to a dance with a horde of 76mm Shermans. I was not looking forward to getting whacked by air support, but that is how the U.S. killed them.

Skorzeny Commandos: A bit of a giggle, but I was using them as cheap recce, hoping to cause problems with Tank Destroyers popping out in ambush. But there were no Tank Destroyers and no Reserves (my secondary use of them), so all I was left with was spreading rumors, trying to pin U.S units. They were not very successful. I lost two for being too close to my units (and not being able to flee fast enough) and two by being spotted as frauds. I am not sure that the original AA would have done better, but it stopped me from getting a panzerfaust with my Panzergrenadier Platoon Commander, which was probably significant.

Panzergrenadiers: Given that I was facing dug-in U.S. Armored Rifles, the extra machine guns on the halftracks helped a bit, but I need to re-read the rules and see if they should have been allowed to stay around. Never got to use the "pinned MG teams fire ROF 2" rule as I kept getting assaulted by Stuarts after I got pinned.

Panzer IV: Solid, as always.

Assault: I like the 8" assault "bubble", but I know we played it wrong once or twice. It is hard to sort out what happens with mixed platoons. Need to read more.

I know the battle report was brief, but then so was the game. Next time, I expect Don will bring the guns. :^)

Blog Archive

Blog and Forum Pages

Popular Posts

Followers

About Me

My photo
Huachuca City, Arizona, United States
I am 58 yrs old now. I bought a house in Huachuca City, AZ working for a software company for the last three years. To while away the hours I like to wargame -- with wooden, lead, and sometimes paper miniatures -- usually solo. Although I am a 'rules junkie', I almost always use rules of my own (I like to build upon others' ideas, but it seems like there is always something "missing" or "wrong").