My blog about my wargaming activities. I collect a lot of 15mm miniatures for the American War of Independence and so collect a lot of rules for this period. I started miniatures with Napoleonics, so I have a number of armies in 6mm and 15mm figures for skirmishing. I have15mm WW II figures that I use for Flames of War, Memoir '44, and someday, Poor Bloody Infantry. Finally there is my on-again, off-again relationship with paper soldiers that I sometimes write about.

Sunday, April 24, 2022

Map Campaign Part 2

For those that have not been following I decided to try my hand at a map campaign using the tables and ideas in The Solo Wargaming Guide (TSWG). Part one of the campaign laid out the basics, then another post spoke about how I was going to convert from Regiments and Companies that TSWG uses, to the units and hits that Neil Thomas' One-Hour Wargames (OHW) uses so that I could use the latter to play out the tactical battles. I played out the first 'battle' – The Battle of Firnskuppe – on the Solo Battles blog. There I showed how TSWG creates terrain layouts for the tabletop and puts some of the factors in TSWG – like the Commander Competency Rating (CCR) assigned to each Brigadier General and force commander – into play.

The basic scenario for the first battle was that the vanguard of the northern Westonian forces – a Regiment of Infantry and a Regiment of Cavalry – sprung to the attack while the Eastonian forces were still mustering. All that was there to defend the Eastonian frontier town of Firnskuppe was an understrength Mounted Skirmisher Regiment. (Note that Mounted Skirmisher is a new unit type for OHW. It is basically a Skirmisher unit that moves 12" as it is mounted on horses.)

I used some old Kings of War Battlefield Cards to determine the battlefield condition both sides had to deal with, the objectives for each side, and the stratagems they had available to them. Looking over the condition cards (there are 14 of them), five are normal conditions, six had easily interpretable conditions, one useless condition, and two hard to interpret conditions (they were written for the Kings of War game system). I think in the future I would prefer to produce my own table of conditions, and increase the odds that the conditions are normal. That said the Reduced Visibility condition had a very good feel to it – the Westonians had surprised the Eastonians and attacked first and although the latter knew the former were across the border, the Westonians had decided to attack early one foggy morning in an attempt to achieve surprise…

One thing of interest that I noted after the battle is how easy it is to become invested in one side or another. There are lots of ways to play solo, but generally you are either playing one side and trying to program the other, non-player side, or you are trying to program both sides. I told myself I was doing the latter, but the reality is that I did the former. I was more emotionally invested with the underdog Eastonians (who I had generated the campaign orders for both Justo and I), so when the Westonian Cavalry flanked the town by moving into the fields at B4, I immediately bugged out.

The whole point of the campaign is to provide interesting scenarios, especially ones you might not normally want to play out on a game night with a face-to-face gaming buddy. The Battle of Firnskuppe (BoF) was just such a scenario. First, it featured two units versus one in a game where it is normally six units versus six. Second, the one unit was the weakest unit in those rules versus the stronger units. So why play it, other than "because you need to know the results"? Well, for one thing, I did not know what the result would be, in terms of campaign impact. BoF was very terrain dense for a OHW game. I added a new Mounted Skirmisher unit type that had all of the weaknesses of the Skirmisher unit type, was more restrictive regarding terrain, and had only a marginally better movement rate of 12" rather than 9". (In hindsight I think it should probably be 15", but that is another discussion.) When we play games unlinked to campaigns, we tend not to think of battlefield casualties – or we minimize the impact – but only of victory conditions. Did we win the battle?

In OHW terms one side took six hits while the other took two, resulting in no lost units. One side 'won' because they achieved more victory points than the other. There wasn't even an obvious reason why the Eastonians retreated because they were giving better than they got.

The Eastonians were firing with 1D6-2 each turn (1.67 hits per turn), while the Westonians were firing 1D6-2 but would have to halve the hits (1 hit per turn) due to the cover the Eastonians were in. If the Westonian Cavalry charged they would hit with 1d6+2 hits (5.5 hits per turn). The Eastonians firing at the Westonian Cavalry would have had 1D6-2 with ½ casualties (1 hit per turn) so once the Westonian Cavalry got into position it should have immediately charged, dispersing the Mounted Skirmishers.

So, why did it play out the way it did? Clearly my own personal bias crept into the stupid play of the Westonians. The Westonian Cavalry could have hit on turn 2, effectively ending the battle with much higher losses to the Eastonians. Or maybe I am just not as analytical 'in the moment' as I like to think.

Even though I am declaring myself a cheat I am going to let the results stand. So how does this affect the campaign?

Converting from Tabletop Back to Campaign

TSWG offers a simple method for adjudicating casualties for the victor: ½ of the total casualties are killed; ¼ are severely wounded; and ¼ are lightly wounded. Killed casualties are replaced after one month; severely wounded casualties are replaced after two weeks; and lightly wounded casualties are replaced after one week. For the defeated the breakdown is the same, but the wounded will be captured – meaning they will not be replaced unless there is a prison exchange – if the victory was decisive.

This begs the question, however: how do you determine total casualties? Let's start by looking at Neil Thomas' notes in OHW:

"My combat rules work on the principle of having units acquire hits throughout the game, to be eliminated after garnering 15. They retain their full fighting ability until destroyed; this reflects a model whereby real casualties are at a fairly low level, but that the sustained experience of combat will steadily degrade a unit’s morale, at which point it routs. This is both simple and historically accurate: most casualties in any ancient battle (and those of most other periods too) were inflicted when the enemy fled, rather than the initial clash of arms. Essentially, loss of morale is reflected in elimination, rather than having to make frequent checks on a unit’s status, which tends to be a feature of complex wargames rules."

With this it is obvious that the six hits sustained by the Infantry Regiment do not reflect a loss of two companies of men, but that morale of the Regiment was down 40% because of ammunition depletion, fatigue, the morale effect of a few men being killed or wounded, and unwounded men leaving the firing line to resupply ammunition, help the wounded to the rear, or simply being ineffective out of fear. he unit did not have two of five companies become casualties.

If the emphasis on unit loss and not hit loss then it is better to come up with a table reflecting casualty effects of a unit loss.

OHW Combat ResultTSWG Campaign Effect
4-9 hits remaining on Infantry or CavalryLose one company on '1' with 1D6
1-3 hits remaining on Infantry or CavalryLose two companies on a '1', one company on a '2' with 1D6
Infantry or Cavalry removed by musketryLose two companies on a '1' or '2', one company on a '3' or '4' with 1D6
Infantry or Cavalry removed by ArtilleryLose three companies on a '1', two companies on a '2' or '3', and one company on a '4' or '5' with 1D6
Infantry removed by close combatLose five companies on a '1', four companies on a '2', three companies on a '3' or '4', two companies on a '5', and one company on a '6' with 1D6.
Cavalry removed by close combatLose four companies on a '1', three companies on a '2' or '3', two companies on a '4' or '5', and one company on a '6' with 1D6.
1-6 hits remaining on any SkirmisherLose one company on '1' with 1D6
Any Skirmisher removed by musketryLose one company on a '1', '2', or '3' with 1D6
Any Skirmisher removed by ArtilleryLose two companies on a '1', one company on a '2', '3', or '4' with 1D6
Any Skirmisher removed by close combatLose three companies on a '1' or '2', two companies on a '3' or '4', and one company on a '5' or '6' with 1D6

I have no idea if these numbers are any good, but I need to try somewhere. Note that the table determines total casualties, so ½ of the companies are replaced after one month, ¼ are replaced after two weeks, and ¼ are replaced after one week. How do we deal with fractional companies? Roll dice to see if you round up or down.

You might question how realistic this table is. What does it mean by "removed", for example? (It means the unit or combat type that rolled the die that caused the unit to be removed, by the way.) What if the unit removing your only inflicted one hit? Won't this lead to unrealistic play like trying to use Cavalry to run down your unit in close combat in order to get a deadlier result? Well, yes, but I don't see it as being 'unrealistic'. If you were routed by Cavalry, for example, they probably ran you down, rather than you outrunning them. Artillery fire was particularly deadlier than musketry, so their casualties tend to 'stick'.

So, how do the casualties play out from BoF?

Westonian Infantry: 9 hits remaining, so it loses one company on a '1'. If it does, that is ½ company killed (50% chance), ¼ company severely wounded (25% chance), and ¼ company lightly wounded (25% chance). So roll a D100 and 1-50 counts as killed; 51-75 counts as severely wounded; and 76-100 counts as lightly wounded.

I rolled a '5', so no company was lost.

Eastonian Mounted Skirmishers: 10 hits remaining, so no losses.

Rest and Recuperation

TSWG is silent (as far as I could tell), on the need for rest and recuperation after a battle, although The Joy of Wargaming hinted at it being otherwise. I noticed that he indicated that it took a day for rest and recuperation after a battle, but he took note, for example, whether light cavalry was uncommitted at the end of the battle. Those troops could be used in pursuit of defeated enemy forces.

The Westonian Infantry spent the remaining day and the next day resting and bringing the town of Firnskuppe under control. Meanwhile the Westonian Cavalry patrol around the town: two squadrons down the road towards Erlenloch, where the Eastonian Cavalry retreated; two squadrons down the road towards Grimme Hutte; and one squadron into the woods north of Firnskuppe.

This leaves a possibility of a skirmish between two squadrons of the Westonian Cavalry and the two squadrons of the Eastonian Cavalry that headed down the road to Erlenloch. But first I need to think about how to handle some of these tactical decisions – such as what to do when you are pushed out of your muster point – better. So that's it on the campaign front for now.

In Other News

So, not that I am looking to garner any sympathy, but more to explain delays in this campaign and other blogging activity I thought I would let everyone know what is going on with me.

About two years ago I was formally diagnosed with high blood pressure and diabetes (type 2). Part of my general problem was that I had hallux rigidus, a degenerative arthritis of the big toe, in both feet. The result is that I would get bloody sores on my big toes, making it difficult to walk as well as spreading blood all over the carpet, which really upset the wife. After months of treatment I decided to have surgery to correct the problem. In October 2020 I had my first surgery and they removed the defective left toe joint and replaced it. That surgery went as well as could be expected, so I decided to follow it up and replace the right toe joint in October of 2021.

Before any surgery you doctor has to clear you. Well the second checkup was worse than they first in that my diabetes was worse than previously. How much worse? Truth be told I was borderline acceptable. A score on my A1C of 9.0 was considered a fail and I was at 8.9. But I think I browbeat my doctor into clearing me anyway – I just wanted to get back to 'normal' and be able to fully walk again – so I went ahead with the second surgery.

The first sign of a problem was when I woke from anesthesia. I was flopping around like a fish out of water. Despite having been under anesthesia twice before in my life (all after the age of 50), I had never had a bad reaction nor found that I was allergic to any medication. This time I apparently had.

After getting home I did not strictly follow the recovery regime of icing and elevating my foot that I had the previous year. That plus the stress I had put on my stitches after the surgery caused my stitches to pop open, introducing an infection to the metallic implant. I did not even know an implant could get an 'infection', but apparently it can and it is bad if it does. Antibiotics cannot really work on digging out an infection from an implant. So after three months I was back on the table and they were removing my implant.

The doctor took no chances and essentially removed the implant and would not put a replacement in. Ironically, by the time of the second surgery on the right toe I had radically altered my diet and brought my diabetes almost under control. Basically an A1C reading of 6.5% means you are diabetic, while 5.7% to 6.4%is pre-diabetic. I had brought it down from 8.9% to 6.2%. Although it would not matter with regards to getting a replacement implant, it has mattered tremendously in healing after the second surgery.

The wound to extract is much larger than the wound when the implant went it. I am pretty sure she took more than the implant; what they call the 'grandma method', which is to basically fill it up with flexible cement. I would still be able to walk, but I would not have as much strength in the foot to push off, so no more hiking and mountain climbing for me. (I never did those things anyway.)

Because the wound was much larger it was going to take longer to heal than the last one (and that had been three months), so they were really worried about it getting infected. The first therapy they wanted to try was a wound vacuum, which is to seal the wound in a vacuum, 24 hours a day. The negative pressure not only stimulates the cells to heal faster, but it helps keep infections out. The downside is that you have to wear a purse-sized pump that sucks the air out of the wound. As the wound was on my bog toe, that meant an air hose ran from the dressing on the wound up through my pants leg, out of the top into the vacuum pump unit at my waist. Thank goodness I work from home. I suddenly discovered the benefits of old-timey nightshirts! It allowed me to look like I had a t-shirt on while attending Zoom conference calls.

So, three times a week I had to change the dressing on the wound. Once per week I went into the doctor's office so she could inspect the wound and measure progress. Well, it turned out that I was healing very well, but the special adhesive they use on the wound dressing is something I was allergic to, as I was breaking out in a very bad rash wherever the adhesive was put, which was largely around the wound. So after about a month the doctor called an end to that given that my rash was just getting so bad. But the wound was healing nicely. New cell growth.

The other issue is that because the wound was so large, and the risk of infection was so high, I was on very strong antibiotics. These were so strong apparently that the doctor had never prescribed them before. My wife is a nurse and she looked them up and this is sort of an antibiotic of the last resort. She was surprised it had been prescribed and that I had been on it so long. Well these antibiotics have a lot of side effects, one of which is killing your gut biome very effectively (the natural result of which is always having diarrhea) and that you can break out in a rash. So not only did I have a rash about the wound from the allergic reaction to the adhesive, I had a rash breaking out all over my body.

When the doctor took me off of the wound vacuum she also took me off the antibiotics; I had simply been on them too long. I was fine with that because it caused a lot of nausea, so my quality of life was down pretty badly. Mind you, I was still wargaming face-to-face with people during this period, but I was always dragging. To counter the antibiotics she told me to get some probiotics to help repopulate my gut biome and bring my gastrointestinal issues to heel. So I did.

Well, it turns out that some people can be affected by heavy probiotic usage and it comes in the form of acne. I would like to think that once upon a time I would not have been one of those people, but after all of this heavy pharmaceutical usage and sickness I should not be surprised that I am one. I broke out in pimples all over the body. Seriously, I thought that somehow bedbugs had gotten into the house and they were bug bites because I would have more red spots every morning. Finally they formed the heads and I looked at the side effects of the probiotics.

One of those pimples turned out to be a monster though. It was on my shoulder, very painful, and I finally had the wife attend to it as I had recently lost an entire weekend to fever. My guess was that it was from all of the inflammation from the acne and rashes, but it had apparently come almost completely from this one pimple/cyst?/whatever. My wife used about a dozen medical sponge gauzes to drain the pus and blood from it that night. We patched it up and I had a fever spike, but the fever broke that night and I felt a lot better the next day. But my weekend was lost.

I would like to say that the campaign has been trudging along because of all of this, but that would not be strictly true. First off, the wound is healing really well. I have moved on to silicon skin graft every week now to higher grade skin grafts every other week. The wound continues to get smaller and not show any complications. So my mobility is up, especially now that I don't have a pump to deal with and dressings to change every day. No the campaign is slow because map campaigns are a lot of work. Plus, the people I game with face-to-face are all climbing out of their lockdown routines and becoming more active and social again, so I have more (welcome) distractions. I need to get out more. No, I chose the wrong time to start a solo campaign; I should have started it months ago.

So bear with me as I intersperse writing up about this campaign with other topics. The latest craze has been playing the cooperative superhero game Marvel United. I like the chibi style of the figures and the comic style that I am painting them. Here are two of the latest supervillains that I have painted.


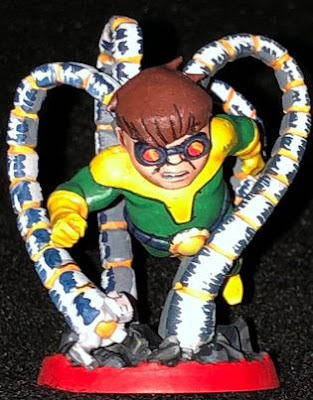
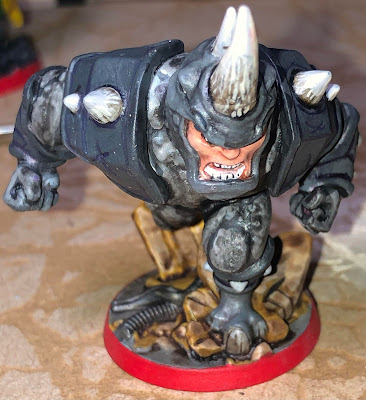
These should be two tough supervillains to take down.

Saturday, April 09, 2022

Campaign to Battlefield and Back Again

 Last week I finally got enough of the preliminary work done on the Map Campaign – refer back to that post if you have not read it already – that I was ready to game out the first tactical battle. Unfortunately, because Westonia caught Eastonia flat-footed, it is not going to be much of a battle, given it is ten companies versus two. Nonetheless, one goal of this campaign was to create scenarios that I would not normally concoct when playing face-to-face, such as uneven battles and, well, this was about as uneven as it was going to get. Nonetheless, I did not want to throw troops away. So I needed a way to fairly deal with a situation where troops might want to voluntarily retreat from engagement.

In the campaign played on They Joy of Wargaming (TJOW) YouTube channel, he generated the tactical map of the tabletop – influenced by the terrain on the larger map where the engagement took place – then used each side's Commander's Competency Rating (CCR) to determine who had the tactical advantage, and thus could pick their baseline (with their opponent generally getting the opposite side). From there I would play the battle, but if a side wanted to voluntarily retreat because of their position being untenable, if they could roll their CCR or less on a D6 (rolling every turn), they would have the option to retreat off of the board.

As I indicated last time, I was still trying to figure out how to move from the campaign map to the tabletop and back again. Primarily, because I could be dealing with very few troops, which rules would I use that could deal with something as small as ten companies versus two, to 5-10 Regiments per side? Playing One-Hour Wargames (OHW) was pretty much what I decided upon, but how to scale up and down.

Modeling Campaign Units in OHW

The Solo Wargaming Guide (TSWG) uses Regiments of five companies, so I decided to equate that to one full-strength (15 hit) unit in OHW. Initially I was going to allow the use of independent companies on the battlefield, but decided against that, as it is against the spirit of the OHW rules, in my opinion. All companies of the same type must be consolidated into Regiments. Regiments not at full strength will have fewer than 15 hits. That said, not all unit types are created equally in OHW.


In the Horse & Musket period rules there are four unit types: Artillery, Infantry, Skirmishers, and Cavalry. Two of the four unit types – Infantry and Cavalry – equate to the Regiments of Line Infantry and Regiments of Line Cavalry, respectively, that are listed in the campaign's force rosters. An Artillery unit equates to an Artillery Battery in the campaign. This only leaves the companies of Light Infantry and squadrons of Light Cavalry to model.

In OHW the Skirmisher unit type is pretty weak. It has 15 hits, has cover benefits when in terrain, and moves faster as it represents unformed infantry not constrained by formation and 'dressing the line'. One important note that Neil Thomas makes is "Units of Skirmishers are only half the size of close order foot, and their musketry is correspondingly less effective." An OHW Skirmisher unit is thus 2 ½ companies in size, not five companies. So now, this give me a tactical choice: I can either run five companies of Light Infantry as a Regiment, which in OHW is an Infantry unit of 15 hits, or as two Skirmisher units, each of 15 hits. (The extra hits reflect the inherently lower casualties that skirmishers take due to their dispersed formation and the ability to use lesser cover not typically reflected on the tabletop.)

So, the Light Infantry is now modeled, what about the Light Cavalry? I decided to allow the same sort of options: they could either form up into five squadron-strong Regiments of Cavalry or 2 ½ squadron-strong Skirmisher units. Yes, I am going to allow a mounted Skirmisher unit. It will fight exactly like a normal Skirmisher unit – including the ability to fire (while mounted) – but will have a 12" move as Cavalry units do. Does that make them better than normal Skirmishers? Yes. The reason I will not downgrade them in some way is because I do not want to add any additional rules, and because their numbers are constrained by the campaign itself.

Conversion to OHW Units

As stated above, Regiments of Infantry and Cavalry consist of five companies/squadrons, which nets them 15 hits in OHW. For every company or squadron short the unit loses three hits in OHW.

For Skirmishers, however only 2 ½ companies/squadrons are required. Given that everything in the campaign is modeled as whole companies, how do I model the ½ companies? I don't. If a Skirmisher unit only has two companies (80% of 2 ½), it will be a Skirmish unit with 12 hits (80% of 15 hits); a one company Skirmisher unit will have 6 hits.

Conversion Back to Campaign Units

With 15-hit Infantry and Cavalry units, for every three whole hits lost – whether permanently from deaths or temporarily from wounds – the unit will lose one company/squadron from the campaign. With Skirmisher units, they lose one company/squadron for every six whole hits lost.

For units that have fractional company/squadron losses, I will use dice to determine if the company/squadron is lost, e.g. an Infantry unit lost five hits, resulting in the loss of one company (3 hits) and a fractional loss of another company (2 hits). I roll a die for the fractional loss and on a 1-4 (D6) the company is lost while on a 5-6 it is not. This should help alleviate some bookkeeping, requiring only the tracking of companies and types and not of men.

What do you think?

Please note that I have started using Amazon affiliate links for any Amazon product I feature in my blog posts. You don't have to use them, of course, but anything Amazon gives me does not affect the price you pay, so using it contributes to my caffeine-fueled blog posts' funding.

Thursday, April 07, 2022

First Attempt at a Map Campaign

One of the hardest goals I have ever tried to achieve is to add context my games. There are plenty of ways to try and achieve that, but I think the one most gamers go for is to play scenarios in the context of a larger campaign game. Hopefully, the larger campaign provides you the forces for each side, a location to be fought over, and both previous and subsequent battles will be affected by the results of the battle you are about to fight.

So what is a "campaign"? Essentially it is a larger game intended to consist of a series of smaller games, linked together over a span of time and distance. Sounds simple on face value, but it requires the gamer to consider many factors that they normally abstract away from normal, tactical play, such as supply and logistics, marching rates (outside of the battlefield), and thinking about multiple objectives spread across distances. With campaigns you have to figure out if you want to continue to abstract many of those factors away.

Rather than talk about the different types of campaigns, this post is going to focus on a map campaign that I started with gaming buddy Justo (in Texas). It started with watching YouTuber The Joy of Wargaming's series Five Villages (which starts here), which was a map campaign he played using the rules The Chosen Men (so it was a skirmish campaign). I decided to play that same campaign after watching the first four episodes. (I should have watched the fifth episode before starting the campaign, by the way.) I drew up my own version of the map (putting it on hexes), created the opposing forces, and developed some rules (largely taken from the original campaign). The next problem to solve was: what strategic orders do I give each side?

Because my intent was to play the battles out solo – the objective of the campaign was simply to produce scenarios for battles to be played out on the tabletop, especially unbalanced and unlikely scenarios you would not play face-to-face with an opponent – I decided to enlist my gaming buddies to provide me the basic strategies for the two sides and then I, as umpire, would execute the orders for both sides and resolve the resulting conflicts.

I enlisted gaming buddies Justo and Chris (from Ohio) for the two sides, but it turned out that I did not convey the requirements adequately and it fell through in about a week. That said, Justo had a map campaign in his tool box – also based on a The Joy of Wargaming (TJoW) video series, in this case an Imagi-Nation map campaign (which starts here) – and he suggested that I give the orders to one side, he does it for the other, and we each play out our own campaign separately. Rather than use this plan for my original campaign, I decided to go ahead and try this one.

Initially Justo provided two map drawings, but eventually I ended up converting these to hexes.

WestoniaEastonia

As with the video series, Justo and I decided to use the system provided in The Solo Wargaming Guide (TSWG) by William Silvester for conducting map movement, dealing with supply and logistics, weather, mobilization, and determining the number of initial forces. (Because the campaign is measured in days and not weeks or months, recruitment is not an issue.) Now, my opinion of this book has been pretty low since purchase. When it comes to solo wargaming, I really don't want to lean on random tables and this book does that heavily (as does Featherstone's). But as I looked through all the variables you have to contend with, it seems like this is a good way to start until you sort out your own rules with fewer fully random tables.

Justo had created the maps, set the city sizes, drew in the terrain and roads, and stopped sort of determining the force composition and location. That is where our campaign started.

I saw that the map favored Westonia, as it had more lesser villages (class C, D, and E urban areas), and thus would have a smaller army, so I chose Eastonia as my side figuring it would likely be the defender. Here is the full process that we used for our campaign:

  1. Select campaign map
  2. Select which side you represent 
  3. Roll your side’s forces
    1. Roll total forces for each city
    2. Divide Regiments into Line Infantry and Line Cavalry
    3. Subtract the number of Line Cavalry from individual Companies; that is the number of Artillery Batteries
    4. Divide remaining individual Companies into Light Infantry and Light Cavalry
    5. Assign Regiments and individual Companies to cities
    6. Name Regiments and Companies
  4. Divide forces into Brigades
    1. Define Brigades (which Regiments and Companies, from where)
    2. Roll Brigadier Generals’ Commander Competency Rating (CCR)
      1. No more than three Brigadier Generals per side
      2. Any additional Commanders will automatically have a CCR of ‘3’.
    3. Assign Brigadier Generals to each Brigades
    4. Name Brigadier Generals
  5. Make a Muster Plan
    1. Define the Muster Rating of each city.
    2. Identify Muster Point for each Brigade.
    3. Define travel from origin Cities to Muster Point.
  6. Define an Action Plan
    1. Identify starting time for each Brigade
    2. Identify general orders (attack, defense, delay, etc.)
    3. Identify route of march
    4. Identify goal of campaign

Step 3, roll your side's forces, comes straight from TSWG, which is as follows: Class A gets 2-5 Regiments (each of 5 Companies); B gets 1-5 Regiments; C gets 4 Companies; D gets 3 Companies; and E gets 2 Companies. Given that both sides started with one A and three B class cities, both sides would start with relatively the same number of Regiments. Note that 3.2 and 3.4 above defines what class of troops come from these sources, Line Infantry and Line Cavalry only come from Regiments, and thus only class A and B cities produce those troops. The class C, D, and E towns only produce Artillery (in limited amounts), Light Infantry, and Light Cavalry. So my feeling was that the extra towns of Westonia would not produce a significant advantage in troops, but enough to justify me being the defender.

As with TJoW, we decided to have one Line Cavalry Regiment for every five Line Infantry Regiments raised, rounding fractions up. I rolled up fifteen Regiments, so that gave me three Line Cavalry Regiments and twelve Line Infantry Regiments.

With three Line Cavalry Regiments, you are allowed three Artillery Batteries, subtracted from your total number of Companies (28) raised from your C, D, and E towns. In hindsight I think that may be a little too few batteries, but we press onward.

Of the remaining Companies (25) we decided to have one Light Cavalry Squadron for every three Light Infantry Company, rounding fractions up. That gives me seven Light Cavalry Squadrons and eighteen Light Infantry Companies. Along with our three Brigadier Generals, this is my total force disposition.

I am not going to bore you with the nitty gritty details of where the units ended up, but my basic plan was to pool my Light Cavalry in certain towns so those forces could muster and move faster to engage the enemy while the rest of the units muster for defense. My sole goal was to attack on the south road, taking the first C class town on that road, and attempt to hold on to that until the cessation of hostilities, hoping I could win that in subsequent peace negotiations or at least use it as a bargaining chip in the event I lose any towns or cities.

By the way, given that we are not using any siege artillery and the class A and B cities are fortified, there is essentially no way to capture the enemy's cities; only the towns are vulnerable.

The first wrench in the campaign was that Justo did not want to determine, at the start, which side was the attacker and which was the defender. Rather he wanted to have each side write attack orders without knowing who was attacking. I thought that was a little strange, but agreed to it. After all, we would each be playing our own campaign so whoever ended up attacker in one campaign might well be the defender in the other's, so I guess it made sense and was easier than writing one set of orders if you are the attacker and another if you are the defender.

My Version of the First Elope-an War Campaign

I will be reporting on my campaign here and on my Solo Battles blog, given that the tactical play will likely be solo (though not necessarily, if I enlist the aid of local or virtual players).

The Westonian Duke, after sending his daughter ahead to Eastonia to eventually be married to the Prince of Eastonia, and subsequently finding out that the Prince had absconded (eloped) with his daughter to another country, decided this was the final straw. After decades of attempts to make peace with the Eastonians, by tying their families through marriage, this was too much! With the loss of his daughter there was no treaty between the two, especially as the Count of Eastonia was claiming it was their strumpet of a daughter that lured his son and heir away! This means war!

Westonian ended up as the attacker so I have to determine how long it takes Eastonia to react to the news and send out their mobilization orders. Looking at the Mobilization table in TSWG, the Eastonian's mobilize five days after the Westonian's do. Clearly the Count did not figure the Duke would react so poorly to the news.

Diary

April 3, 1750

Light Rain (6) greets the Westonians as they start to muster. Each city has a Muster Rating to determine how long it takes the news to get to that city, and how long it takes the local garrison commanders to get their troops mustered locally.

April 4, 1750

A light rain continues. Troops in Tresvoces, Siayfin, Avrafin, and Vacaque have completed their muster.

April 5, 1750

The rain has stopped (7). The troops above are moving to their Brigade Muster Point while the remaining troops complete their muster in their respective cities and towns. (I did not roll a single Westonian city with a Muster Rating of '1', which is the slowest Muster Rating. They have clearly been contemplating this action and have been drilling.)

April 6-8, 1750

The Vanguard of the Brigade SLT completes its muster in Astaelfin and prepares to move on towards Firnskuppe.

April 8, 1750

Mobilization orders are sent out to all Eastonian units. Units will muster in their cities and towns on the 9th through 11th, depending upon their Muster Rating.

April 10, 1750

The Vanguard of the 1st Westonian Brigade arrives in Firnskuppe, just as the Firnskuppian Husaren (two independent light cavalry squadrons) complete their muster. One Light Infantry Regiment and one Light Cavalry Regiment versus these two Husaren squadrons… Not quite your normal matchup to play on game night!

Fighting Tactical Battles

The next question is how to fight tactical battles, going from the campaign map to the tabletop and back. In this regard Justo and I have again decided to take our own routes. We can use whatever rules we like to fight out the battles, but they need to be able to map to our unit structures.

One-Hour Wargames

I am considering using Neil Thomas' One-Hour Wargames (OHW), especially for the simpler battles. I like the basic mechanics of either moving or firing, which feels right for this period. The issue is how to represent the units?

The basic unit in the campaign is the company. Towns and cities provide a certain number of companies to the army. Cities provide the line units, and thus are organized in units (regiments) of five companies each. Towns can either combine their companies into consolidated regiments (again, of five companies each) or use them as independent companies. Given that an OHW unit is 15 hits, that can easily be translated as 3 hits per company in a five company regiment. That would make independent companies and squadrons as 3 hit units. Any permanent losses in hits from the unit can likewise be reflected back to the campaign by removing a company for each 3 hit loss.

The problem with this, however, is that a unit maintains its firepower/melee power regardless of the number of hits remaining, so five 3-hit units are far stronger offensively, than one 15-hit unit. The former would be throwing 5D6 in combat while the latter would only be throwing one. How to resolve that?

Another method would be for one OHW unit to equal a company, but force the companies in regiments to operate together (in formation). That might be interesting. Basically it would be scaling OHW up (tremendously), as this first battle would be 10 units versus 2.

Finally, I can just see forcing all independent companies to consolidate into units of five companies, with the fractional unit having three hits per company.

2x2 Napoleonics

Justo will be using 2x2 Napoleonics by Rod Humble, which was also used in the original TJOW campaign. Although I enjoyed those rules immensely back in the day – it was one of the first rule sets that Justo and I played almost 20 years ago when we first met – I have to say that I have outgrown them a bit. Roll a D6, add modifiers from a table, and compare the result to a chart (which is fairly easy to remember). Very 1970s-80s.

One-Hour Skirmish Wargames

Interestingly, Justo and I discussed these rules on our last call. The idea was to convert the rule mechanics – using a standard deck of cards as the sole chance element – to mass combat. As I pondered the idea more I liked what I was coming up with, but I don't want to hold up the battles as I try and sort it all out. So maybe later in the campaign or another one.

Well, that's the start. I have a butt stomp to play out. I'll let you know how it goes in the next post.

Blog Archive

Blog and Forum Pages

Popular Posts

Followers

About Me

My photo
Huachuca City, Arizona, United States
I am 58 yrs old now. I bought a house in Huachuca City, AZ working for a software company for the last three years. To while away the hours I like to wargame -- with wooden, lead, and sometimes paper miniatures -- usually solo. Although I am a 'rules junkie', I almost always use rules of my own (I like to build upon others' ideas, but it seems like there is always something "missing" or "wrong").