My blog about my wargaming activities. I collect a lot of 15mm miniatures for the American War of Independence and so collect a lot of rules for this period. I started miniatures with Napoleonics, so I have a number of armies in 6mm and 15mm figures for skirmishing. I have15mm WW II figures that I use for Flames of War, Memoir '44, and someday, Poor Bloody Infantry. Finally there is my on-again, off-again relationship with paper soldiers that I sometimes write about.

Friday, December 27, 2019

American War of Independence Variant for One-Hour Wargames

I have a lot of painted American War of Independence (AWI) figures laying around – some based singly, some based for DBA-style armies, some not based at all – and I really love the Southern Campaign, but I haven't played a lot of it lately. The last outing with the figures was using them for Tin Soldiers in Action, which are rules I also enjoy. That said, I am becoming more enamored with One-Hour Wargames (OHW) because of its simplicity, ease of setup, and the ability to bring a game to a decision in a reasonable amount of time. Combine that with well-tuned scenarios that mesh with the game rules and you have a good system, even if it ends up not being your primary rules system. (Sometime, you just need something crunchier. "Sometime you feel like a nut, sometimes you don't!")

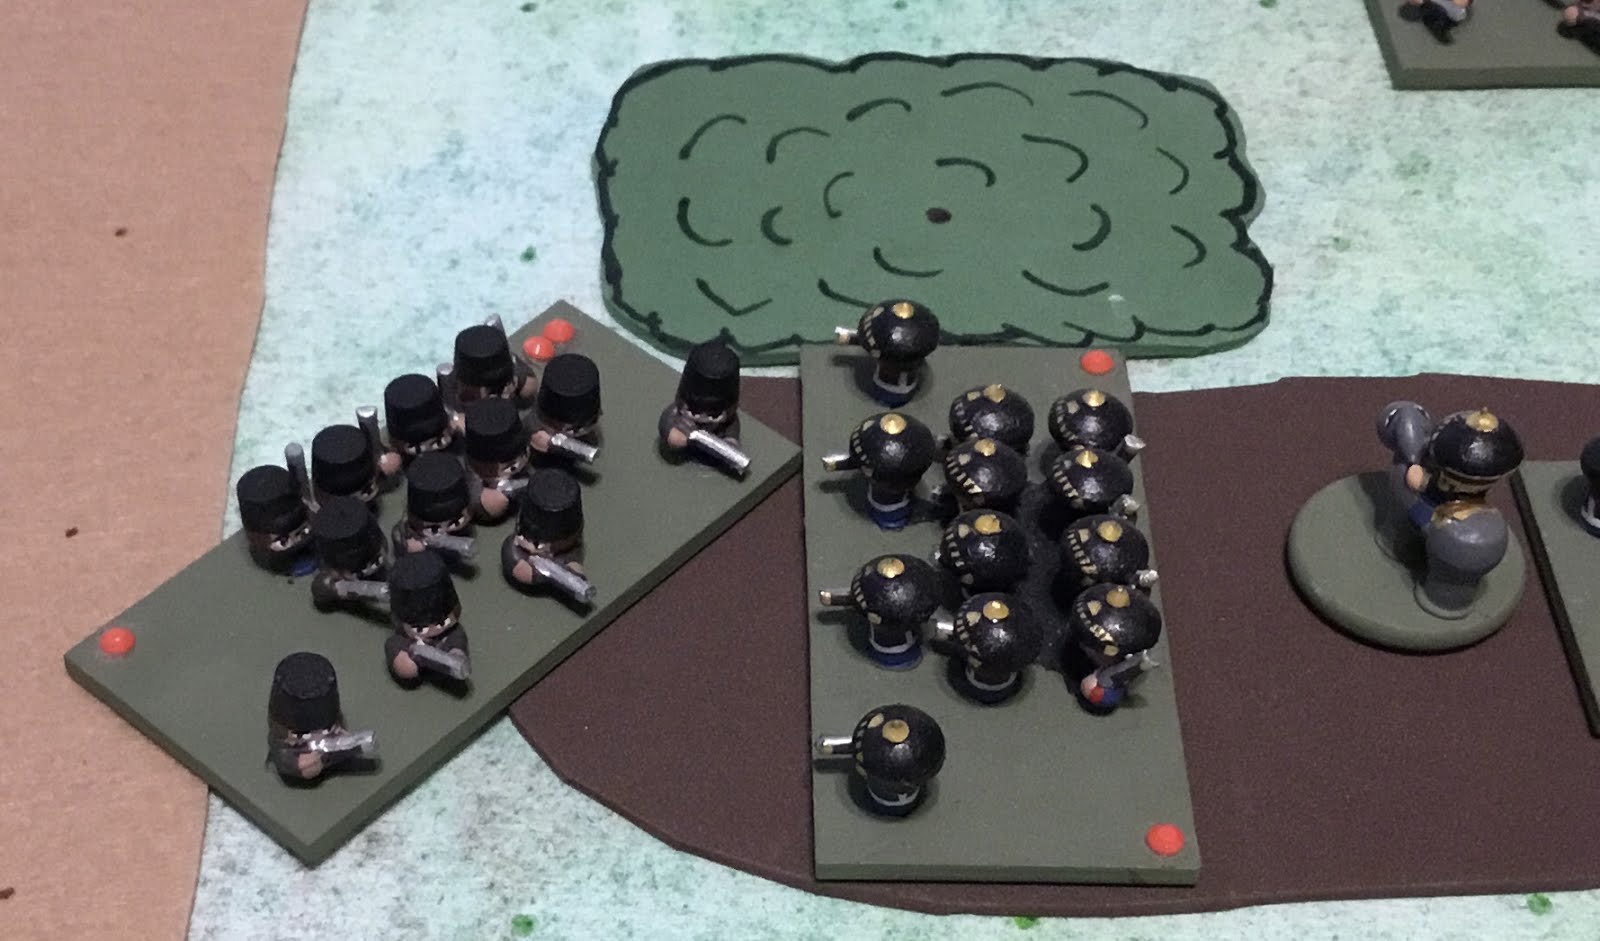
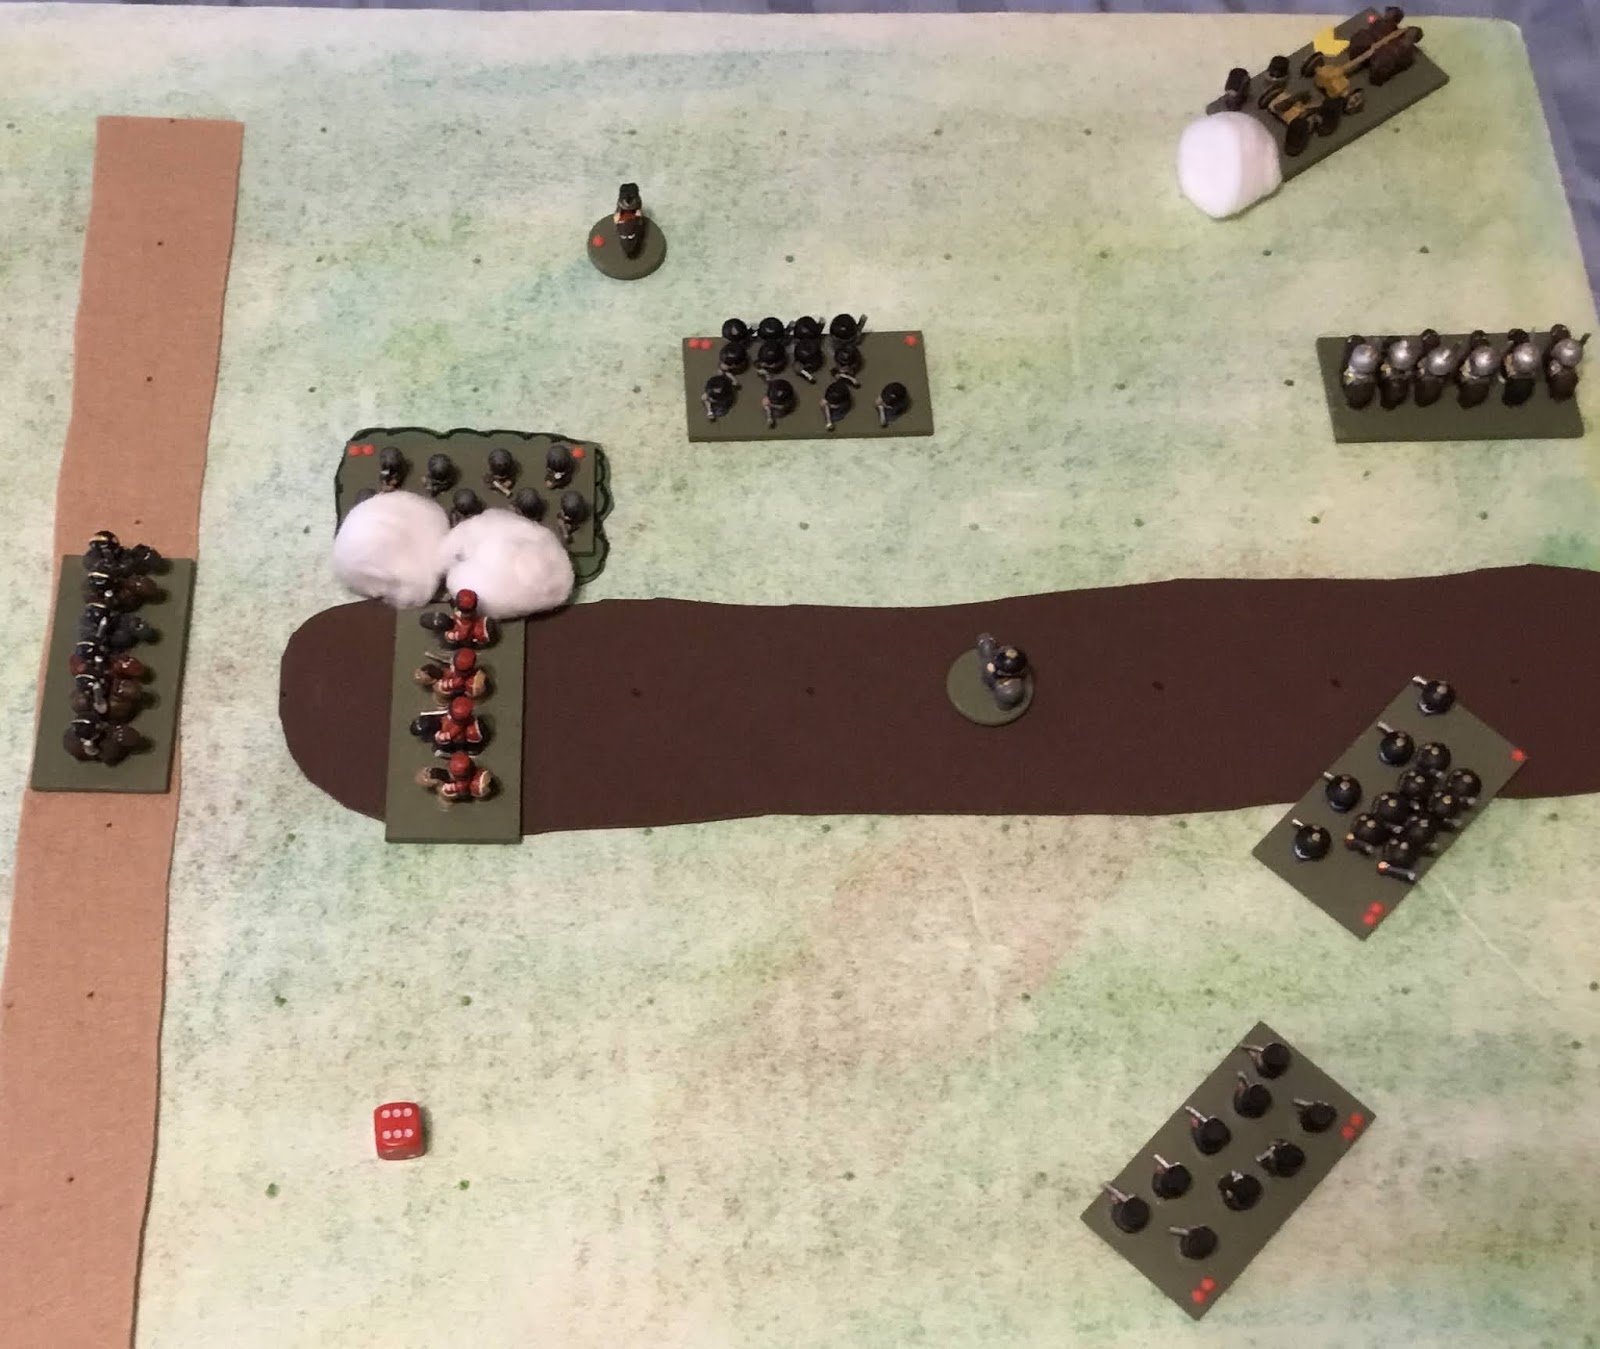
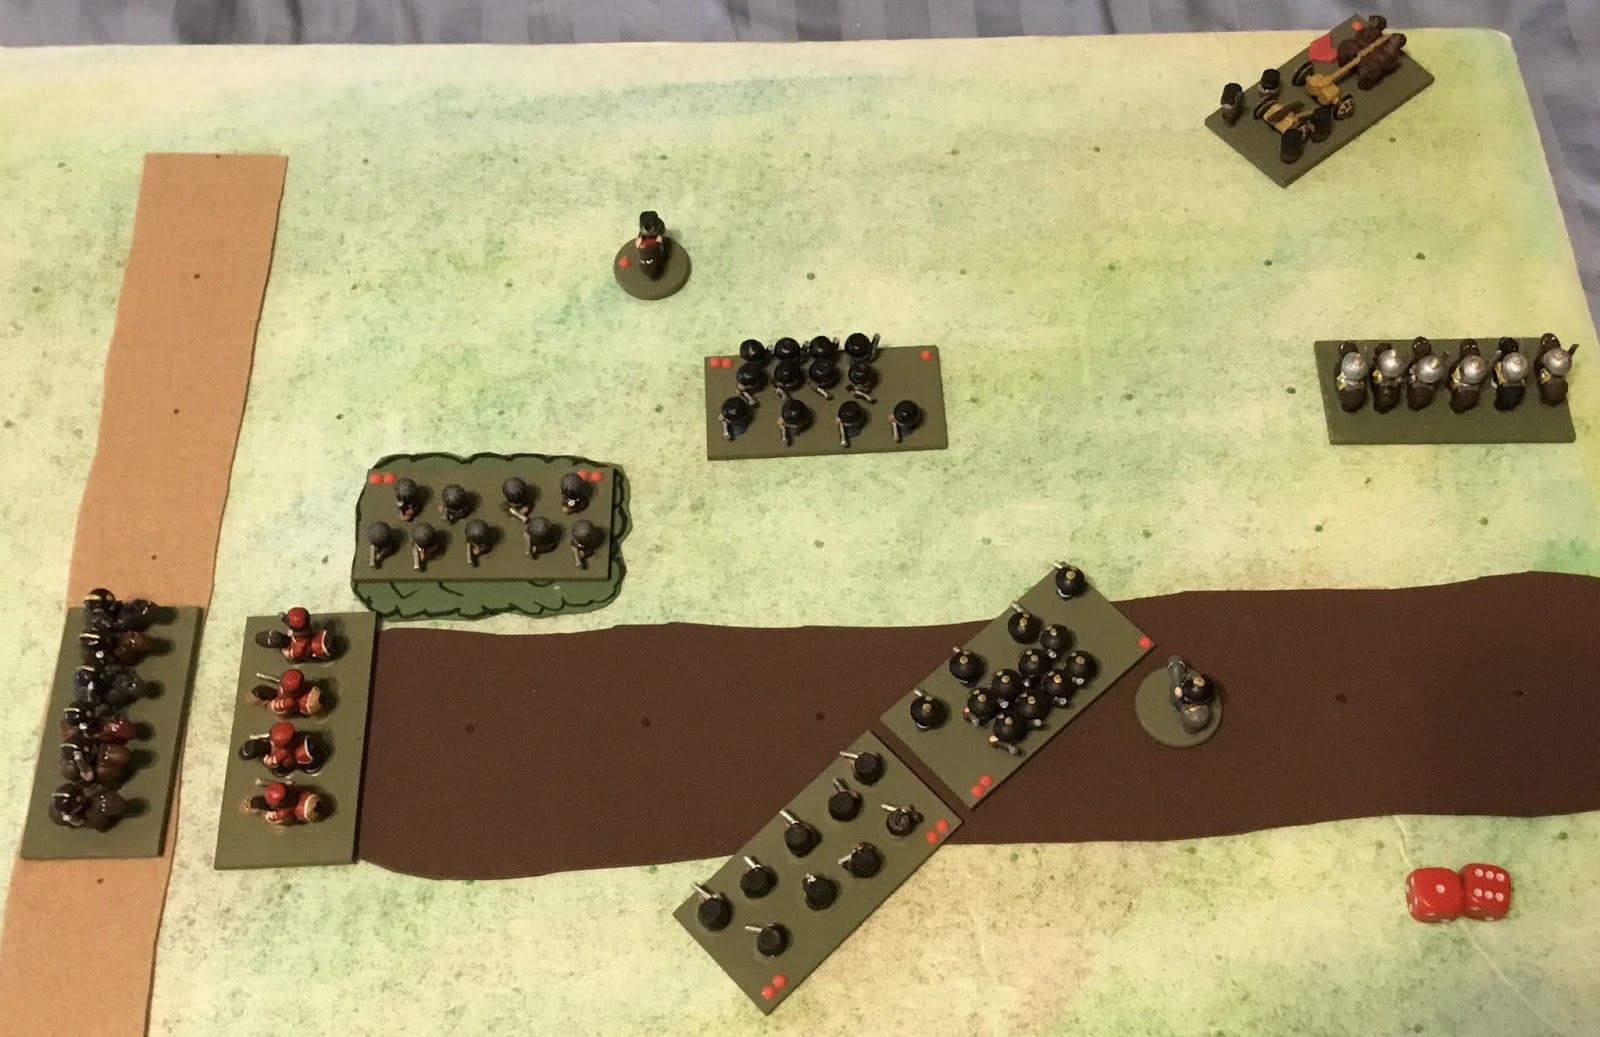
AWI game using DBA-style rules and my first gameboard

AWI Warfare

Not wanting to start a war on how the AWI was fought, I nonetheless have to model how I think it went. That is hard because how things played out in the Northern campaigns went quite differently than in the Southern Campaign. The latter had more elite troops and militia troops on both sides in addition to having much smaller numbers. If I had to choose, I would say that this variant is modeling the Southern Campaign.
For my Canadian and UK readers please feel free to substitute my use of the term "Patriots" for "Rebels", "Traitors", or whatever you feel is appropriate. I don't use the term "Americans" for a variety of reasons, least of which is that we weren't quite that yet.

Unit Types

As Neil Thomas does, it is best to start with the unit types first. Starting with the Horse and Musket variant as our base, what is wrong with Infantry, Skirmisher, Artillery, and Cavalry?

Artillery

Let's take a look at the artillery composition in a few battles in the Southern Campaign.

BattleBritish/LoyalistPatriot
Cowpens2 three-poundersNone
Guilford Courthouse1-2 six-pounders and 2 three-poundersTwo batteries of 2 six-pounders
Camden4 guns7 guns
King's MountainNone ?None ?
Hobkirk's HillNoneThree six-pounders

Clearly, there was not a lot of artillery available. But it is noteworthy that Lord Rawdon, for example, decided to attack at Hobkirk's Hill because he was told by a Continental deserter that the Patriot forces had no artillery. Believing that the Continental artillery was still miles away, he was convinced it was time to attack. The fire from that artillery contributed to Lord Rawdon's defeat and retreat from the battle.

Although there was not much artillery, it did play a role in some of the battles. Thus, when an army rolls for its composition, it may only receive one Artillery unit. If it rolls two the second unit is exchanged for an Infantry unit for the British army and a Skirmisher unit for the Patriot army.

An Indian or Indian/Loyalist army converts all rolled Artillery units to Skirmisher units, as does the Patriot player fighting against an Indian or Indian/Loyalist army.

Cavalry

There is a recurring belief that: there was no cavalry in AWI battles; there was cavalry, but it was only used operationally; or that there was a small bit of cavalry, but the terrain was so bad that it was ineffective. In the South, especially due to the longer distances at play, mounted operations were much more prevalent. Not only did cavalry play a role operationally, but they also had a battlefield role. At Guilford Courthouse, for example, we see elements of the British Legion under Banastre Tarleton, but we see the 1st and 3rd Continental Dragoons under Lieutenant Colonel Washington, Lee's Legion, and even some North Carolina militia cavalry. At Cowpens we see the British Legion, the 17th Light Dragoons and Tory Scouts/Guides under Alexander Chesnee, while the Patriots have elements from the Continental Light Dragoons, South Carolina State Cavalry, Virginia State Dragoons, North Carolina State Dragoons, South Carolina ”Guides”, Militia Volunteers under Benjamin Jolly, North Carolina Militia under Captain Mordecai Clark, and South Carolina Militia under Thomas Young.

Like the artillery, when rolling for army composition, an army may only receive one Cavalry unit. If it rolls two the second unit is exchanged for an Infantry unit.

In Indian or Indian/Loyalists versus Patriot battles, all Cavalry units rolled for either force are converted to Skirmisher units.

One might argue that, as the cavalry was classified as "light", it should not hit as hard in combat. I counter that argument with the reduced number of bayonets that infantry had in this theater, and that units tended to operate in looser formations, making even bayonet-wielding units less effective against cavalry.

Skirmishers


I would consider the Patriots would be allowed one Skirmisher unit (if any are rolled as being present) to be classified as rifle-armed, granting it an 18" range.

Skirmisher units in an Indian or Indian/Loyalist army may charge into hand-to-hand combat against Patriot Infantry and Skirmisher units. They roll D6-2 in hand-to-hand combat.

Infantry


If you read With Zeal and With Bayonets Only then you will certainly gain the impression that British infantry can and should be allowed to charge into hand-to-hand combat as the Patriots frequently fled from charges in several battle descriptions. In fact, what is notable in most commentaries is when the Patriots do not run due to being charged. If you follow that line of thinking then that really must be modeled.

One thing to note is that the charge seems to have rarely led to actual casualties. What it did was dislodge the Patriots from their positions and force them to fall back. (There were some exceptions, of course.)

To reflect this tendency for Patriot infantry to run from charges, British, German, and Loyalist Infantry units may charge Patriot Infantry and Skirmisher units. They roll D6 in hand-to-hand combat.
All Infantry units rolled for an Indian force are exchanged for Skirmisher units, i.e. the only troop type allowed for Indian armies are Skirmisher units. Infantry units in Indian/Loyalist forces are not converted as the Infantry units are considered Loyalist militia.

Summary of Changes


The Charge Moves rule is amended to allow charges by some Infantry and Skirmisher units, as indicated above. None of the other rules in that section are modified, including the prohibition on attacking an enemy unit with more friendly unit each turn (the Limited Engagement rule).

The Measure Range rule is amended by allowing Rifle-Armed Skirmisher units a range of 18".

The Hand-to-Hand Combat rules are amended to allow combat by some Infantry and Skirmisher units, as indicated above. The Assess Casualties rule is amended by allowing eligible Infantry units to roll D6, and eligible Skirmisher units to roll D6-2, in hand-to-hand combat. The same Terrain and Flank or Rear Attacks rules apply, as written.

The Retreat rule is amended to handle the cases for retreat when eligible Infantry and Skirmisher units are attacking.
  • After a round of combat, if British Infantry fails to destroy the Patriot unit, the Patriot unit retreats 6" after the combat is resolved, ending the move facing the British unit. The only exception to this is if the Patriot unit were defending a hilltop, town, or some form of fortification, in which case the British unit retreats 6", as per cavalry.
  • After a round of combat, if the Indian Skirmisher fails to destroy the Patriot unit, the Indian unit must retreat 6", as per cavalry.
The Square Formation rule cannot be used in this variant; it is not an option.

The Army Lists


For your convenience, here are the army composition tables.

British, German, or Loyalist Army

Unit Type
Die RollInfantryArtillerySkirmisherCavalry
14101
23120
34011
44101
54110
64011

Indian/Loyalist Army

Unit Type
Die RollInfantryArtillerySkirmisherCavalry
13030
23030
33030
44020
54020
64020

Indian Army

Unit Type
Die RollInfantryArtillerySkirmisherCavalry
10060
20060
30060
40060
50060
60060

Patriot Army

Unit Type
Die RollInfantryArtillerySkirmisherCavalry
13111
23120
33021
44101
54110
64011

Patriot Army (versus Indian or Indian/Loyalist)

Unit Type
Die RollInfantryArtillerySkirmisherCavalry
13030
23030
33030
44020
54020
64020

I need to test all of this out. I haven't yet as I am basing a sufficient number of figures to make up the forces. I am thinking of going full size here, with 4" x 2" units for infantry, skirmishers, and cavalry, and 2" x 2" for artillery.

Let me know what you think.

Saturday, December 21, 2019

OHW Austro-Prussian War Variant

After playing a few times with One-Hour Wargames (OHW) using the Medieval variant I had a hankering to blow off the dust from my 1866 Austrians and Prussians and give the Rifle and Saber variant a go. I have used these troops in the past using Neil Thomas' Wargaming Nineteenth Century Europe (WNCE) rules (on a grid, of course) and really enjoyed them. WNCE is crunchier than OHW (what isn't, after all), but not too crunchy.

As you might expect, the Rifle and Saber variant is very generic. The 'problem' with using them to represent the Austro-Prussian War (also known as the Seven Weeks War, War of 1866, Unification War, Fraternal War, and the German War) is that this period represents the transition from assault to firepower doctrine for infantry tactics and from smoothbore to rifled technology for artillery. Even more so, the Austrians clung to the assault doctrine with their rifled musket-armed infantry and rifled artillery, while the Prussians had adopted the breechloading rifle decades ago, but still had smoothbore artillery. Basically Prussian infantry was technically superior to Austrian infantry while Austrian artillery was technically superior to the Prussian artillery. (Austrian cavalry was generally superior too, not that it mattered much.)

Here are the basic stats in the Rifle and Saber variant.

Unit TypeHand-to-Hand Combat Shooting Combat
InfantryNot AllowedD6+2
SkirmishersNot AllowedD6
CavalryD6Not Allowed
ArtilleryNot AllowedD6

Of note, Cavalry that does not defeat its enemy in hand-to-hand combat must retreat 6"; it does not stay engaged in melee.

To reflect the ability of the breechloader to produce significantly more firepower than a rifled musket – in WNCE breechloaders produce twice the number of dice over rifled muskets – it is given the D6+2 rating, while rifled musket-armed infantry get D6. Because the Austrians were armed with the rifled musket and fought in columns and relied upon the bayonet, their shooting is further reduced to D6-2, but they gain the ability to charge into hand-to-hand combat (against all except Cavalry), where they get D6+2.

Bronze rifled artillery is granted the 48" range and D6 rating listed in the rules while Steel rifled artillery (Krupps) will be granted a longer 60" range, but no other changes. Smoothbore artillery, however, will be granted a D6+2 rating at 12" or less (to reflect their superior canister) and a D6-2 rating at up to 36". The shorter range reflects their additional vulnerability to rifle fire (rather than increasing the Bronze rifled artillery range).

Unit TypeHand-to-Hand Combat Shooting Combat
Prussian InfantryNot AllowedD6+2
German InfantryNot AllowedD6
Austrian InfantryD6+2D6-2
SkirmishersNot AllowedD6
CavalryD6Not Allowed
Rifled ArtilleryNot AllowedD6 (Bronze 48" / Steel 60")
Smoothbore ArtilleryNot AllowedD6+2 (12") / D6-2 (36")

In WNCE there is one other huge differentiation between breechloader-armed and musket-armed infantry: the former can lay down will they fire and reload while the latter do not. This grants breechloader-armed infantry a saving throw, even while in the open. I decided to give Prussian Infantry and Prussian Skirmishers to count as in cover (take one-half hits), regardless of the terrain they are in. Note that this means that Prussian Skirmishers in woods are still only one-half casualties, not one-quarter casualties, as you cannot count cover twice.

You might be thinking that the Prussians have a huge advantage over the Austrians, and you would be right. But, if you have played them in WNCE you know that is the way Neil Thomas modeled it in those rules.
Just as a comparison between OHW and WNCE, in WNCE a full unit of Prussians roll 8 dice, require a 4+ to hit, and the Austrians get no save. A full unit of Austrians roll 5 dice, require a 6 to hit, and the Prussians get a 5+ save. That is inflicting 4 hits per turn versus 0.5 hits, respectively. Prussians have 8 times the firepower. In OHW a unit firing D6+2 would eliminate an enemy in 3 turns, while a unit firing D6-2 would eliminate a unit taking one-half casualties in 15 turns. Prussians therefore only have 5 times the firepower. That is further offset by giving the Austrian infantry the ability to charge Prussian infantry (and skirmishers and artillery, but not cavalry) and inflict equal casualties.

Against German infantry, Prussians roll 8 dice, require a 5+ to hit, and the Germans get no save. The Germans get 4 dice, require a 5+ to hit, and the Prussians get a 5+ save. That is 2.64 versus 0.88 hits per turn, or the Prussians delivering 3 times the firepower. In OHW, again the Prussians would eliminate a unit in 3 turns while a German unit would eliminate a unit taking one-half casualties in 8 turns. Again, that gives the Prussians less of a firepower advantage over the Germans in OHW than it does in WNCE.

Test Game

I decided to play Scenario #8 (Melee) from the OHW rules. I have been playing a lot of this scenario lately as I am trying to prove to myself that playing one particular scenario over and over does not have to be boring or tedious, and that changing periods really helps keep the scenario 'fresh'.

At first I thought I would play one side programmed, but I quickly dispensed with that idea as I was not really sure what a good plan would be, especially with the Austrians as defenders. Given that the Austrians still fall under the assault doctrine, I thought it would be interesting to have them attack.

I rolled for the Prussians and received: three Infantry, one Skirmisher, and two Cavalry. For the Austrians I rolled three Infantry, two Skirmishers, and one Cavalry. I decided to switch out one of the Austrian Skirmishers for Artillery largely because I only have one Skirmisher unit for each side and I wanted to try the artillery rules out.

The Austrian Attackers
The Prussian Defenders

If you are wondering why the miniatures look 'funny' it is because they are made from beads and hot glue.

Turn 1


I decided to put two of my Prussian Infantry on the hill to defend. That would give them the ability to take one-half casualties from shooting (their natural ability) and also from hand-to-hand (defending uphill), so they should be very hard to dislodge, allowing the off-board reinforcements time to arrive and either hold the hill, or repel the Austrians that had gained the heights.

Meanwhile, the Austrians brought on their Artillery and two Infantry units.

End of Turn 1
By the way the Generals (round bases) play no role in the game and are for aesthetics. Also, I am using a gridded board (squares) with units centered on the point rather than within a square. Movement is done by counting each point moved as 3", with diagonal moves counting as 3" for the first diagonal, 6" for the second, and 3" for the third (the 1-2-1-2 counting method).

Also of note is that I am using John Acar's 3-hits method for OHW. Generally, I think this is an interesting idea, and I like that John shows the math, but I am concerned that I may get a result where a unit is destroyed in a single turn to a lucky roll.

In game terms this means that a D6-2 attack rolls 1D6, a D6 attack rolls 2D6, and a D6+2 attack rolls 3D6 with each 5+ scoring a hit (double casualties scores on 3+ and one-half casualties scores on a 6).

Turn 2

The Prussians maintain their same position on the hill, however the right unit pivots in order to get a bearing on any Austrian infantry advancing up the hill. Meanwhile the Austrians flank left and right, trying to maneuver their infantry into position so they can attack. Meanwhile the artillery stays out of range and starts bombarding the infantry, inflicting one hit (out of three).


End of Turn 2

Turn 3


It is at this point that I notice a flaw with my game board. The hill is too long. Although it is hard to see, there is a dot on the left end of the hill, indicating that there is an open uphill position. Because I did not move the Prussian Infantry on turn 2, the Austrians can gain the hill. To try and block the maneuver, the Prussian Infantry both march to the left. This also allows the right-most Infantry to get out of the line of fire of the Austrian Artillery.

The Prussians bring on their first reinforcements, the two Cavalry regiments, from the road entrance. The Prussian Hussars swing wide on the left, outside of the firing arc of the Austrian Infantry, while the Prussian Cuirassiers move towards the right end of the hill.

Prussian Turn 3
As expected, the Austrians charge the hill. Because they get a D6+2 attack in hand-to-hand, they get to roll 3D6, so it is possible that the can wipe the Prussian Infantry in a single turn. All they have to do is roll three 6's ...

Austrians Charge Up the Hill
They almost did it, scoring two 6's. But, given they did not succeed in eliminating the unit, they retreat 6" back. Meanwhile , the Austrian Infantry faces off against the Prussians uphill, while the artillery swings around to the Prussian right flank.
Honestly, I was not quite sure what to do with the Artillery unit. The woods block line of fire to the hill and eventually the advancing Austrian infantry would also. The alternative was to pivot to the left and threaten the Prussian Cavalry that was now threatening our flanking Infantry. What would you have done?
End of Turn 3

Although the Austrian Infantry is exposed to a flank attack, next turn more Austrian reserves will arrive via the road. The lead unit is itself a Cavalry unit, so it should be able to keep the Prussian Cavalry at bay while the Austrian Infantry continues to attack the hill.

Turn 4

The Prussian Hussars attack the Austrian Infantry from behind while the Prussian Infantry fire at it from the heights. The fire missed completely, probably indicating that the charged rattled them and they are still trying to reform, but the Hussars inflict two hits. Again, not enough to eliminate them, so the Hussars retreat. The Prussian Infantry on the hill fire down on the Austrians at the foot of the hill and inflict heavy losses.

Prussian Turn 4
The Austrian Infantry charge up the hill and inflict the single hit needed, gaining a foothold on the hill. Although it looked like the Austrian Infantry at the foot of the hill is shooting, they actually charged up the hill, fought in hand-to-hand (inflicting one hit) and then retreated back down.

More Austrian reinforcements enter the board and the Artillery slides right to get a line of fire on the hill.

End of Turn 4
As an aside, I like this effect of charging units 'bouncing off' of units they do not defeat in hand-to-hand. Aesthetically, it looks and feels right.

Turn 5


Big turn for the Prussians as the Hussars ignored the threatening Austrian Cavalry and charged the Austrian Infantry on the hill, wiping them out. Further, the Prussian Infantry finish off the Austrian Infantry at the foot of the hill. Meanwhile, the Prussian Cuirassiers gallop over the hill, ready to charge the Austrian Artillery.

Prussian Turn 5

Given that the Prussian Hussars were outside of 45º of the Austrian Dragoons front, they cannot charge, so they ascend the hill, taking the open position. (Note that the Prussian Hussars are facing away, so they cannot charge the Austrian Dragoons next turn either. So the Austrians have the upper hand, even if they cannot immediately take advantage of it.)

The Austrian Jagers (Skirmishers) advance into the woods, ready to pour fire into flank of the Prussian Hussars.
The most important decision is what to do with the Artillery. The Prussian Infantry on the hill need one more hit. The Artillery get 2D6 and needs a '6' on either die to inflict that remaining hit. Alternately, they could pivot so that they face the Prussian Cavalry about to hit it on its flank. Which move would you do?
I fired with the Artillery at the vulnerable Prussian on the hill and, unfortunately, miss.

End of Turn 5

Turn 6


Finally, the final Prussian reinforcements arrive. The final Infantry unit move to ascend the hill, plugging the gap to the right end. The Prussian Jagers (Skirmishers) move towards the weakened Prussian Infantry on the hill, should they fail to hold.

The Prussian Cuirassiers charge the Austrian Artillery, hitting them in the flank, inflict one hit, and bounce off.
2D6 inflicting double casualties (hit on a 3+) and only one hit! Note that in this period, even when you hit the enemy's flank, if you do not defeat the unit you retreat from hand-to-hand combat. This also means that defending units do not get a free pivot to engage a flanking unit as they are no longer engaged.

Prussian Turn 6

Despite the fact that the Austrian Dragoons charged the Prussian Hussars frontally while the Jagers fire at them from the flank, no hits are inflicted on the Hussars. The Dragoons retreat off of the hill. Meanwhile, I have the same decision with the Artillery and cannot resist the odds; I fire at the Infantry on the hill and finally eliminate them.

End of Turn 6

Turn 7


The Prussian Cuirassiers again charge the flank of the Austrian Artillery and again inflict only a single hit, forcing them to retreat. They only have one more chance to take out the Artillery before it will have pivoted and be able to fire upon them.

The Prussian Hussars could have charged the Prussian Dragoons, but instead chose to simply make a stand at the end of the hill. The Prussian Dragoons will only inflict one-half casualties charging uphill. It won't be until next turn that I realize that it was a bad move.

Prussian Turn 7

On the left the Austrian Dragoons charge uphill against the Hussars, while the Jagers continue to pour fire into their flank. Again the Jagers miss, but the Dragoons inflict a hit before retreating.

The Austrian Infantry also charge up the hill and attack the Prussian Infantry, but fail to inflict a hit, forcing them to retreat back down the hill.

The Artillery decide that they will be slowly killed if they keep firing at enemy on the hill, so they pivot to face the Prussian Cuirassiers. It may be too late though.

End of Turn 7

Turn 8

The Prussian Hussars stupidly stand at the end of the hill and do nothing while the Jagers move up to face off against the Austrian Jagers. The Prussian Cuirassiers charge the Artillery and finally eliminate them while the Prussian Infantry fire at the charging Austrians, inflicting a hit upon them.

Prussian Turn 8
At this point, looking at the match-ups, the Austrian Cavalry hits with 2D6, but need a '6', while the Prussian counter with 2D6 needing a '5' or '6'. The Jagers firing at one another both use 2D6 and require a '6' to hit. Finally, the Austrians will use 3D6 when charging, but require a '6' to hit, while the Prussians firing will also get 3D6 and require a '5' or '6' to hit. So, in the three match-ups the Prussians will inflict twice the damage. The third match-up is even. Even worse, the Prussians have a Cavalry unit that is unchecked.

End of Game


By the end of the Prussian turn 10 it was obvious that the Austrian cause was lost. I realized that the Prussian Hussars needed to charge off of the hill against the Austrian Dragoons, otherwise they would eventually be destroyed by the relentless Dragoon charges. Although the Austrians had inflicted the first hit, the Prussians won as they always retreated back up the hill and this got the benefit of defending uphill.

The Prussian Infantry on the hill also had the upper handed was able to eliminate the Austrian Infantry charging up the hill. The defensive quality of the hill just could not be overcome.

Prussian Turn 10

Summary


APW scenarios are hard to play in WNCE because Neil Thomas models the advantage of the breechloader as being so significant over the rifled musket. Those that play late war ACW know how devastating the Union units with single-shot breechloaders and repeating rifles can be, so it is not really that surprising. However, in the ACW it is usually only a unit or two that the Confederates have to deal with; here the Austrians have to deal with the entire enemy infantry force with such a firepower superiority.

I view periods like this as similar to the historical scenarios you find when playing Memoir 44. Those scenarios tend to be won by the side that won historically. When we played Memoir 44 as a tournament you basically had to play the scenario twice; once as each side. The player that scored the best over the two games won the round. I could see doing the same with playing the APW using OHW.

One reason why I think OHW might be a good ruleset for this period is that the games are quick, so playing it twice might not be so problematic. All in all, I think toning down the math of WNCE as I did here makes the Austrian side less dismal to play. Of course, the only way I can prove that is to play the scenario again, with the Austrians defending the hill.

Tuesday, December 10, 2019

Wargaming Mechanics Blog and Square Grids

I am embarrassed to say that it has taken me all this time to find Phil Dutré's blog Wargaming Mechanics. There is some really good material out there, not the least if which is his analysis on using a square grid. I am not going to copy any of his material here as I have not asked for permission, but if you are interested in gaming on a square grid, this post is a must-read.

The main question his post answers is: should I allow diagonal movement in a game using a square grid? Phil lays out numerous methods for counting and compares the distance moved to  the "true" Euclidean distance from the center point of the starting square. In his second blog post on the matter he comes to the conclusion that "we don't really want a measurement procedure, we want a counting procedure", meaning a means of counting squares. (The second post makes the distinction clearer, as Phil discusses moves like the Knight's Move, the Zebra's Move, and the Camel's Move.)

What this answered for me is that my previous counting method, which he calls "at most 1 diagonal move allowed", is sub-optimal. I much prefer his "1-2-1-2 alternation" method. It is simple and a much better representation of the "correct" distance. (Again, go to Phil's blog to see the diagram.)

When I put it into practice, I had another revelation. Rather than placing the units in the square, I placed the center point of the unit on a dot I normally use to define the corners of the square. This allowed me to more easily to use the counting method Phil described (in my case, from dot-to-dot rather than from empty space-to-empty space). Also, because units straddled two squares (rather than being within a single square), this made for much cleaner unit pivots. Below is an example that I used for my small space gaming grid conversion of Neil Thomas' 19th Century rules.

How to pivot within a square.
As you can see, the center point of the unit moves when you are confined within a square, whereas if you pivot on a point the center point stays fixed.

This also solves another issue, which is that I generally only allow a unit to face the flat side of a square and not the vertices. With this improved counting method, there is little reason not to allow the additional four facings. (You still have to deal with contact for hand-to-hand combat, but that is another subject.)

Tip of the hat to Phil and his blog. I would also tip my hat to the follower of this blog - I look at your profiles every so often to see the other blogs you follow - that led me to Phil's blog, but I forgot who it was.

If you like examining game mechanics like I do, Phil's blog is highly recommended. If you know of any other blogs like this, please let me know in the comments.

Friday, December 06, 2019

One-Hour Wargames

I have avoided reviewing the rules One-Hour Wargames (OHW) by Neil Thomas for quite a while for one simple reason: just reading through the rules it felt like they were not for me. If you have read through any of my reviews you know some of the factors that I favor, but you might have also noticed that my tastes are getting "simpler". The question is: is OHW too simple?

OHW has three main sections: discussions about how warfare changed over time; wargaming rules on how to represent those changes over time; and wargames scenarios. If you read enough comments on OHW you will quickly see that many of them are about the scenarios, and generally they are all positive. I will touch upon that, but mostly I want to focus on the rules, as this is the area that I avoided all this time.

Rules Overview


OHW is not one set of rules as much as it is a set of core wargaming rules with nine variants to reflect the different periods of warfare that the book covers: Ancients, Dark Ages, Medieval, Pike and Shot, Horse and Musket, Rifle and Sabre, American Civil War, Machine Age, and the Second World War.

Let's start with the basics. A typical game is played on a 3' by 3' board with units occupying 4" to 6" of frontage, using six units per side. Each period has four different unit types that are broken down into one predominant type and three supporting types. Which unit type is the predominant one, what types are allowed, and what the characteristics of the unit types are is what provides the period's 'feel'.

Army composition is broken down into 3-4 units of the predominant type, and 0-2 units of each of the supporting types, up to a maximum of six units. Scenarios in the book can modify the army size – some armies only have four units – and there are random tables to determine exactly how many of each type you receive for a battle. Note that, if you are playing the scenarios as the author intended, you will have random force composition and will not be allowed to select your army composition. However, nothing stops you from choosing nor will anything 'break' if you do.

As a side note, this 'four unit type' model fits with his other book Wargaming Nineteenth Century Europe 1815 - 1878, which uses ten and five unit armies, so there is nothing to stop you from using those random force selection tables to include scenarios with those additional force sizes. Just consider that your board size may have to change.

Movement is fairly straightforward. There are three movement speeds – 6", 9" and 12" – and no changes due to terrain (other than +3" for road movement), turning, charging, interpenetration, etc. Terrain effects are largely impassable versus no effect on movement (by unit type). Turning is at the beginning and/or the end of the move (at only the beginning of a charge) and is an unlimited pivot on the unit's center point (limited to 45° for charges).

A key concept with these rules are that a unit can only move or shoot in a turn. There are no exceptions for skirmishers, vehicles, etc.

Shooting and Hand-to-Hand Combat are very simple. There is only one modifier to the die roll and that is a combat factor that applies to the unit type. For example Knights and Warbands roll a D6+2 while a Skirmisher rolls a D6-2, and so on. Shooting ranges are either 12" and 48", regardless of the period played. Combat is handled by the attacking unit (Shooting or Hand-to-Hand Combat) rolling a D6, adding their unit's modifier and inflicting that many 'hits' upon the enemy unit. When a unit has taken 15 hits it is eliminated and removed from the board.

There are a few modifiers to receiving hits. Having a terrain advantage can halve the number of hits received, as can having heavy armor (indicated by the unit type). Contacting the enemy unit's flank or rear will cause double the number of hits. Other than that, there are no modifiers.

So that is movement and combat, the core elements. There is no command and control, nor is there any morale. 15 hits and out is about it.

Where's the Beef?!?


I have to admit, when I first read the rules, that was my thought. Way too simple. I mean, I understand Neil Thomas' passion for stripping down rules, getting rid of complexity, and emphasizing the need to get to a decision in a reasonable amount of time, but this seemed like a bit much. So I passed judgment without actually playing the rules, skipped to the back and read the scenarios, and consoled myself that at least that provided enough value for money.

It was while I was skimming over my library that I saw an old title by Charles Stewart Grant entitled Programmed Wargames Scenarios that I decided to revive an old project: trying to develop a programmed opponent that I could write down, send to another player, and they could use that program to game solo. You can read about my thoughts and experiments on that idea in the links below.

I am still working through the idea, but the core of the solution was to try and scope to programmed opponent to a specific side or a specific scenario using a specific set of rules. (Charles S. Grant took a broader approach and thus had to keep his programming at a strategic level.) I liked the scenarios in OHW, so it made sense to use one of them, hence my last blog post's project of creating a gameboard for scenario #8. I had also resolved to (finally) actually try the OHW rules and I felt that playing the scenario would help me get a feel for it, so why not use the rules that were intended for it? Two birds with one stone, and all that.

The Game


I decided to break out my DBA medieval armies and give it a go. (The gameboard was designed for units of that size, after all. Plus I could test out my system for tracking hits. It worked great.) I was going to play it straight ... except I wanted to use a grid. (So sue me.)

I threw the forces forward and tried various actions to see their effect and I realized that the game was surprisingly tactical. Moves mattered. Exposing your flank got you crushed. Knights hit hard, but they did not automatically run over units. This was Chess with a random die roll. This did not play out as I expected, where both sides would line up, and you would simply throw dice adding up number with no thought or enthusiasm. The guy with the better die rolls eventually won – as is true with most games – but there were definitely consequences for bad decisions.

Afterwards, I wrote a blog post on my Solo Battles blog about my ideas for using OHW for a programmed opponent. One of the asks was for others to try the program out and provide feedback. A gaming buddy asked me to write a programmed opponent for the same scenario, but for the Dark Ages variant of the rules.

The Rules Variants


So, I started looking at the Dark Ages variant and I noticed how Neil Thomas modeled the changes to warfare through time. In my initial reading I thought the model only changed subtly. "In this period X unit type gets +2, but it is the Y unit type that gets that bonus in the other period."

No, actually it was not really subtle. Basically a unit type determines the combination of: movement speed; offensive power; defensive power; and frequency of appearance in an army. 
  • As stated previously, a unit type can either have a 6", 9", or 12" movement speed. 
  • Offensive power is represented in rolling a D6-2, D6, or D6+2 for combat, whether you can attack in Hand-to-Hand Combat and/or Shooting Combat, and – if you can shoot – what the range of that attack is (either 12" or 48").
  • Defensive power is represented by taking all or just half of the number of hits your enemy rolled against you.
  • Predominant unit types have a chance for more units in the army (3-4), than support types (0-2).
Again, it is this combination of factors that distinguish the unit types, and it is the combination of allowable unit types that distinguishes the period's army.

I should note that, although the author talks about playing armies from one period against an army of another period as a possibility, there are no changes to the rules about technological superiority of one period over another. In this regard OHW is like DBA philosophically in that an army's power is relative to other armies within the same period. (Of course, this idea is ignored in DBA much of the time...)

Rules Ratings


Using the review system from before, here are the game ratings for One-Hour Wargames (OHW).

Drama – do the rules create tension during play?

Generally speaking, this game is about attritional combat with no effect on units until the unit is destroyed and removed from the board. As the average roll is 3.5 hits and a unit takes 15 hits before it is destroyed, units will generally break after five turns, or one-third of the game length.

Drama comes from the scenario, how you match up units, and how you maneuver units in order to concentrate combat power to wear down your enemy faster than they wear you down.

These rules rate 2 out of 5 in Drama.

Uncertainty – are there enough elements that introduce uncertainty into the game?

The two primary mechanics that create uncertainty are: the roll to determine your army composition and the combat rolls made throughout the game. There are no other significant chance elements. That is okay though, as the author has simply stripped away other chance elements and boiled them down to these two. If the math is the same does it really matter if it takes three rolls (to hit, to wound, and to save) versus one roll? Some people would say yes, but I am not one of them. I am skeptical of the probabilities in most game rules anyway.

These rules rate 3 out of 5 in Uncertainty.

Engaging – do the rules allow the player to make meaningful decisions that lead to consequences?

This was actually the area that surprised me the most. I thought that the game would be a die-rolling contest, more so than other rules, and that the games would degenerate into troops lined up beating on one another until someone broke. (Which, by the way, describes many DBA games.) Given the core rule that you can only move or shoot, and that you cannot break away from hand-to-hand combat, when you choose to engage is critical, especially as combats are multi-turn affairs. When you commit, you commit.

If you can out-maneuver your opponent and hit their flank or rear (or they make a mistake in their maneuvering) you can eliminate units very quickly in comparison to frontal attacks. Additionally, if you can control advantageous terrain, you can take very little damage from your opponent, allowing you to tie them up twice as long as normal. Simply throwing your troops in headfirst is not likely to be a winning tactic.

These rules rate 4 out of 5 in Engaging.

Unobtrusiveness – do the rules get in the way?

No. Obtrusive have lots of exceptions for special cases. These rules have few such special cases to worry about.

These rules rate 5 out of 5 in Unobtrusiveness.

Heads Up – are the rules playable without frequent reference to a quick reference sheet?

Basically you need to memorize the stats for four unit types, but given that both sides use the same types, this is not really an issue. Stats may change as you switch from period to period, but within the period being played, everyone is the same.

The majority of my test game was played without the rules being nearby. Once you get the hang of the rules, you will only access them to refresh on stats before you start a new game.

These rules rate 5 out of 5 in Heads Up.

Appropriately Flavored – do the rules 'feel' like they represent the period or genre being played?

This is where the author's work shines. I admit that I have not played all of the periods, but just looking at two period, Dark Ages versus Medieval, you can see how they would not only play very differently, but appropriately. Using these periods as an example, let's look at the predominant unit type for each period: Shieldwall Infantry versus Mounted Knights. Infantry move 6", are D6 in hand-to-hand combat (only), and take half hits. Infantry versus Infantry will inflict two hits per turn, requiring eight turns to break the other unit. Knights move 12", are D6+2 in hand-to-hand combat (only), and take all hits. Knights versus Knights will inflict 5.5 hits per turn, requiring three turns to break the other unit. That simple comparison will tell you that Medieval games will probably not require the full 15 turns to determine a winner while the Dark Ages games might well see more units surviving until the bitter end.

Despite the seeming generic nature of the rules, these really feel like they are trying to emulate the period they are designed for.

These rules rate 4 out of 5 in Appropriately Flavored.

Scalable – can the rules be scaled up or down – in terms of figures or number of units played – from a 'normal' game?

As the number of figures in a unit plays no role in the game – only the number of units matter – I won't consider that a factor. That said, these rules are designed to be played quickly and in a small space. They probably could scale up, and even have multiple players per side, but that is not the intent. (I will certainly give it a try some time.)

The main factor that might provide issues are tracking hits for each and every unit. Dice used to register the number of hits sometimes get picked up, knocked about, left behind when the unit moves, etc. Plus, they just look plain ugly on the table. Marker look a little better, but with 15 hits per unit, you are going to have a lot of them unless you with use markers with numbers, or have some system where one color counts as 5 and another counts as 1. Even so, they too can get left behind.

These rules rate 2 out of 5 in Scalable.

Lacks Fiddly Geometry – do the rules require fiddly measurements or angles?

The only angles in this game are 45º, used as the maximum turn before a charge and the arc of fire for most units that can shoot. Generally, most players can agree on that.

Measurements are in 3" increments, so again not too much of an issue. Plus, these rules are easy to convert to a grid.

These rules rate 4 out of 5 in Fiddly Geometry.

Tournament Tight™ Rules – are the rules clear and comprehensive, or do the players need to 'fill in the blanks'?

Let me start by saying that my preference is towards tighter rules, where everything is spelled out clearly by the author, not looser rules where the author leaves certain mechanics up to the individual players, gentlemen's agreements, and a roll of the die where agreements cannot be found. So a high value means 'tight' and a low value means 'loose'. If you like looser rules, subtract my rating from '6' and that would probably be your rating!

Although the author defines the different periods and unit types pretty sharply, he clearly intends that players develop their own modifications to suit their taste. An example in the Dark Ages variant discusses that to represent Viking invaders you could swap the Infantry units for Warband units, while Frankish force might better be modeled by swapping the Infantry units for Cavalry units. That said, I think it is not a good idea to muck about with the modifiers too much, unless you think you have the math right. Even adding a +1 to the combat die roll allows that unit to move in and take out a normal unit (on average) without being broken.

There are a number of things unexplained, such as what qualifies as sufficient contact for hand-to-hand combat. (At least it has simple rules for multiple units attacking a single unit straight.) But, for Neil Thomas rules, these are more clearly defined than all of his others. There aren't many edge cases when the rules are so simple.

These rules rate 3 out of 5 in Tournament Tight™ Rules.

Solo Suitability – do the rules have elements conducive to solo play?

There are no hidden elements to the game so that alone usually grants the rules high solitaire suitability.

Generally solo game mechanisms need to address the following questions:
  • Which units can act in a turn? In OHW all units can act in a turn, so this question is moot.
  • Which unit should act next? As OHW has all units move, then shoot, then conduct hand-to-hand combat, timing is generally not an issue. But, there is no mechanic for answering this question.
  • What action should a unit take? Generally this is the most important question that the solo gamer wants answered. Again, there is no mechanic for answering this question.
What makes OHW suitable for solo gaming is the lack of complexity in its rules. This makes for easier decisions, which in turn makes it easier to graft on solo gaming mechanics that will not significantly alter the dynamics of the game.

There is a chapter on solo wargaming, but it is largely a rehash of older mechanics from Featherstone, Grant, and Asquith that involve adding chance elements into the game to simulate decision making and the fog of war.

These rules rate 4 out of 5 in Solo Suitability.

Component Quality – are the components provided made with quality?

This is a new rating, meant primarily for board games and books, which addresses the quality of the physical components.

These rules come printed and as a Kindle eBook. I have both. The book is paperback with quality binding. However, it is not a lay-flat binding. Given the thinness of the book (just over 100 pages) it is capable of having a lay-flat binding. The quality of the paper and the legibility of the type screams quality. At $20 on Amazon, I think this book is a good value. Even when it was just for the scenario material, but I was happy with my purchase.

These rules rate 4 out of 5 in Component Quality.

Summary


There is much of this book that I did not cover, such as the differences between the periods, the scenarios themselves, and the notes on running campaigns. For the most part I review rules, not books. These rules are very accessible, in my opinion clear and understandable (more so when you break out the figures and try them), will possibly lead to disputes about terrain and 'just out' cases, and can provide a decisive game in a reasonable amount of time.

Will everyone like these rules? No! Every rules author must decide where to add detail and where to abstract them away and players will not always agree on where that line should be drawn. If you think that there is "no way" you could play a set of rules that have only four unit types, you probably won't like OHW, especially the Second World War variant.

If you like Neil Thomas' rules but find yourself tweaking them, you will probably not like these rules until you finish tweaking them. 

(Surprisingly) Recommended.

Sunday, November 24, 2019

Gameboard for One-Hour Wargames

If you have been reading this blog for a while then you know I often game on boards that I make out of Elmer’s foam core boards. The smaller, cheaper ones that you can find readily available are about 30” wide by 20” deep. They take ink, colored pencil, chalks, and pastels well (although you probably want to seal it with matte varnish, especially if you use chalks), but if you use anything water-based, you will have to deal with warping.

Given my move to small board, grid-based gaming, these work pretty well for me.

The one thing that I like especially about Neil Thomas’ One-Hour Wargames is the scenarios. Although generally simple, I think too many gamers get bogged down in too much scenery. (Lots of scenery is a necessity for skirmish games, but you probably need to abstract a lot of that away if you are gaming at a higher scale, i.e. units are brigades, rather than individuals or fire teams.) Neil’s scenarios are very sparse when it comes to terrain. They remind me of the tactical exercises I used to game – where I would attack a woods or a house – until I understood the basics of tactics in whatever rules I was running.

Because the terrain in Neil’s scenarios is very sparse, and has no random element in its placement, making a gameboard for an often played scenario makes sense. Here is what mine looks like for Scenario #8 – Mêlée.

This is the view from the Red side. 


Although it is hard to see (I should probably paint them) there are little strips of plastic needlepoint ‘grating’ to the left of the red boxes. You move a peg from hole to hole, indicating how many hits have been inflicted. There are 15 holes, so you can either handle units with 15 or 16 hits. The red boxes each hold markers to indicate which unit each represents. 


At the bottom is another strip with 15 holes, which is the turn track. Given than Red goes first, the turn track goes on his side.

This scenario has special rules around unit placement, reinforcements, and unit entry points. You can find those rules to the right of the unit tracks. Finally, there is the victory condition, found in the lower left-hand corner, to remind you to focus on the objective.

Here is a view of the Blue side. It has the same basic setup as the Red side, with the details differing, as per the scenario. There is no turn track, however.


The first game I am going to run is using 15mm DBA units, which is why the squares are 2”. They will, however, represent 6” of table space in the game given that the recommended frontage of units is 6”. So one unit horizontally for each square. (I am still pondering whether to allow multiple units in a square. For DBA units, as long as they do not exceed a depth of 40mm, I should be good.)

I have been tinkering with an idea for One-Hour Wargames, but as I have not played it ‘straight’ yet, I am holding off right now. Everyone has ideas on how to make it better, but there is only one concept I wish to model. (Things like Elites, Large Units, etc. I think can be modeled as scenario rules.) My concept is Fresh Units. Basically, as a unit wears down in combat, it becomes less effective. Some of Richard Borg’s games reflect that by granting more dice in the attack when you have more blocks or figures in the unit. (Others, like Memoir ‘44 do not modify the roll at all. It seems like the larger the game scale, the more likely he will allow units to roll full dice until they are destroyed.)

Rolling multiple dice and adding them to count the hits would make units disappear faster, so that would throw off things like scenario length, reinforcement rates, and so on. My idea is simple, units with: 0-4 hits would roll 2D6 and pick the highest; 5-9 hits would roll 1D6 (as normal); and 10-14 hits would roll 2D6 and pick the lowest. Because I use pegs and holes to record hits it would be easy to color code the strip to indicate whether the unit is Fresh (yellow), Worn (orange), or Exhausted (red).

So, a unit that is worn down a bit fighting through the first line, would (on average) not hit as hard as the unit in reserve in the second line. This mechanic would also have the side effect of encouraging the use of reserves. I think few games accomplish that.

Friday, July 05, 2019

Kings of War Historical

It seems like it has been a while since I have posted, so I thought I would write up some thoughts on a game I played recently. (One of the few played with other people!)

Kings of War Historical

Kings of War Historical (KOWH) is a set of multi-figure based rules from Mantic designed to be simple, fast, using lots of figures and buckets of dice. A gaming buddy has been rebasing his Romans and Germans from single-figure based (used with movement trays for Hail Caesar) and KOWH is what he decided on using them for. You can download the free fantasy version of the rules here. The core rules are the same with KOWH changing some special ability names and giving you suggestions on how to classify your historical troops.

Our test game was pretty simple as it had no terrain and we just grabbed troops. There were four Roman heavy infantry bases (no pilums), two Roman skirmisher bases (javelin-armed), and one Roman cavalry base. Opposing them were four warrior bases, two skirmisher bases (bow-armed) and two cavalry bases.

The first concept you learn with KOWH is that units can be 1 or more bases. Basically, his models were 10 figures to a base for skirmishers and 20 figures to a base for heavy infantry and warriors. Units are either 10, 20, 40, or 60 models. If you have one 20-figure base as a unit, it is a 'regiment'. If you have two 20-figure bases, it is a 'horde'. To make things interesting, I decided to use my four bases of warriors as two hordes, while my opponent kept his as four regiments of heavy warriors. I put one skirmish unit on each flank and one cavalry unit outermost on each flank. My opponent, having only one each, put his cavalry on his right flank and his skirmishers on his left.


As you can see, a pretty simple setup. The Romans moved first, and due to the distance between the battle lines, the Germans struck first.

KOWH is very much an 'Alpha Strike' style of rules, meaning that you can move forward (5" with infantry, double that for cavalry, +1" for skirmishers) and shoot and melee and force the enemy to check morale all before they get a chance to respond. Fortunately, units do not generally die on the first hit, but hitting first is a distinct advantage.

Each unit has a set of stats that determine how well you fight. Your Melee and Ranged stat is stated as a die roll, e.g. 4+ on D6. This is the die roll needed to score a hit on your enemy if you are in melee or are shooting, respectively. Your Defense stat is also stated as a die roll, and that is the roll needed for to turn each hit made by the enemy into damage. For example, if your enemy's Melee stat is 4+ then they roll their dice and each 4+ scores a hit. They then roll a number of dice equal to the number that scored hits and and try to roll your Defense value (in this example, a 5+). Those that succeed are damaging hits and are applied to your unit, either indicating the hits with markers, or ticking off boxes if using a roster.

When a unit is damaged in combat it must check morale by rolling 2D6 and adding the number of accumulated hits, then comparing that to the unit's Nerve stat, which has two values; Wavering and Routing. Equal or exceed the numbers and the morale effect is applied. (Routing means the unit is removed.)

Generally speaking, your unit's size does not affect your Speed, Melee, Ranged, or Defense stats, but they do affect your Attacks (the number of dice you roll in Melee or Ranged combat), Nerve, and Points Cost. To give you an idea of how unit size might change stats, here is an example for an Archer unit.


Archers
Unit SizeSpeedMeleeRangedDefenseAttacksNervePoints
Troop (10)65+4+4+810/12115
Regiment (20)65+4+4+1014/16150
Horde (40)65+4+4+2021/23250

Note that having the flexibility of having two 20-figure units will cost you in points compared to one 40-figure unit.

Now that you can see sample stats, you can see why it is a buckets-of-dice game. My Warrior Hordes were throwing 24 dice for each attack! You can also see that when testing morale your units can take several hits before they disappear, although low and high rolls will definitely influence their staying power.

So, let's take an example combat in the game. My Warrior Hordes were throwing 24 dice in melee, hitting on a 4+ (12 hits on average), damaging the Roman Legionnaires on a 5+ (4 damaging hits on average). The Romans had a nerve of 16/18 (if I recall correctly), so with an average 2D6 roll of 7, they would rout on the third melee round, but quite possibly waver on the second.

The Roman Heavy Infantry, on the other hand, were throwing 15 dice (if I recall correctly) as they were a Troop and not a Regiment, hitting on a 4+, damaging on a 4+, also for about 4 hits. But the Germans had a Nerve of 22/24, so a possible rout on the fourth melee round, but more likely on the fifth.

That gives you a basic idea of the combat system. Movement is very simple in that everything is straight lines with a single pivot of up to 90º (unless standing still, then you can pivot any number of degrees). Differentiation in units and armies comes through the application of "special rules", much as you would find in Black Powder or Memoir '44.

I personally think you could easily convert this to a square grid (equal to one base in width) with a minimum of rules changes, especially as the rules are always trying to square up units and maintaining distances between units (friendly and enemy). Using a square grid as a space regulator is the perfect mechanism.

As for the game, the German cavalry crushed the skirmishers on their right flank, forcing the Romans to face spare units outwards. As the German cavalry on the left got the jump on the Roman cavalry, it defeated the Romans before it was defeated in turn, so the flanks simply enveloped the Roman center, eventually destroying it.

Conclusion

I liked the game. I would use a roster to tick off casualties, rather than use dice on the board as hit counters. (I prefer a cleaner board, if possible.) I would also prefer to use a square grid as almost every maneuver, other than straight forward, straight back, or turn to flank, were of little consequence to the game.

The game played fast – easy to play two games, one for playing each side once, allowing you to play unbalanced scenarios – and there were very few things that needed looking up, other than Stat values. I would definitely play it again on a smaller board with my 15mm DBA-based miniatures.

Saturday, April 13, 2019

One-Hour Skirmish Wargames and Close Combat

A recent comment on my One-Hour Skirmish Wargames Review blog post read:
"So maybe a close combat should be treated as firing – engage in one and the figure ends all action for the turn."

I suspect this is the authors intent. This is a shooting focused game and melee should not be so over powered.
Hey, I thought, I have John's email address. Why not simply ask the author his intent?
Hi Dale,

Yes, I intended that close combat ends a figures move for that phase.

Best wishes,
John
Well there you have it! Thanks to the Unknown blog post commenter. I agree that it is a good change also and does change the nature of the game considerably.

Sunday, April 07, 2019

Warhammer Underworlds and the Games Workshop Marketing Machine

First off, this is not intended to be a review, but I will be talking about the subject game, its design, and its marketing model.
I was given a copy of Warhammer Underworlds: Nightvault by someone who got it as a gift. They opened the box, took one look at the miniatures that needed to be assembled and later offered it to me. "Sure" I said. Who doesn't want a free game?

I opened it later, looked at the model – they looked like a familiar sculpting style – looked on the back of the box and saw it was by Games Workshop, the dreaded sucker of souls and wallets, and I promptly put it on the shelf to collect dust. Nope. Not going to do it. Not going to get sucked into a mainstream money pit of a game. My days of Warhammer 40K and Warhammer Fantasy are over.

One day a video pops into my YouTube feed and it is about Warhammer Underworlds: Nightvault, so I decide to give it a watch. Several things immediately leap out at me.
  1. The game is played on a hex grid.
  2. The game is played on a small space (although some board configurations take more space than others) and can generally be played on a standard gaming convention or hobby store folding table. It will easily fit on your dining table.
  3. The dice have the combat resolution odds built in.
  4. The war band (faction) you play uses a set number and combination of figures, from three to nine figures. No futzing around with points, figure selection, or army composition. (As I found out later, you do customize your decks, however, so there is some futzing about before a game.)
  5. Each player has two decks and maintains a hand of cards from both decks, that are kept secret from the opponent. The Objectives deck provides the player with options to score points and the Power deck consists of upgrades (better sword, spells, and gear for your fighters) and "gambits" (think dirty tricks and "tactics" card that modify the combat in some way).
  6. The cards for your fighters have their stats and abilities clearly spelled out, so no requirements to reference rules.
  7. Games are fixed in length; think of it as a 12 turn chess match.
  8. Games play fast (about 30 minutes, once you get the hang of it) and chance (dice rolls and card play) has a large impact, so matches are best out of three games.
  9. The game plays very well with three and four players, not just two.
Honestly, so far this game looks like it scratches a lot of my itches (grid, small space, small figure counts, rules on cards, combat resolution built into the dice). People talk about Warhammer Underworlds (the official name of the game, Nightvault being one of two waves, the other being Shadespire) as a gateway game, but this is a tactically rich game, despite having relatively simple rules to play.

Games Workshop's New Marketing Model

Let's look at the fantasy lineup that Games Workshop is providing now. The old Warhammer Fantasyis no longer sold (although it is certainly played) and has been replaced by Age of Sigmar. If you want to play Age of Sigmar you can go out right now and legally download the rules and start playing with the figures you have. Games Workshop's idea was that a kid could go into the hobby shop, buy a $25 or $35 box of miniatures, and start gaming with only a few more pieces. Not like the old days where someone would have to buy an expensive rulebook, each player would need an army book, and then both people would need miniatures. (That is why the large, expensive box sets were so popular, as they were a "good deal" because it included the two sides and the army lists, as well as the rules.) Now, that kid can download the rules for free, download the "warscrolls" for free, and get to gaming.
No, Games Workshop has not gotten out of the business of selling rules – you can still buy the glossy hardback versions of all of this – but they have lowered the barrier for entry.
Back to Warhammer Underworlds. The starter sets contain everything you need for two players to start playing: the game boards, two war bands, dice, tokens, and cards. You can actually push-fit the miniatures together (no glue required) and the hobby shops near me that sell this line will lend you plastic cutters and a hobby knife to remove your miniatures from the sprue so you can start gaming right then and there. My first game was in a "Draft Tournament" at a hobby shop. They charged $15 as an entrance fee, gave you a random war band box ($30 retail value) to use in the tournament, and we all set about building our models and card decks in the first hour. It is a brilliant marketing move by Games Workshop to support these sort of tournaments and it shows you how cheap getting into this game can be.
So, if one person in a group has the starter set ($60 retail), you have two war bands, the boards, dice, and tokens. Some of my local stores have multiple copies on hand on their demo shelf. That allows people to invest as little as $30 getting a war band and getting started, either at a hobby shop with a demo set or with someone who owns the starter set. So, pretty cheap to get started.
Let's switch back to Age of Sigmar for a moment. So Age of Sigmar is the big brother army game using lots of models, but they also have Age of Sigmar: Skirmish so you can play smaller games with fewer models. No, those rules aren't free, but they are only $8. Using the core rules (free), the Skirmish supplement ($8), the warscrolls (free), and a few miniatures you can play that game pretty cheaply. Now for the connection: Games Workshop published free warscrolls for the war bands in Warhammer Underworlds so you can use those figures in your Age of Sigmar and Age of Sigmar: Skirmish games. Pretty damn smart. So I can buy a war band and use those miniatures for three different games (four, coming soon, as Games Workshop is releasing another themed Age of Sigmar game called Warcry which is at the skirmish level).
Back to Warhammer Underworlds. So, how does this game sustain itself such that there is a second wave of expansions and a third (Dreadfane) on the way? Remember that interesting twist, the game uses cards as a way of customizing your war band and how it plays? Yeah, that.

Warhammer Underworlds is a collectible card game with miniatures. Now before you stop reading, understand that there are two variants of "collectible card game". The first, which is the evil version, assigns probabilities to each card in how frequently they will appear in starter decks and booster packs, then randomizes the cards you find in those packages. Think Magic the Gathering. Many of these are branded trading card games because they follow the model of sports trading cards, but wrapping a game around the cards.

The second model is that all packages have a fixed set of cards, so there is no randomness to collecting, you just have to collect them all. And they way that Warhammer Underworlds gets you to collect them all is to include cards in with every war band. So to collect all of the cards, you have to buy all of the war bands at $30 a box or $60 a starter set. (There is also a set of cards not associated with any war band.) On top of that, there are now additional boards to collect. (Initially the game boards were only included in the starter sets.)

If you were to go all in, getting everything, that would be two starter sets at $60 each, ten additional war bands at $30 each, two additional boards at $25 each, the Leaders card expansion at $25, and dice for the factions at about $15 each. Mind you that the Shadespire starter set is out of print and the dice were limited items, so finding them for sale, or for sale at normal retail prices might be hard. Not counting the dice you are sitting just shy of $500 for the collection.

I, of course, being of the species that collects lead, pewter, plastic, and wood mountains, started collecting them, simply to complete the card collection, thinking it was required to make me "competitive". I watched so many games with people using cards I did not have ... oh the possibilities. "If only I had card X."

Ironically, I am not the only one that has spotted this ploy by Games Workshop. Not only are their deck builders out there, showing all the cards and which war band box they appear in, but there are virtual card players now that allow you to play cards with an app. This would allow you to build decks with cards you do not own, so would be another inexpensive way to go.

Okay, so I have laid out what I think is the largest negative out there, that if you have an obsessive collecting disorder, i.e. wargamer's OCD, then you have been warned. There is a way to mitigate that aspect, however.

That said this is a game that my wife has played with me (when she deigns to humor me) and due to its small footprint we can easily play on the dining room table, sitting down, so it saves my back. It uses a grid, to save on standing up to measure and reducing arguments. (Not that I win any arguments with my wife.) Maybe if there is interest, I will write more on it. As it stands now, I am a bit late to the train on this one. This came out more than a year about and although it is still getting support from Games Workshop, it is no longer the Flavor of the Month, so getting games takes some work.

Blog Archive

Blog and Forum Pages

Popular Posts

Followers

About Me

My photo
Huachuca City, Arizona, United States
I am 58 yrs old now. I bought a house in Huachuca City, AZ working for a software company for the last three years. To while away the hours I like to wargame -- with wooden, lead, and sometimes paper miniatures -- usually solo. Although I am a 'rules junkie', I almost always use rules of my own (I like to build upon others' ideas, but it seems like there is always something "missing" or "wrong").